SadTalker Windows WebUI Installation Guide: Zero to Hero Tutorial
A complete, step-by-step tutorial for installing and running SadTalker WebUI locally on Windows OS. Tested and benchmarked on a dedicated Windows system equipped with an NVIDIA Tesla T4 GPU (16 GB VRAM), including verified solutions for PyTorch CUDA setup, model weights (sadtalker.zip), the Gradio Row.style bug, standalone FFmpeg PATH configuration, LMDB compilation fixes, and empirical execution benchmarks.
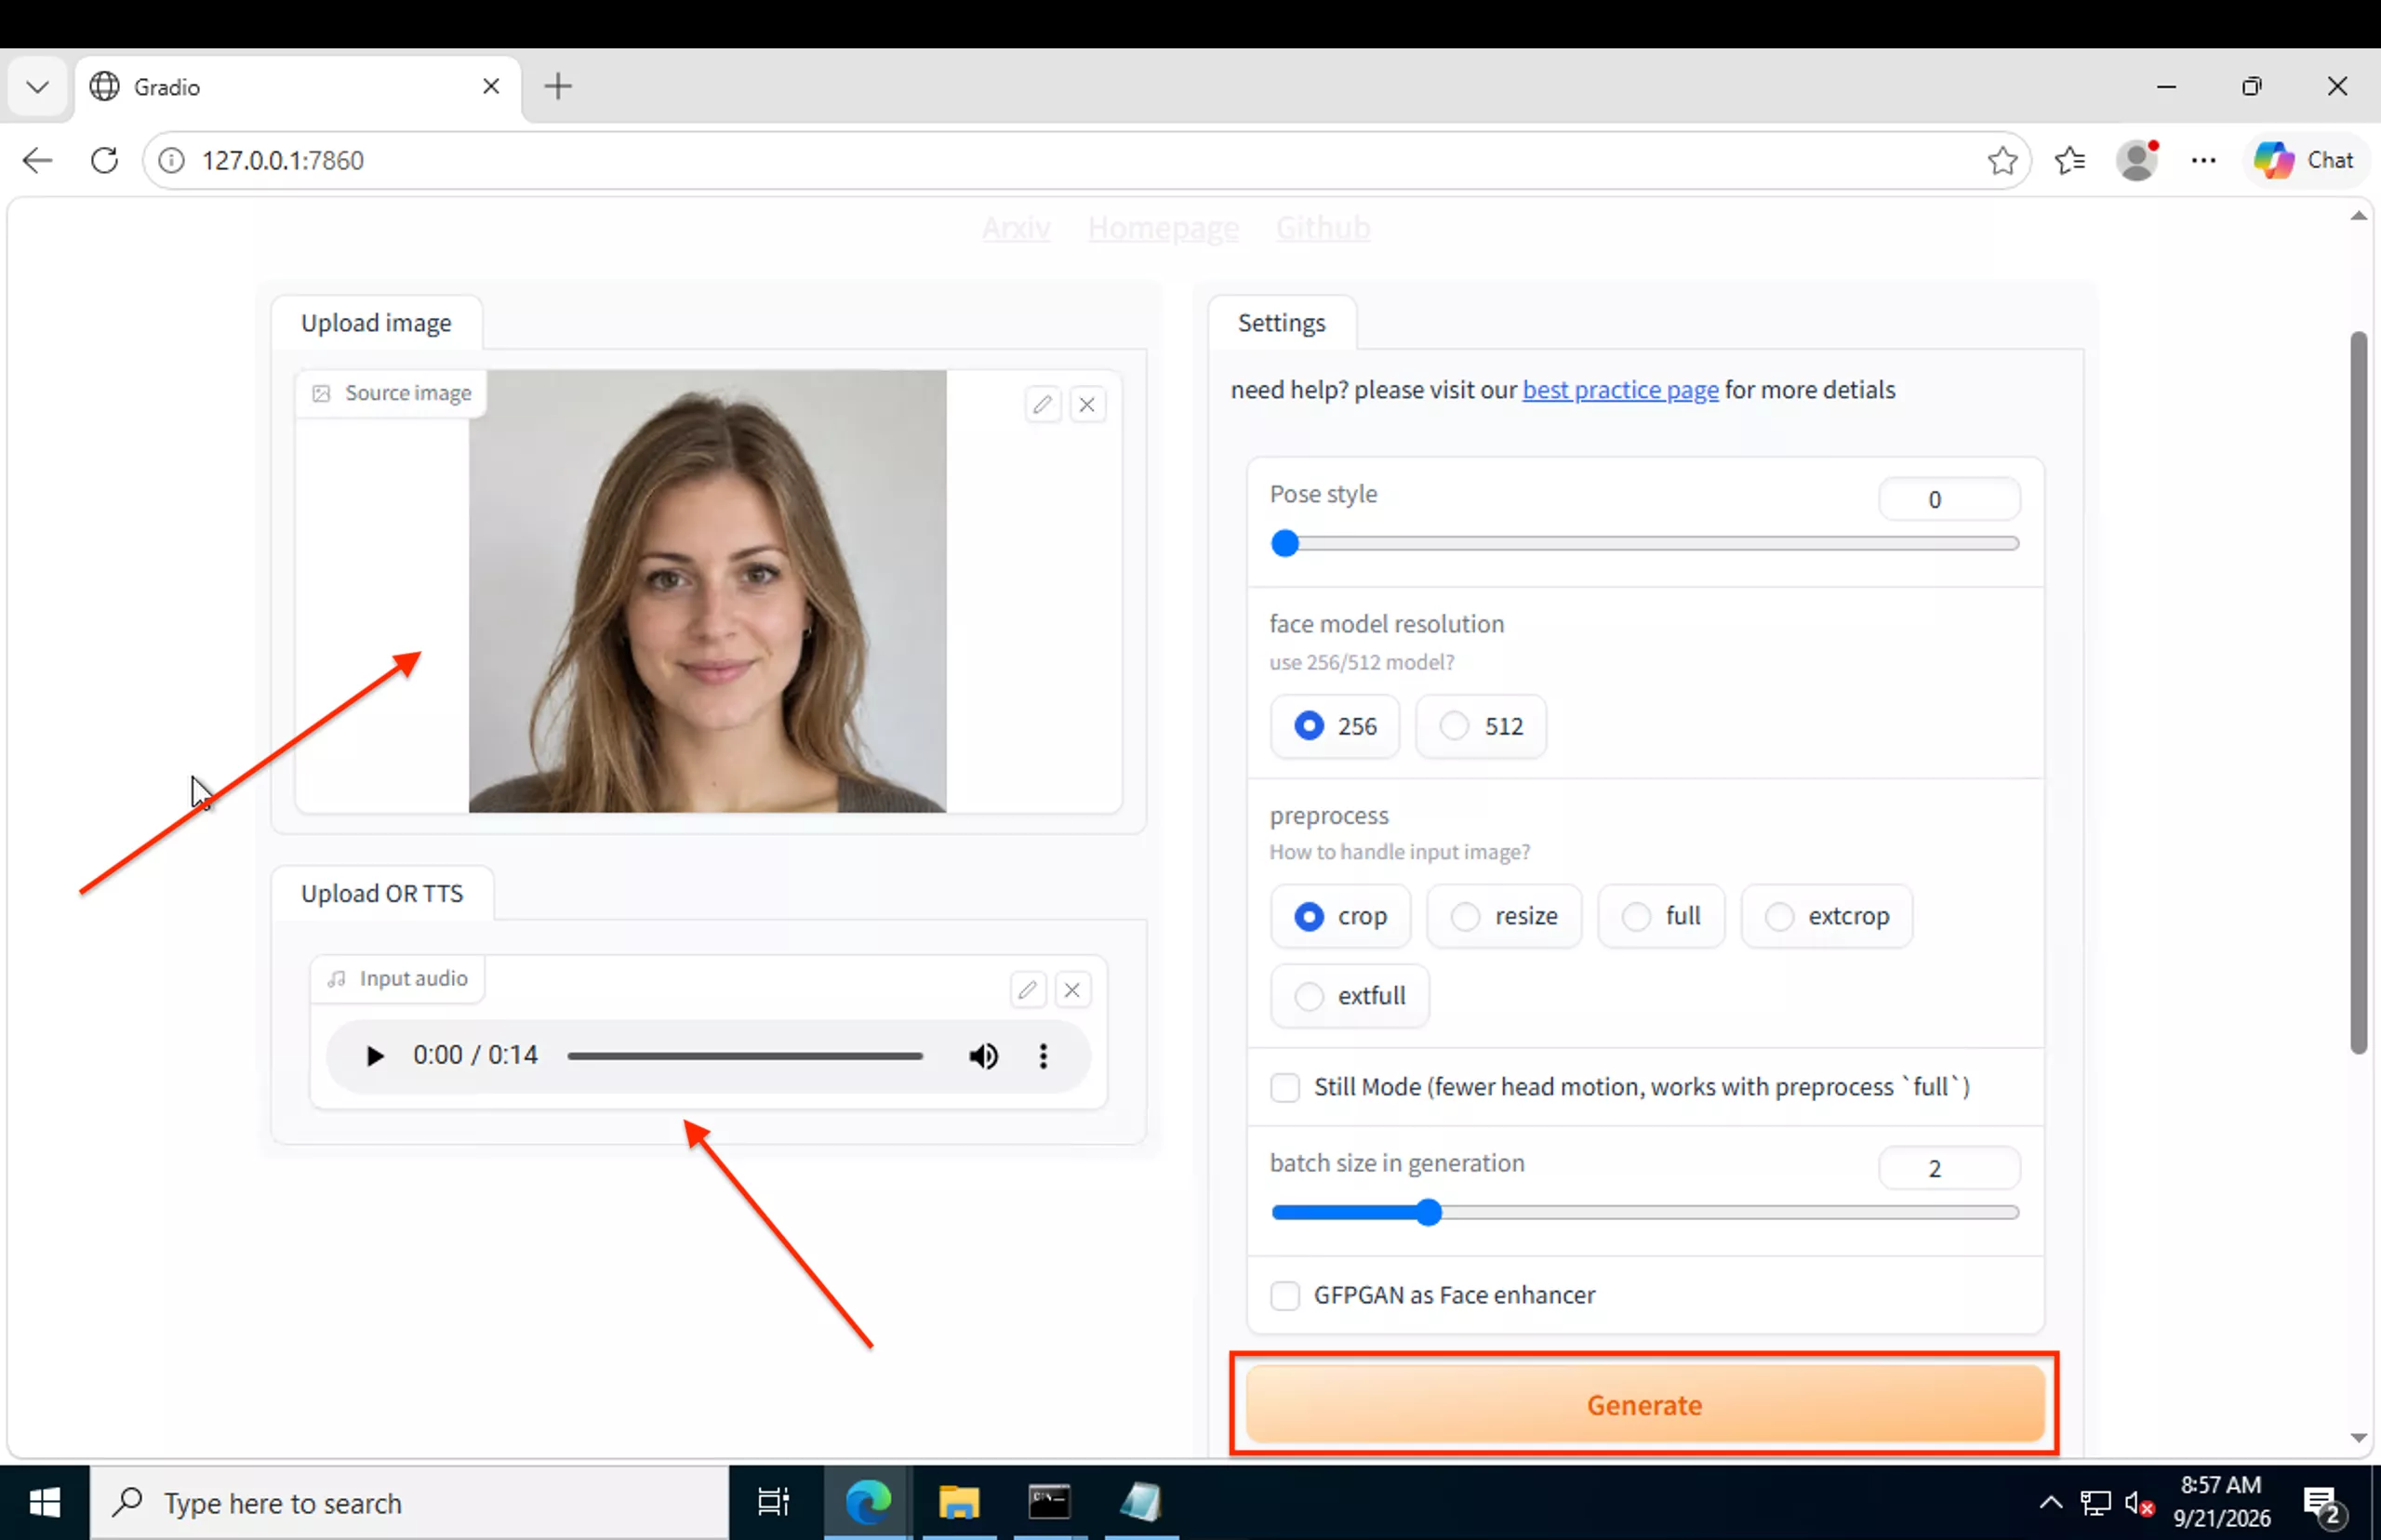
http://127.0.0.1:7860 on a dedicated Windows system with NVIDIA GPU acceleration.1. Hardware & System Prerequisites
SadTalker generates talking-head video clips by calculating 3D Morphable Model (3DMM) coefficients, audio spectrogram bins, and rendering neural face patches. Running this on a Windows workstation requires adequate GPU compute and dedicated VRAM.
| Component | Tested System | Minimum Required | Recommended Consumer GPU |
|---|---|---|---|
| Operating System | Windows Server 2022 (64-bit) | Windows 10 (64-bit) | Windows 10 / Windows 11 (22H2+) |
| GPU Model | NVIDIA Tesla T4 | NVIDIA GTX 1660 / RTX 2060 | NVIDIA RTX 3060 (12GB) / RTX 4070 / 4090 |
| Video RAM (VRAM) | 16 GB GDDR6 | 6 GB VRAM (256px crop mode) | 12 GB+ VRAM (512px with GFPGAN) |
| System RAM | 16 GB RAM | 8 GB RAM | 16 GB – 32 GB RAM |
| Free Disk Space | 30 GB available | 15 GB free space | Fast NVMe SSD for checkpoint loading |
| Python Version | Python 3.8.20 | Python 3.8.x strictly | Do not use Python 3.10, 3.11, or 3.14 |
2. Step 1: NVIDIA GPU Driver & CUDA Verification
Before installing Python or AI libraries, verify that Windows recognizes your NVIDIA graphics hardware and that the display driver provides CUDA compute capability.
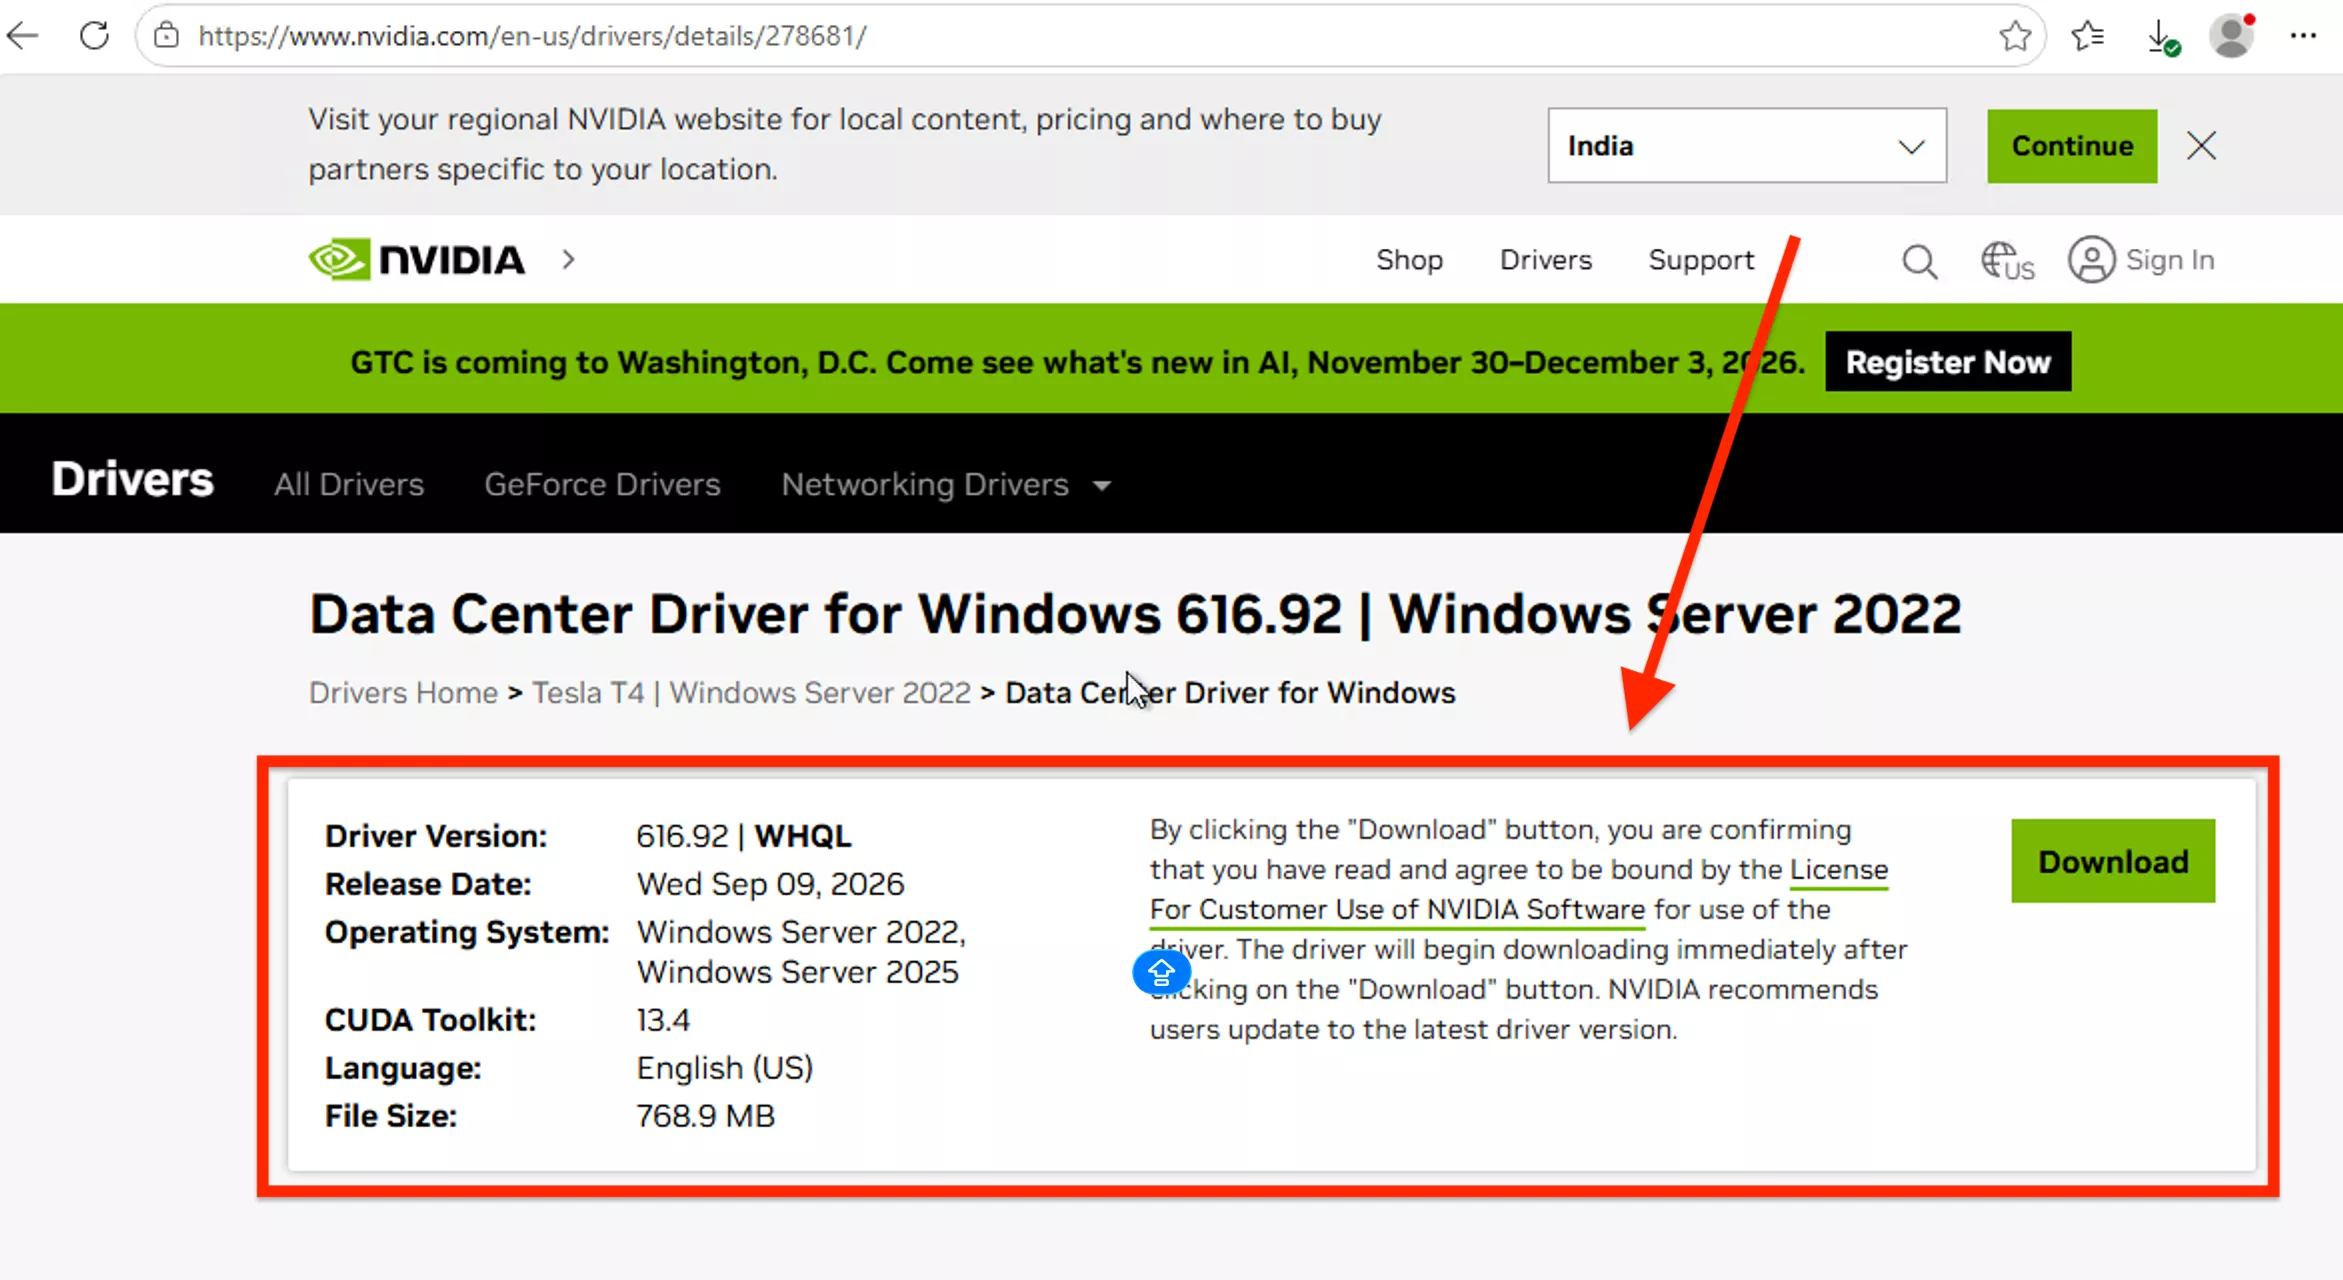
1.1 Downloading NVIDIA Driver for Tesla T4 / Workstation
On NVIDIA's official driver portal, select Data Center / Tesla → T-Series → Tesla T4 → Windows Server 2022 (or Windows 10/11 64-bit for GeForce RTX cards):
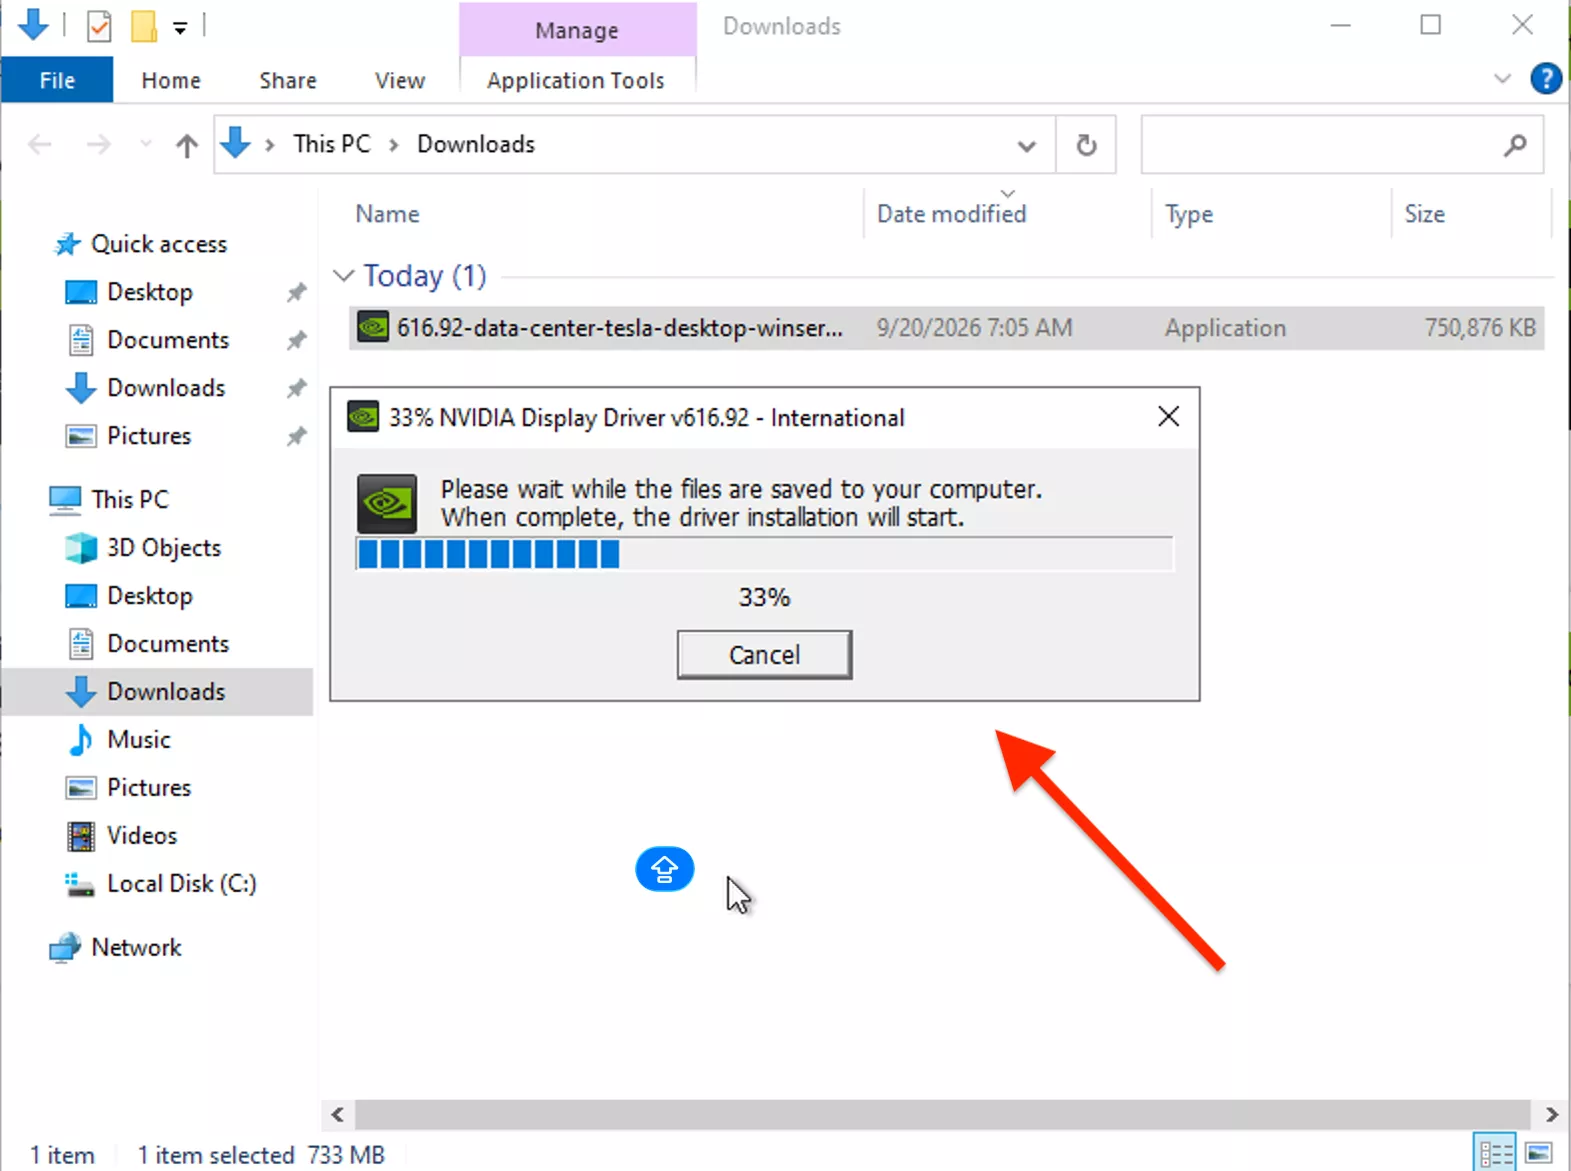
1.2 Extracting Driver Installation Files
Run the downloaded installer executable to unpack the driver files to C:\NVIDIA\DisplayDriver\...:
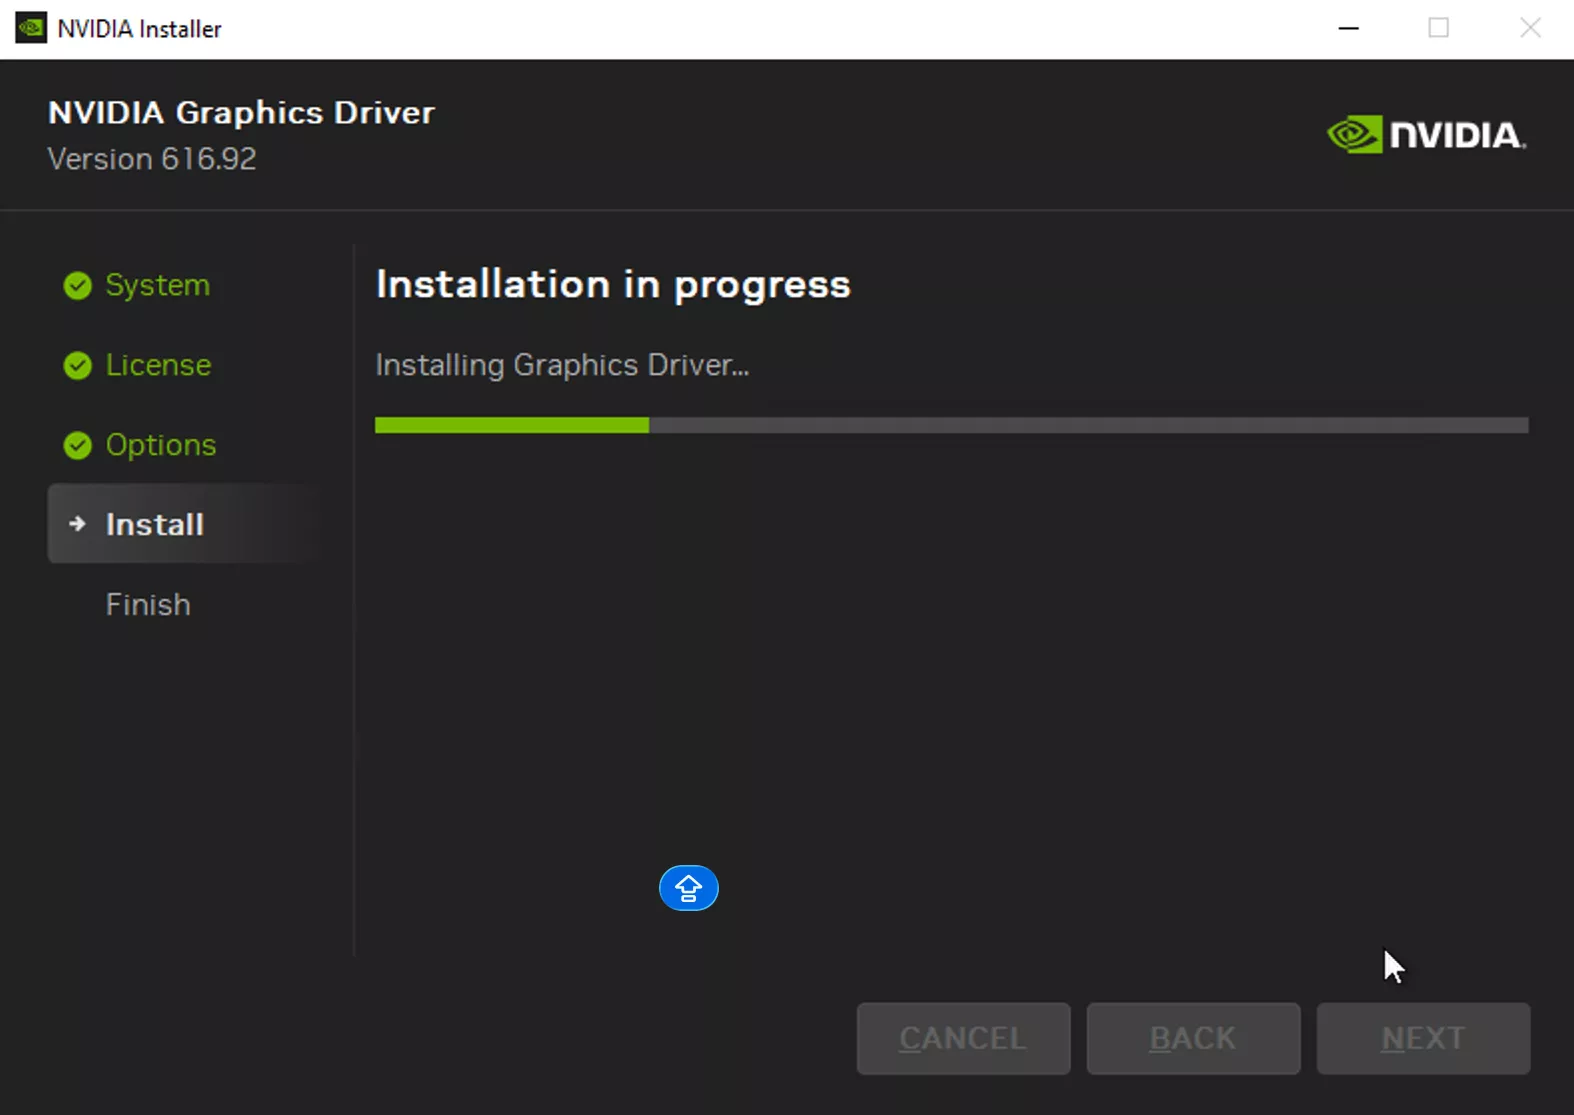
1.3 Installing Graphics Driver Components
Proceed through the standard installer dialog and restart Windows when prompted:
1.4 Verifying GPU via nvidia-smi in PowerShell / CMD
Open PowerShell or Command Prompt and run nvidia-smi to verify hardware telemetry:
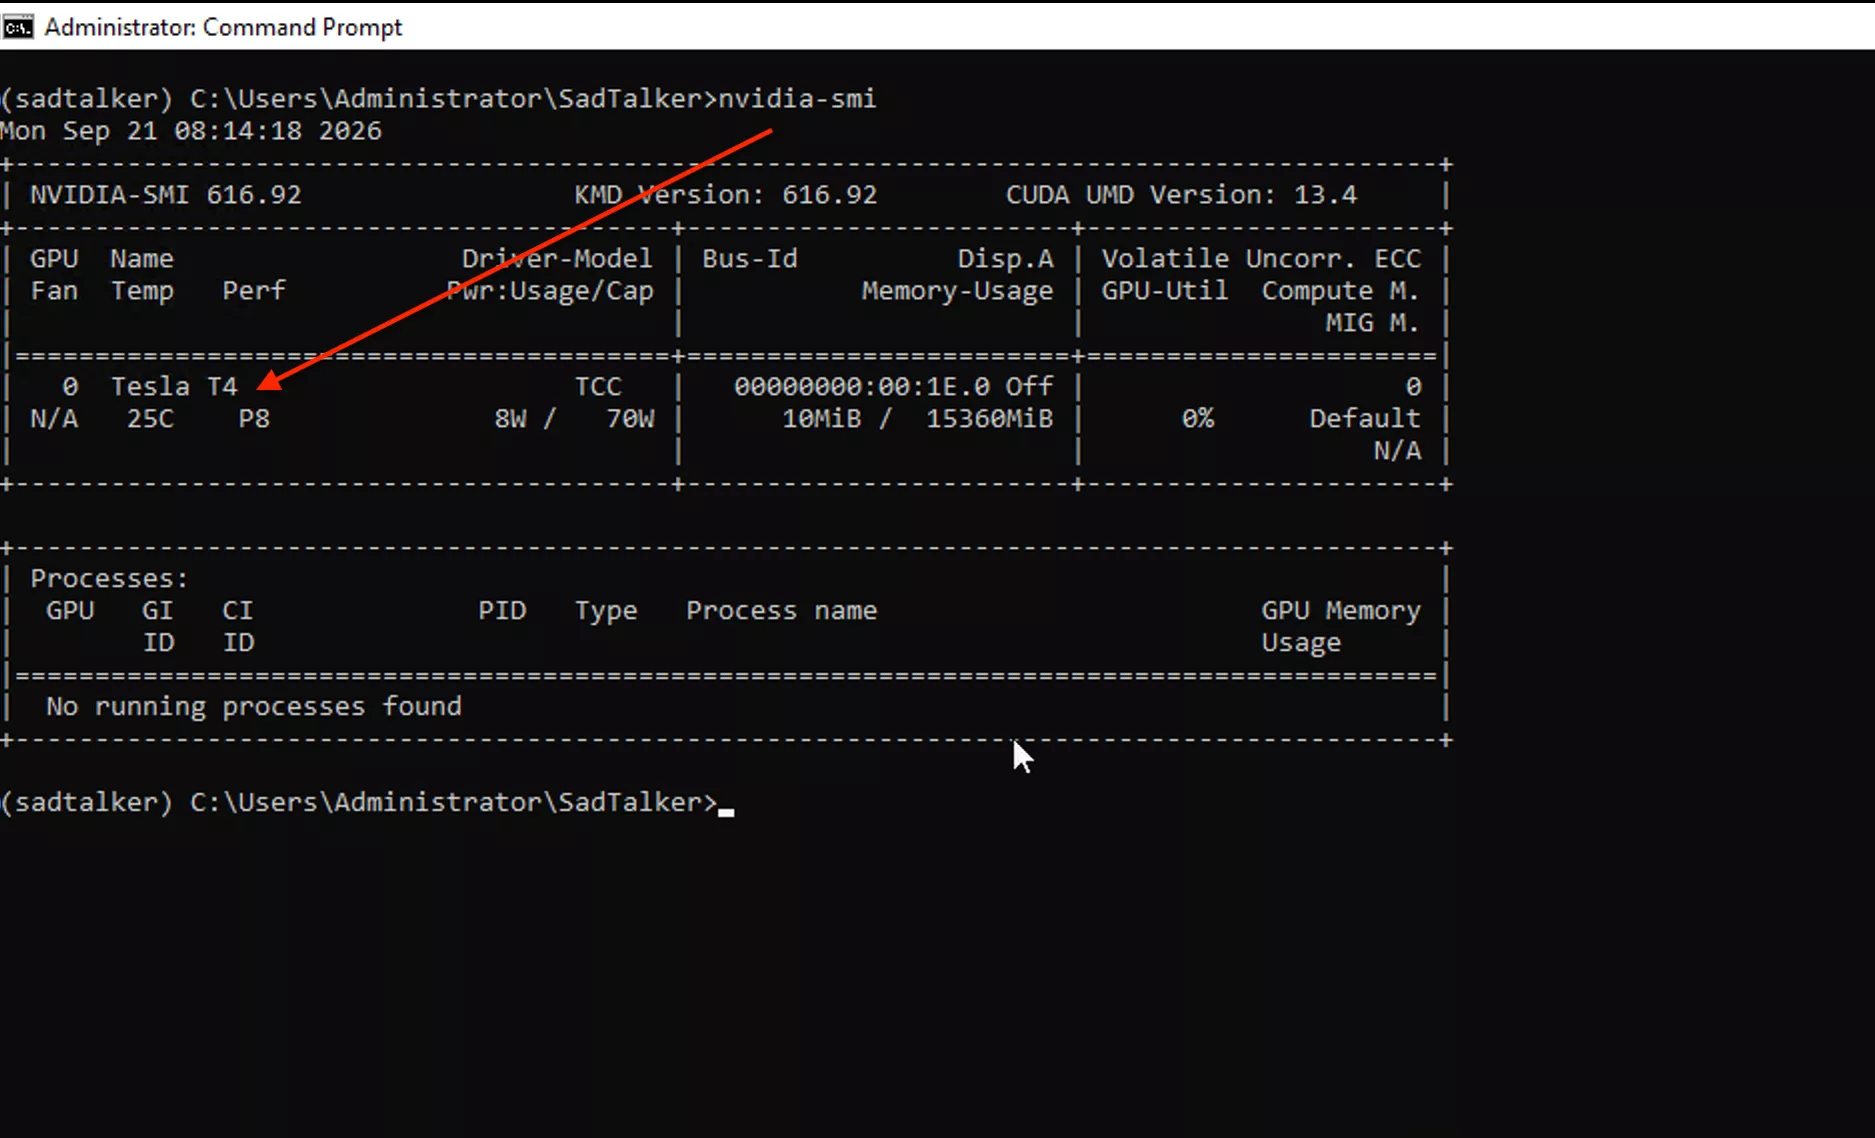
CUDA Version: 12.2 displayed by nvidia-smi indicates the maximum CUDA version your driver supports. SadTalker will run PyTorch with CUDA 11.3 wheels without needing a separate full CUDA Toolkit installation.3. Step 2: Python 3.8, Git & Environment Activation
SadTalker was engineered specifically around Python 3.8. Installing modern versions like Python 3.10, 3.11, or 3.14 will cause severe wheel build failures because older dependencies (such as PyTorch 1.12.1+cu113 and LMDB) do not provide pre-compiled wheels for newer Python ABIs.
2.1 Install Python 3.8.x (64-bit)
Get the official Windows installer: Python 3.8.10 Windows x86-64 executable installer.
2.2 Install Git for Windows
Download and install Git for Windows (64-bit). Keep default settings during setup.
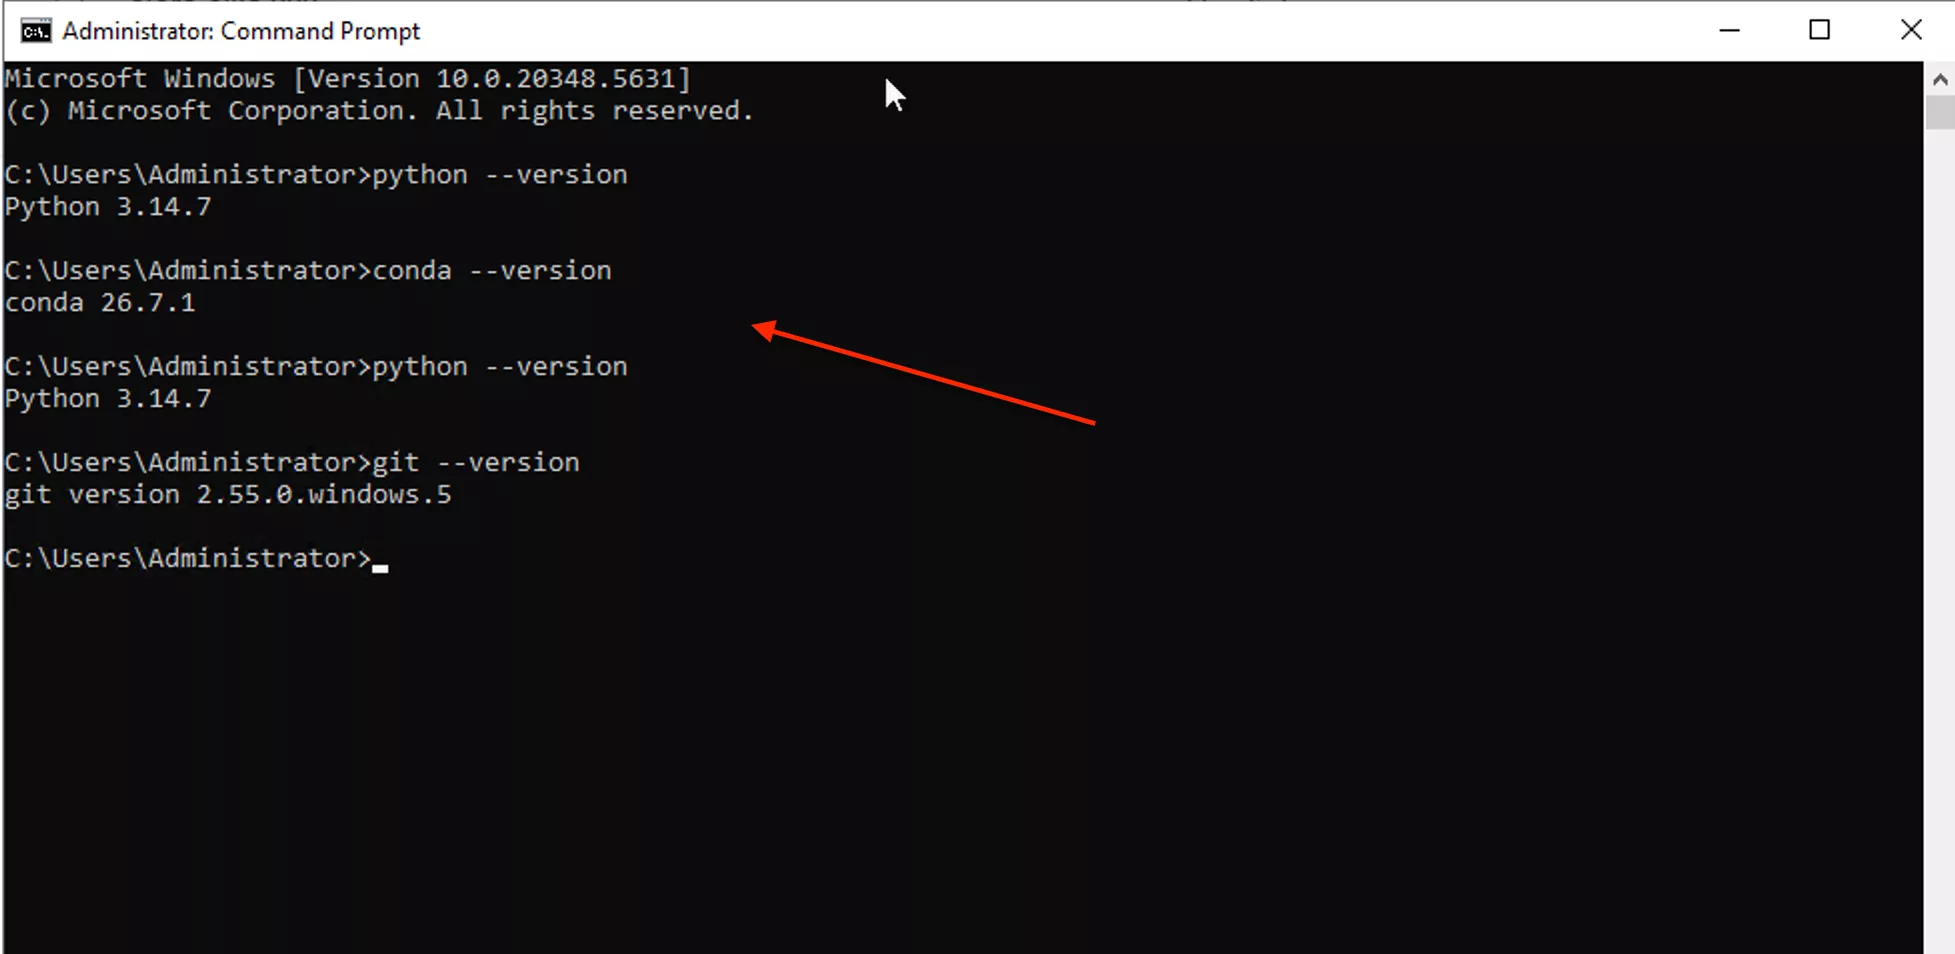
2.3 Verifying Python & Git Versions in Windows Terminal
Open a new Command Prompt or PowerShell window and verify that Python 3.8 and Git are detected:
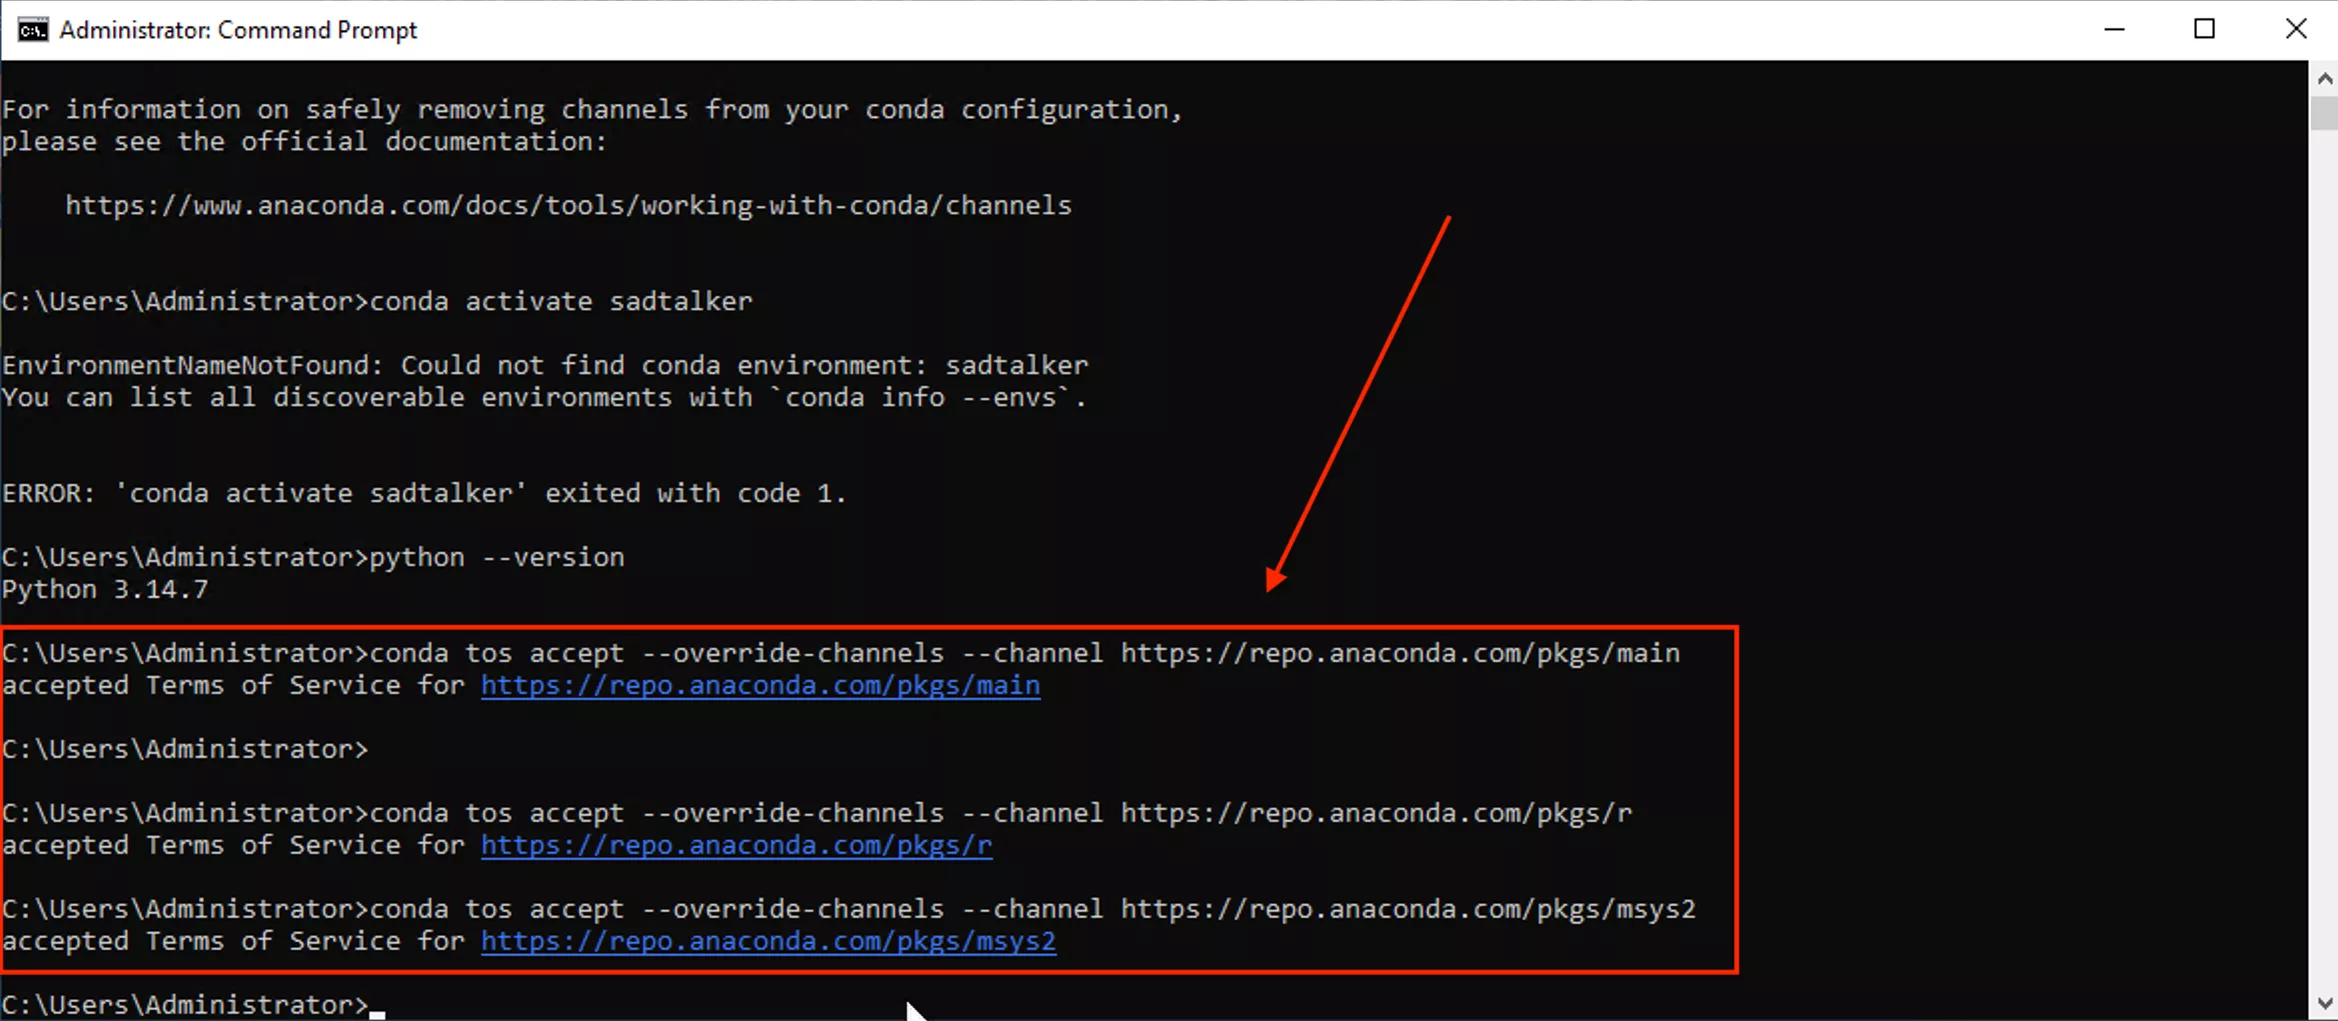
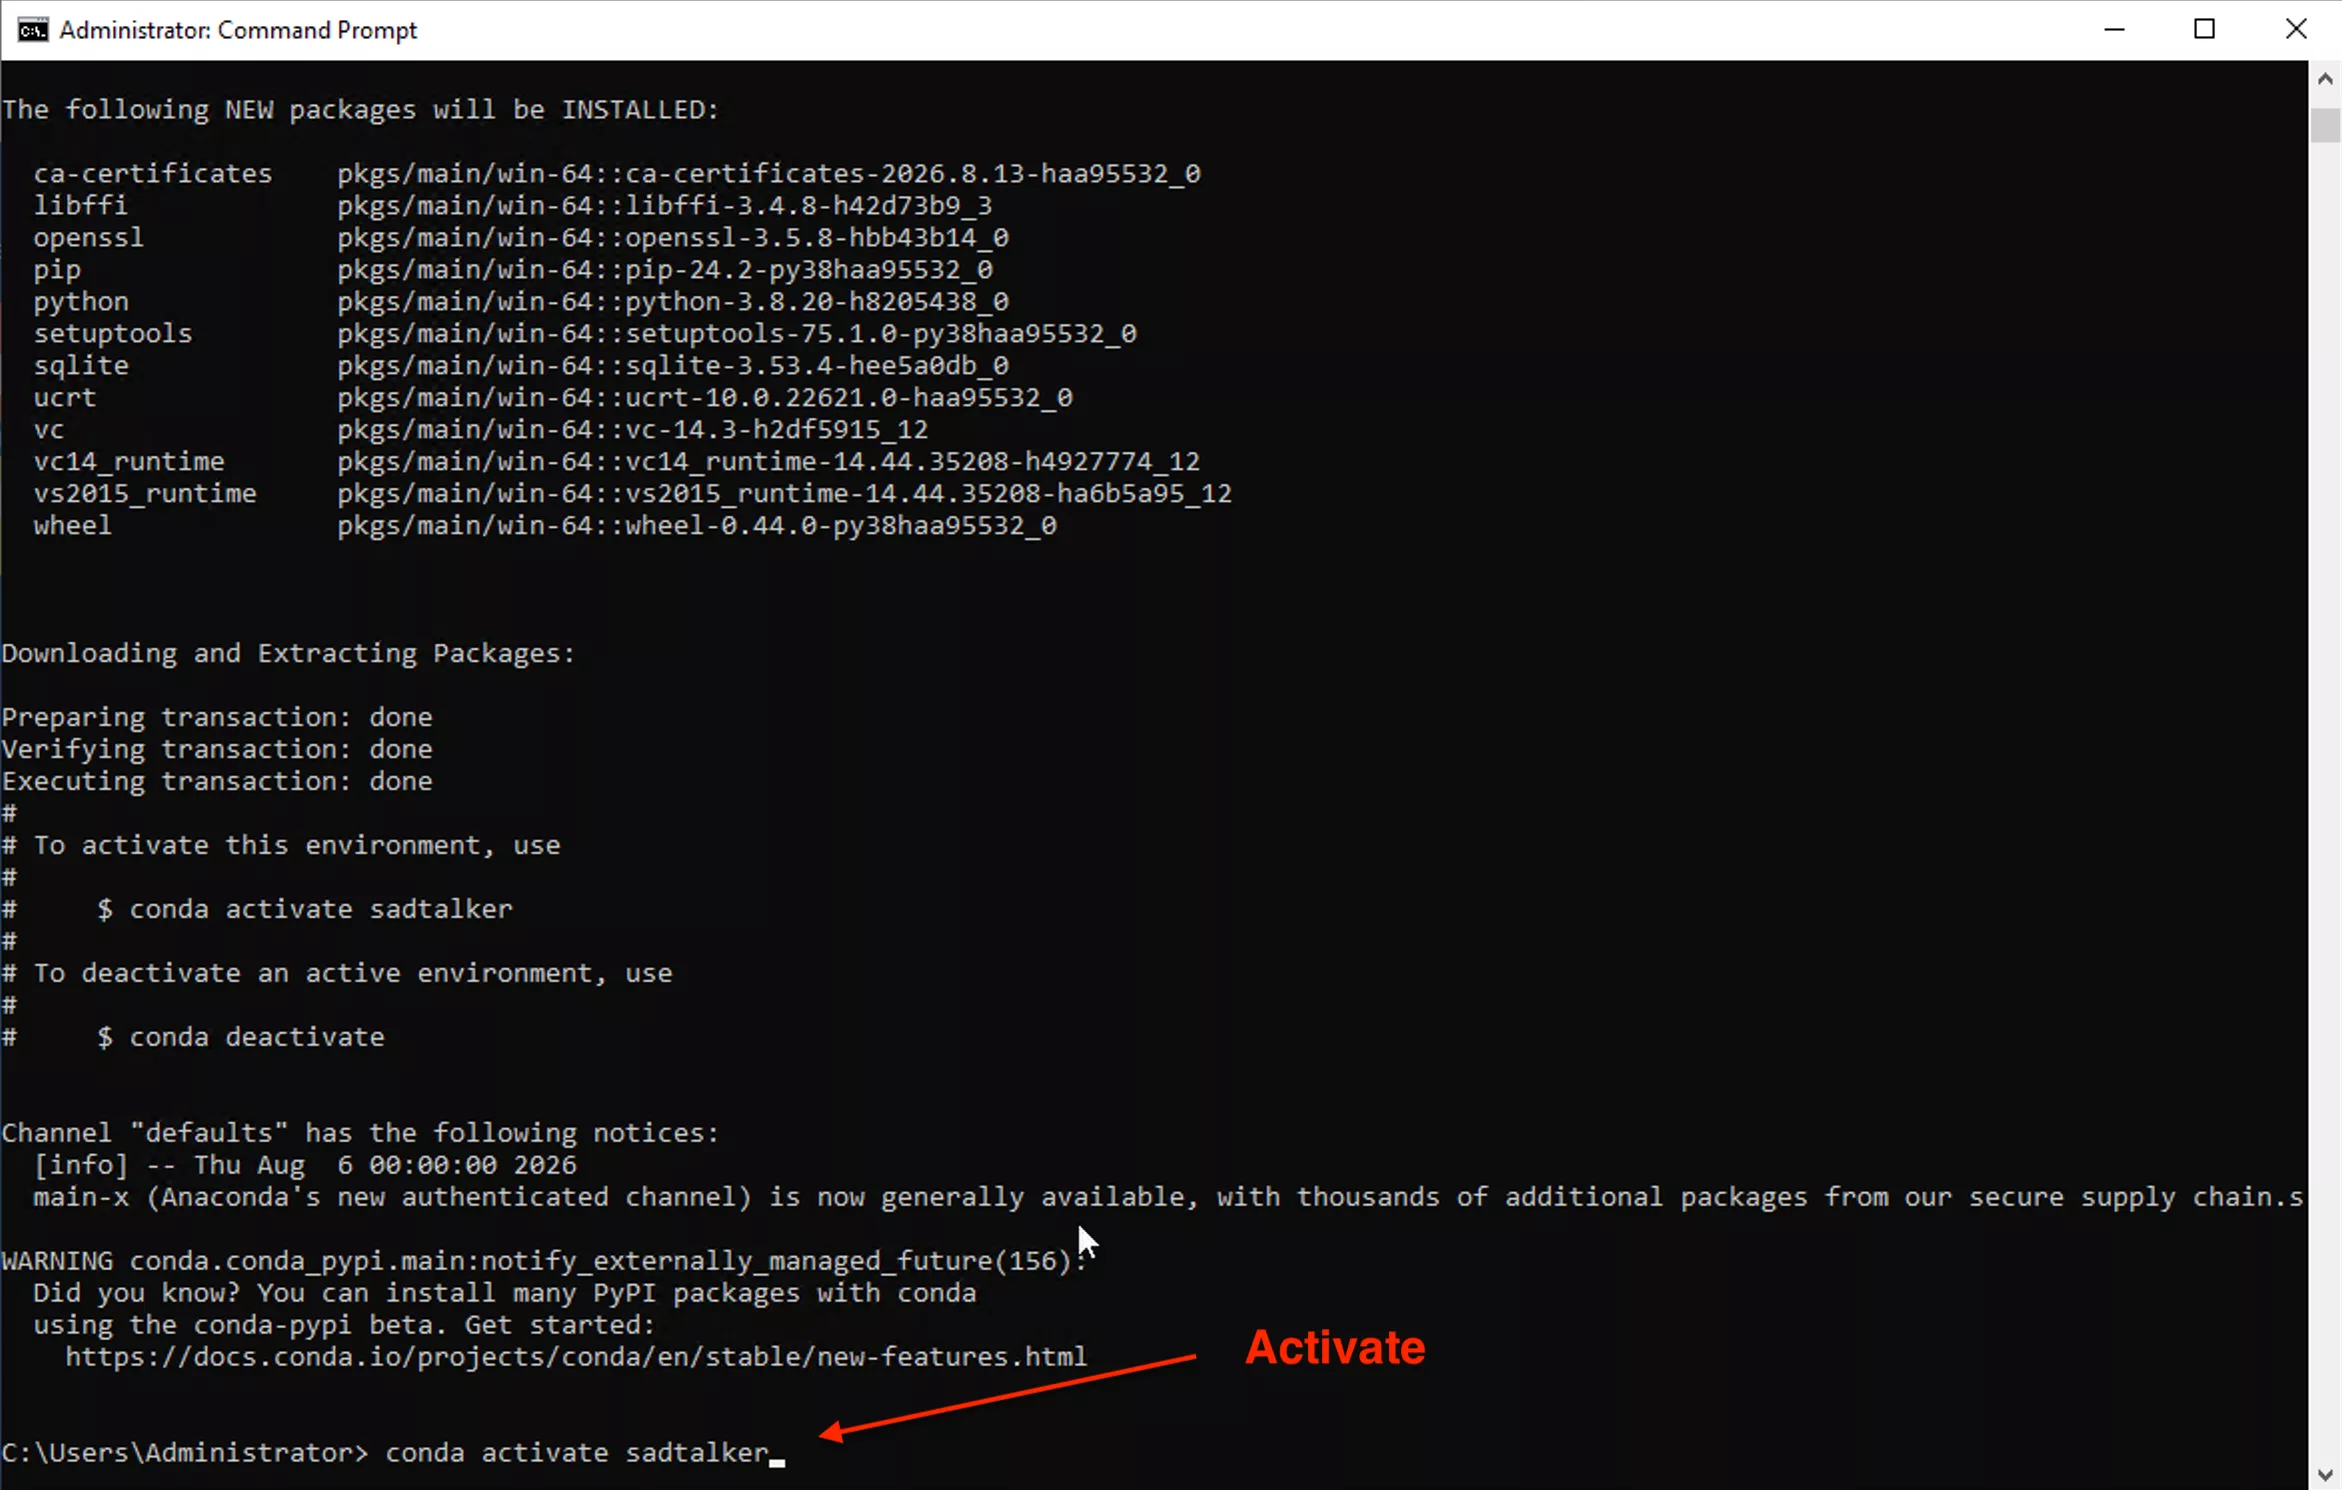
2.4 Creating & Activating the “sadtalker” Environment
To keep your Windows system clean and isolate package versions, create a dedicated Python 3.8 environment named sadtalker:

4. Step 3: Install PyTorch with CUDA in Activated Environment
Immediately after activating the environment, you must install the CUDA-accelerated PyTorch build. Do not wait until running scripts later. SadTalker requires PyTorch 1.12.1 compiled with CUDA 11.3:
3.1 Running pip install torch torchvision torchaudio
With (sadtalker) active, run the CUDA wheel installation command:
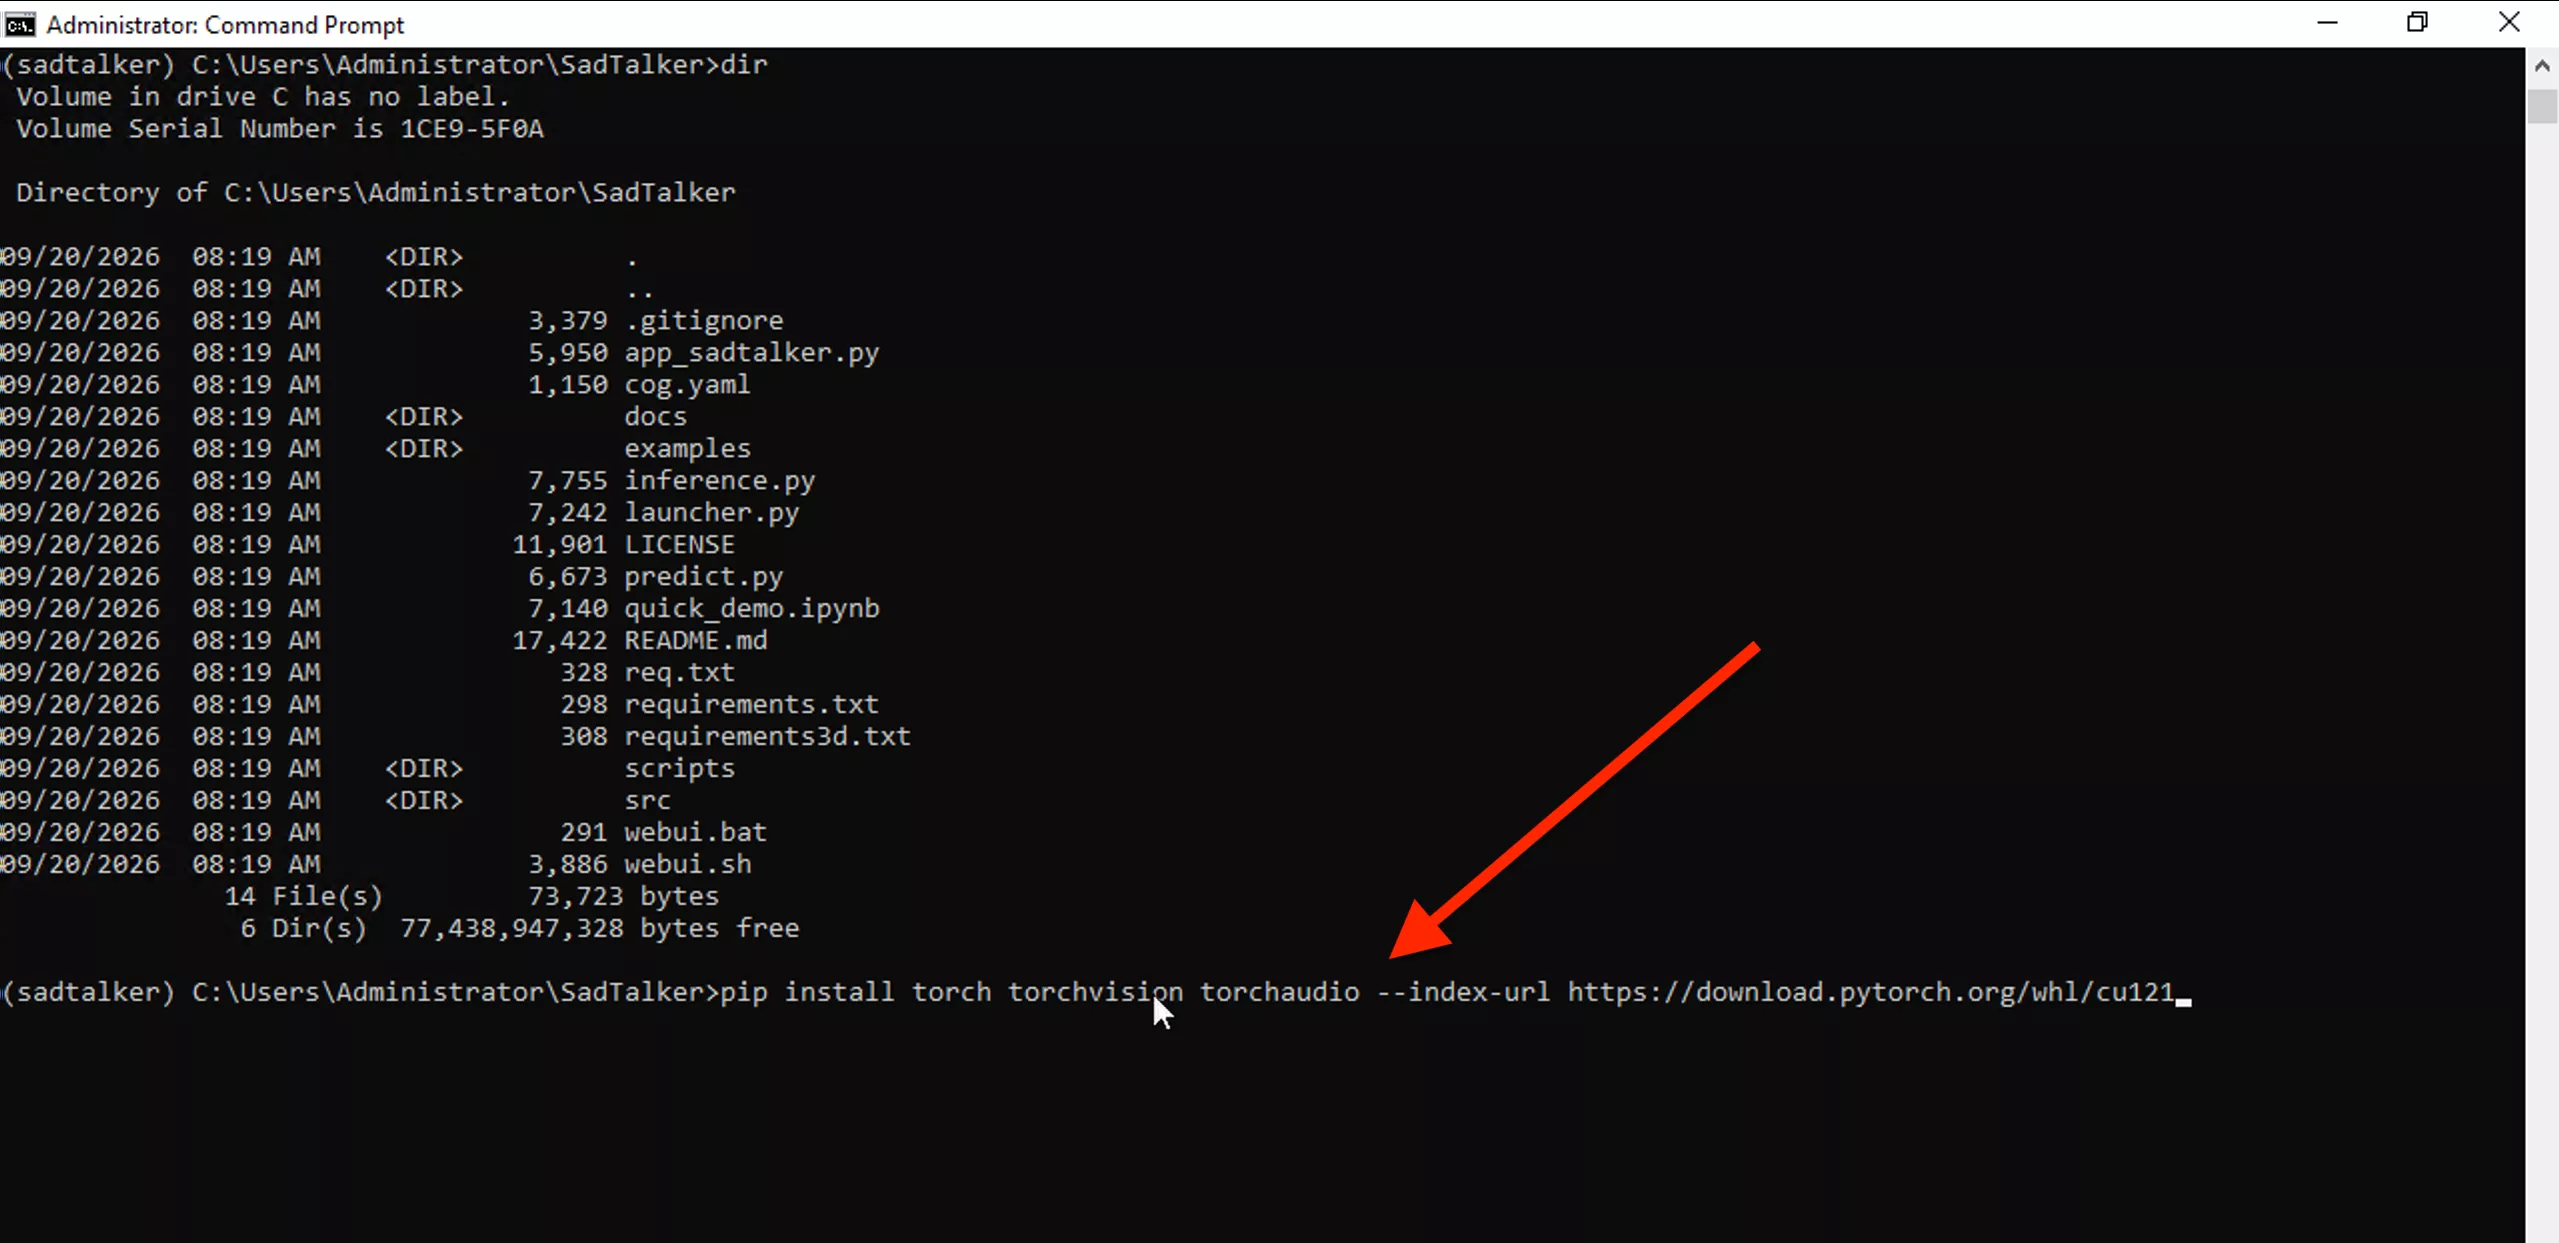
Note: The PyTorch wheel is ~2.2 GB. Let the installation finish completely before proceeding to the next step.
5. Step 4: Standalone FFmpeg Setup (Why Conda Fails)
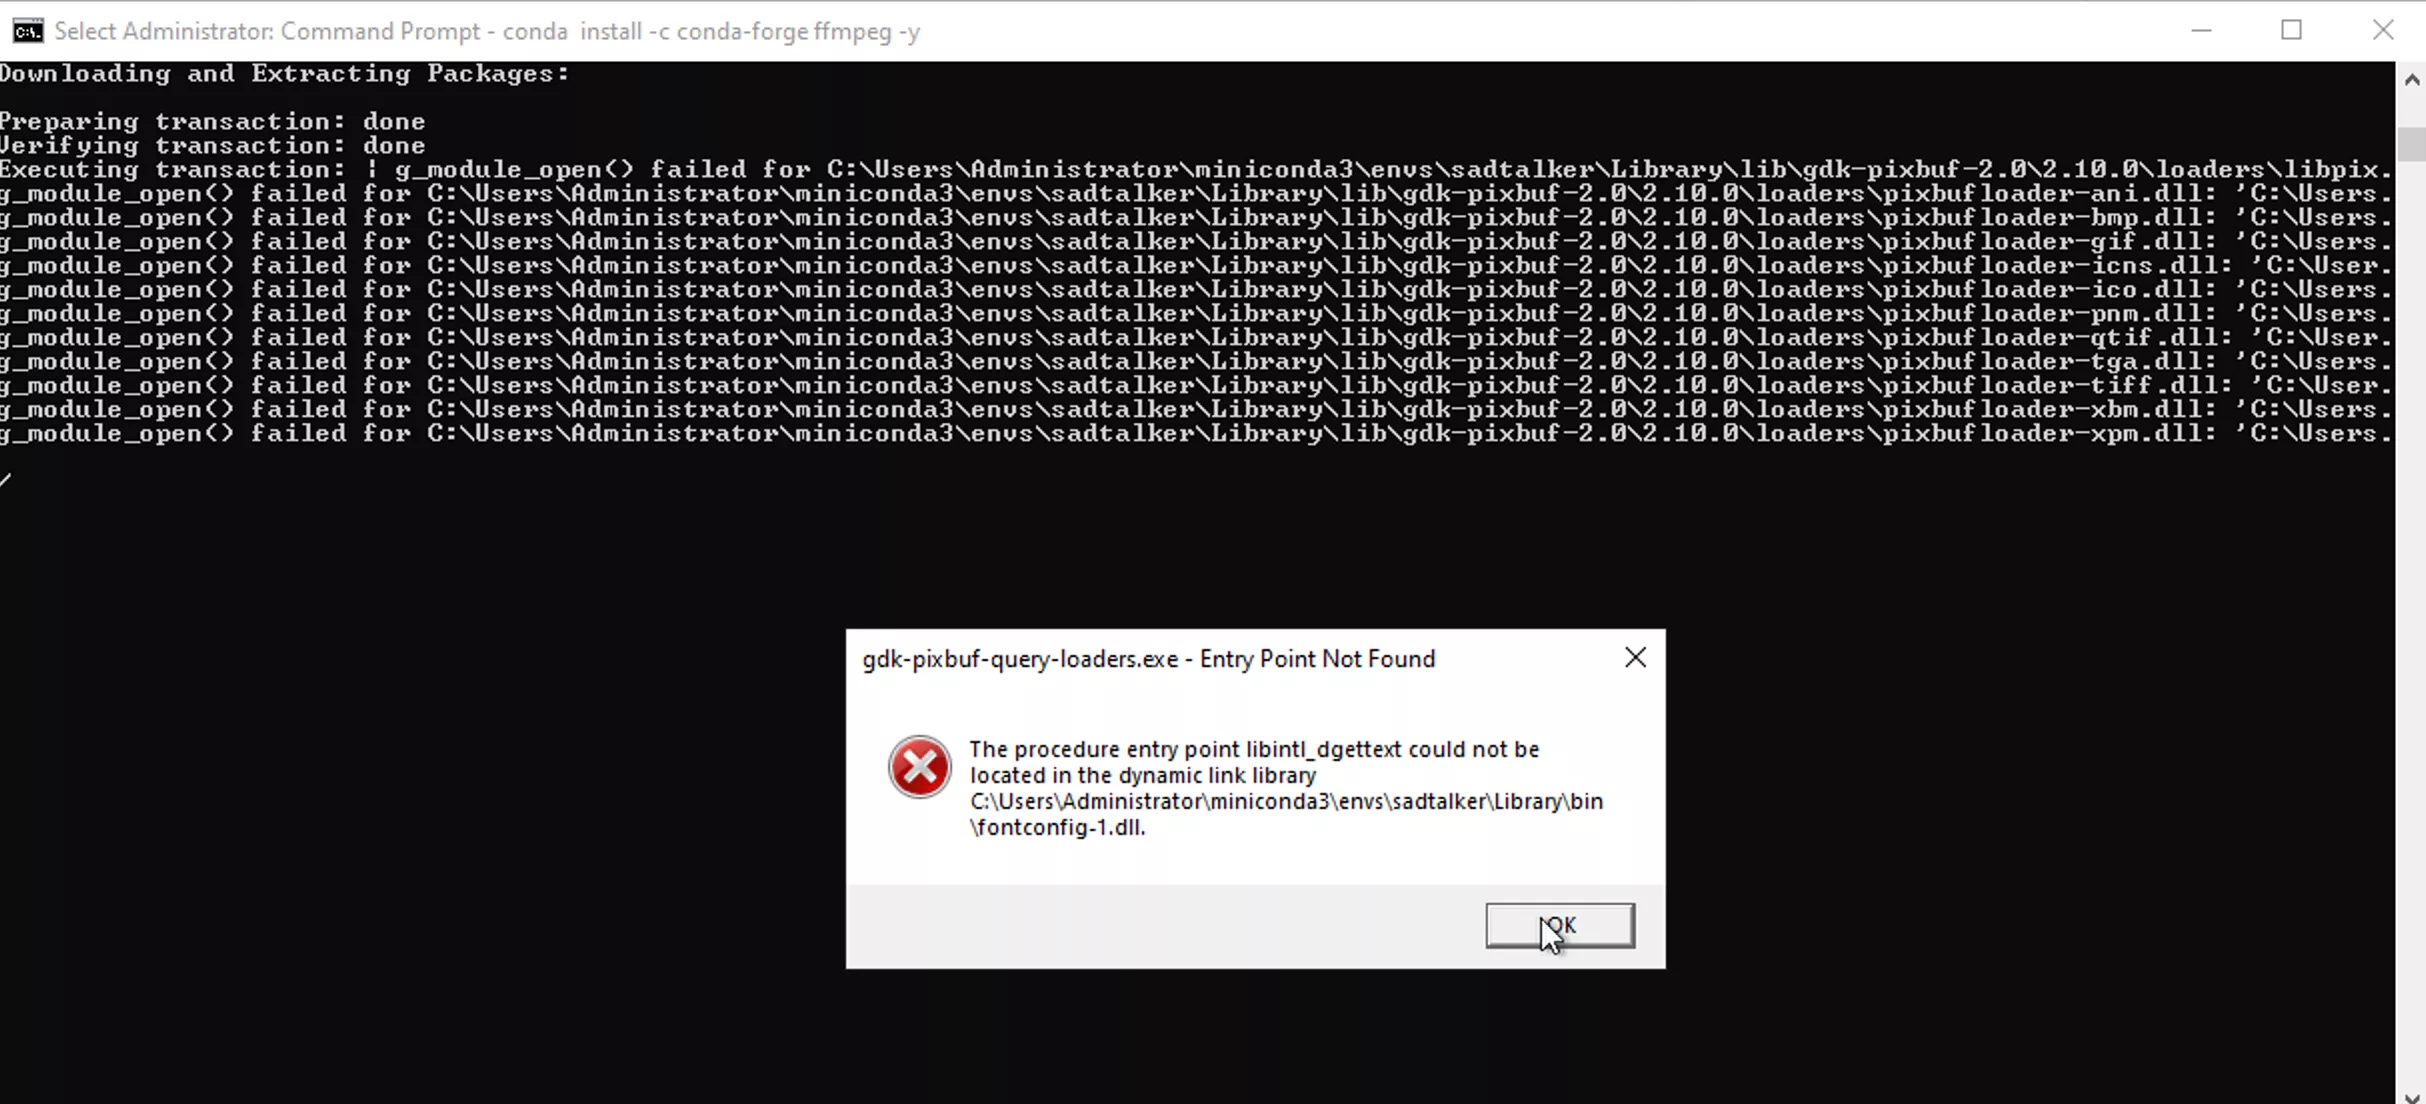
FFmpeg is required by SadTalker to extract audio waveforms, encode video streams, and multiplex audio onto animated frames. However, on Windows, installing FFmpeg through Conda causes dynamic library linking failures.
Why “conda install ffmpeg” Fails on Windows
When installing FFmpeg via Conda on Windows, executing FFmpeg triggers missing entry point errors:libfontconfig-1.dll was not found andlibintl_dgettext could not be located:
The Foolproof Solution: Standalone Gyan.dev Release Essentials
To avoid all DLL conflicts, get a statically compiled release build from Gyan.dev (the official Windows build maintainer recognized by FFmpeg.org):
Download: Gyan.dev FFmpeg Builds Portal (select ffmpeg-release-essentials.zip):
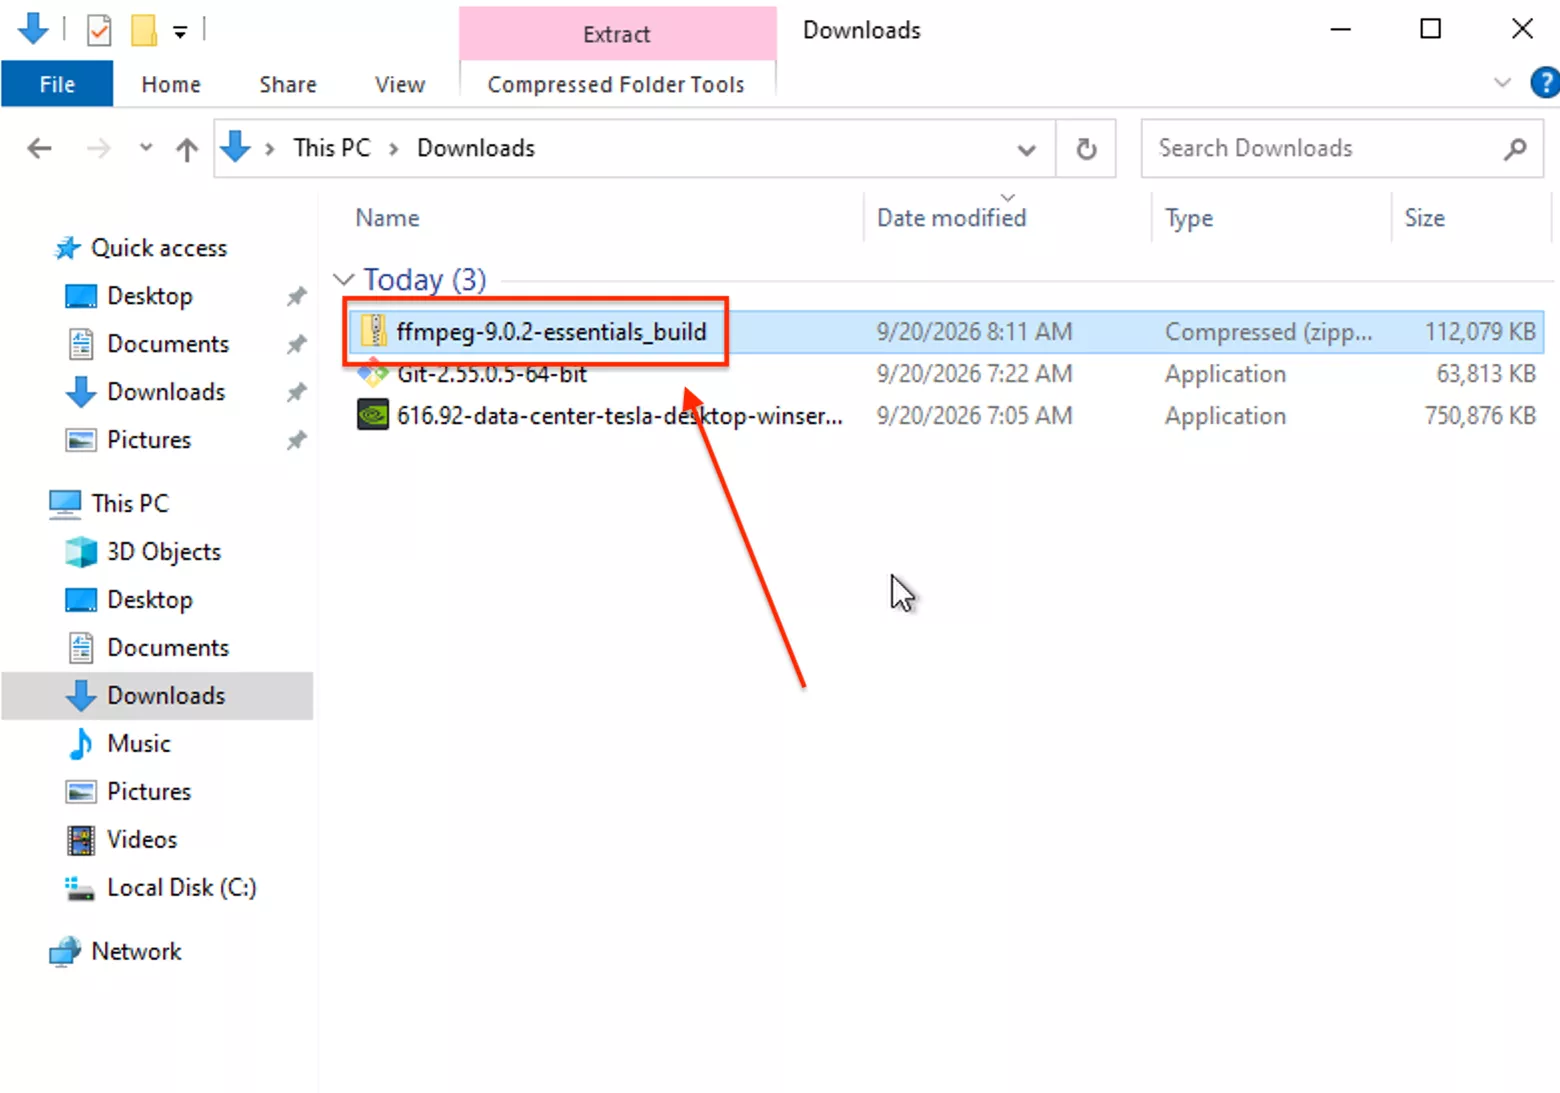
Extract the zip so that the bin folder contains ffmpeg.exe, ffplay.exe, and ffprobe.exe:
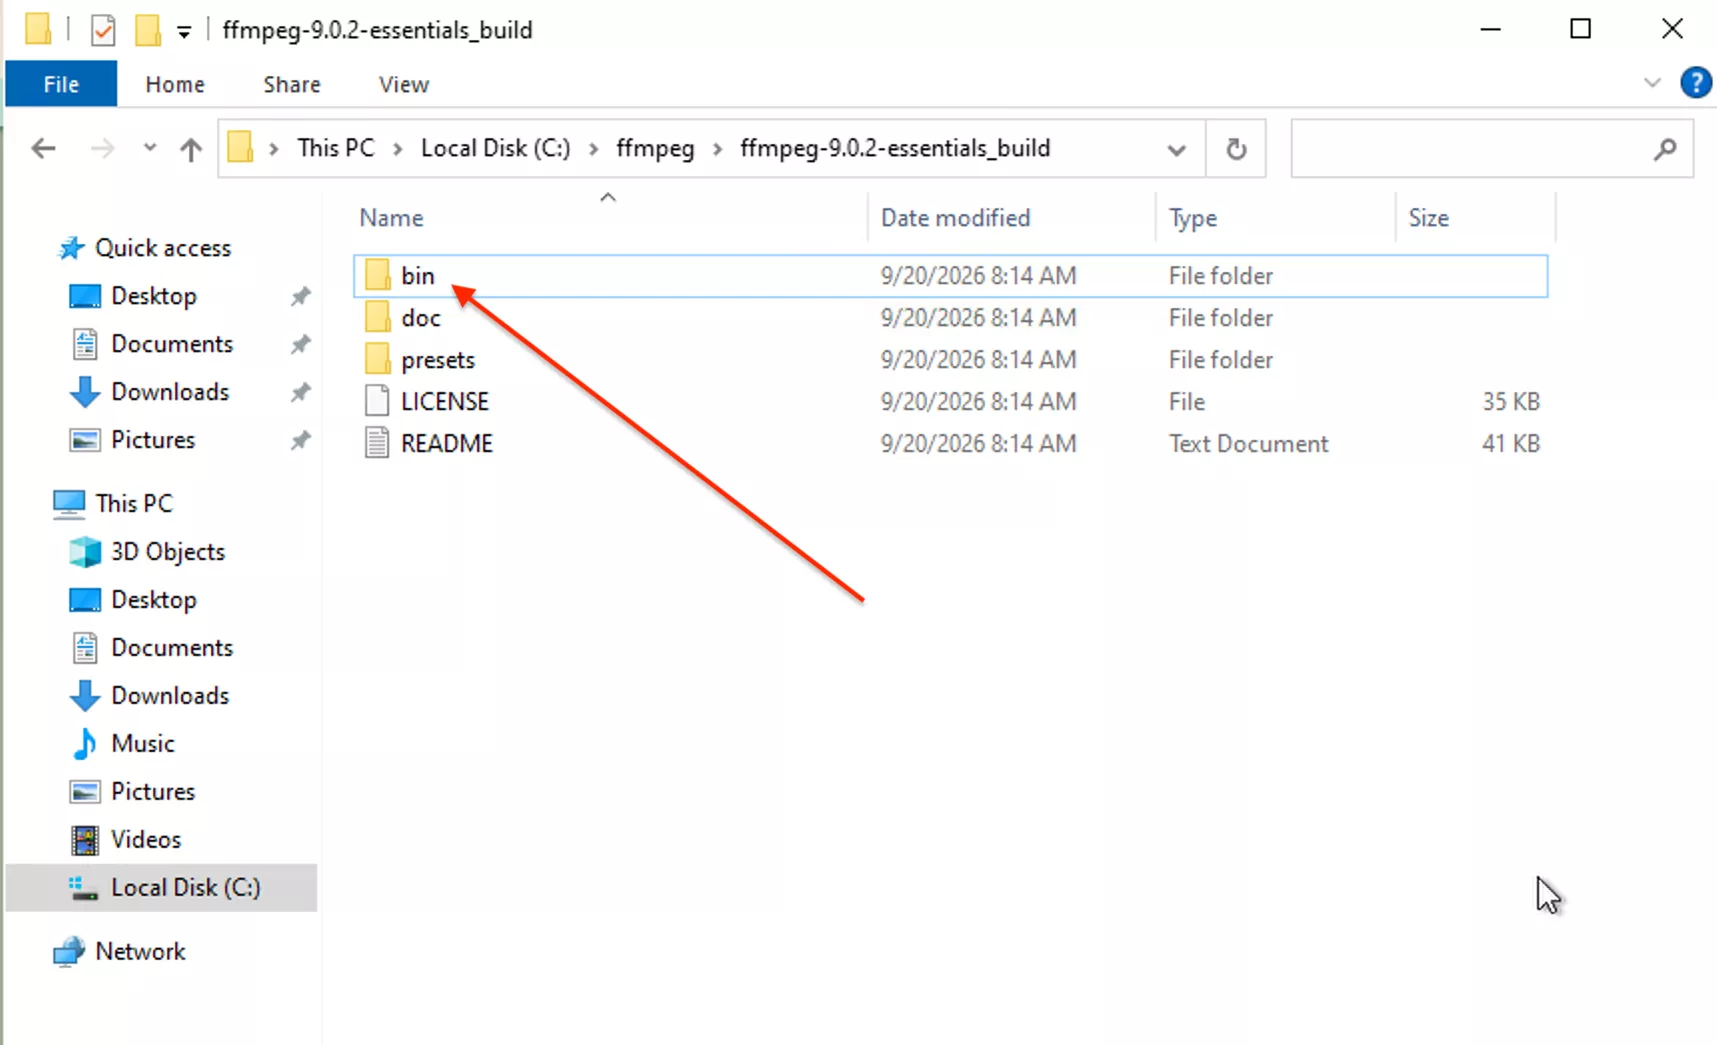
For your current command prompt session:
Permanent: Open Windows “Edit the system environment variables” → “Environment Variables” → select “Path” → New → paste your bin path.
6. Step 5: Clone SadTalker Repository
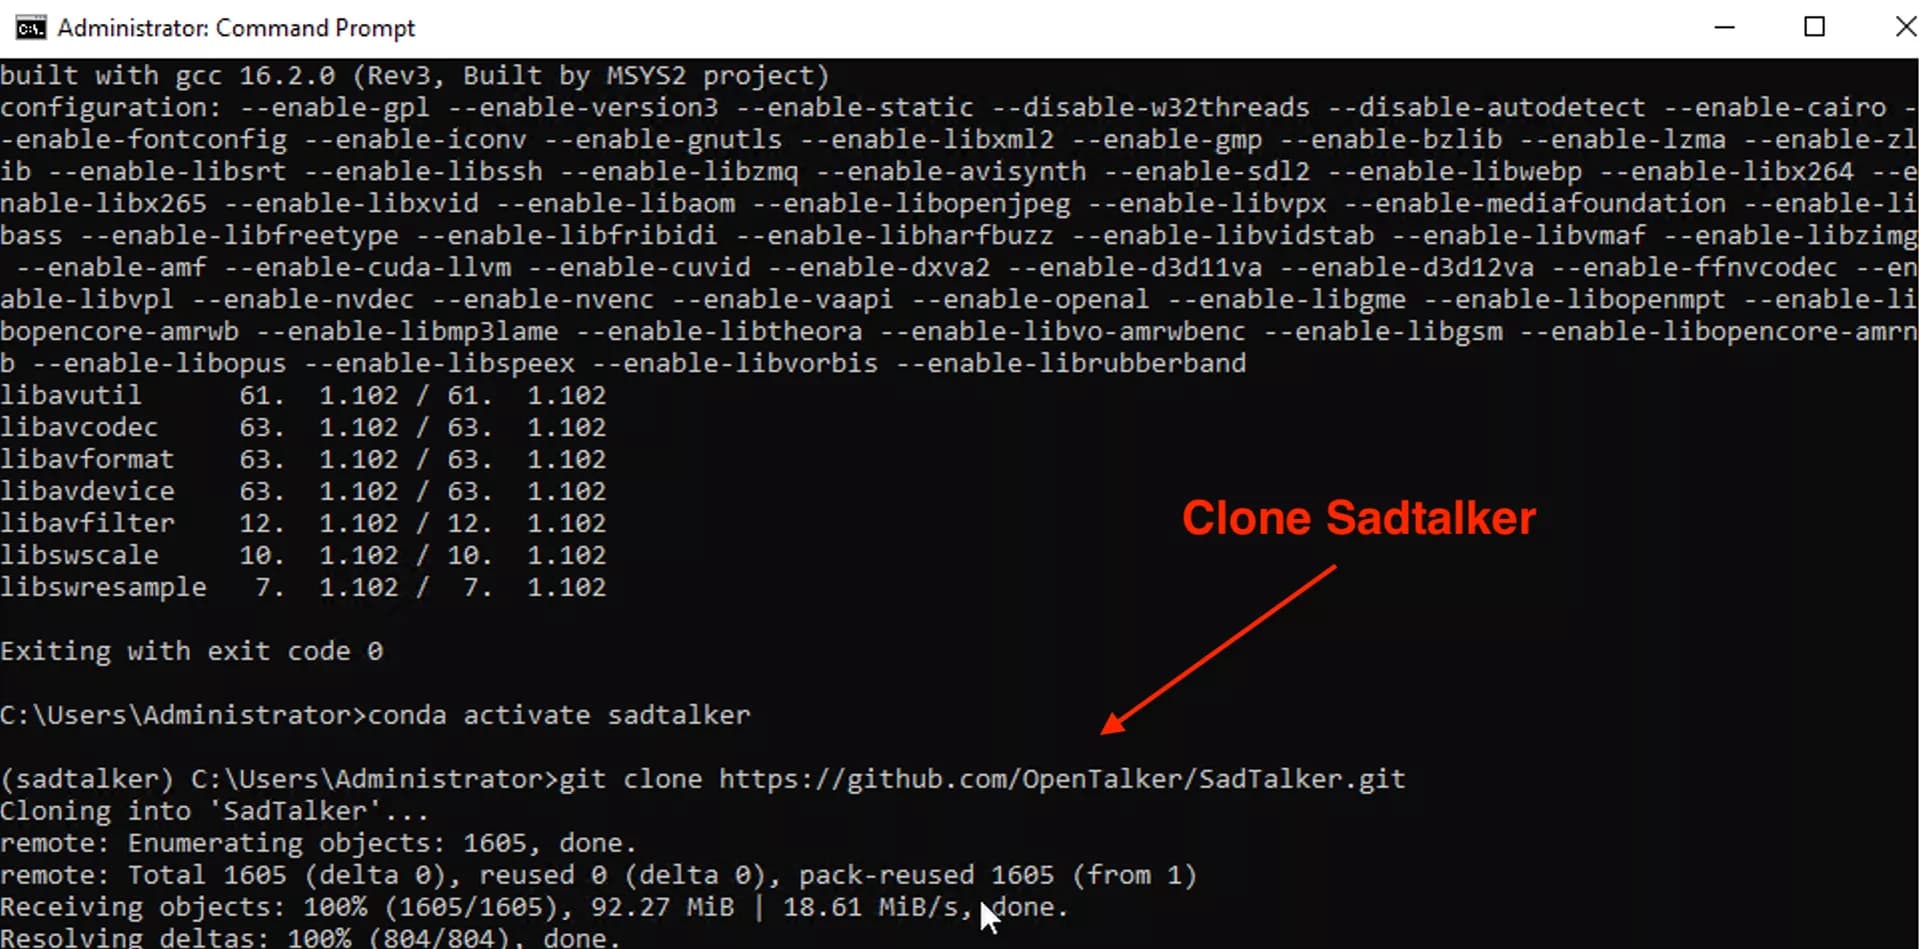
Open Command Prompt or PowerShell, navigate to your desired directory, and clone the official SadTalker repository:
5.1 Cloning the Repository via Git
7. Step 6: Get Model Weights (sadtalker.zip & GFPGAN)
SadTalker requires two sets of model files to operate offline: the SadTalker checkpoints and the GFPGAN offline face restoration weights.
Direct Links for Model Weights
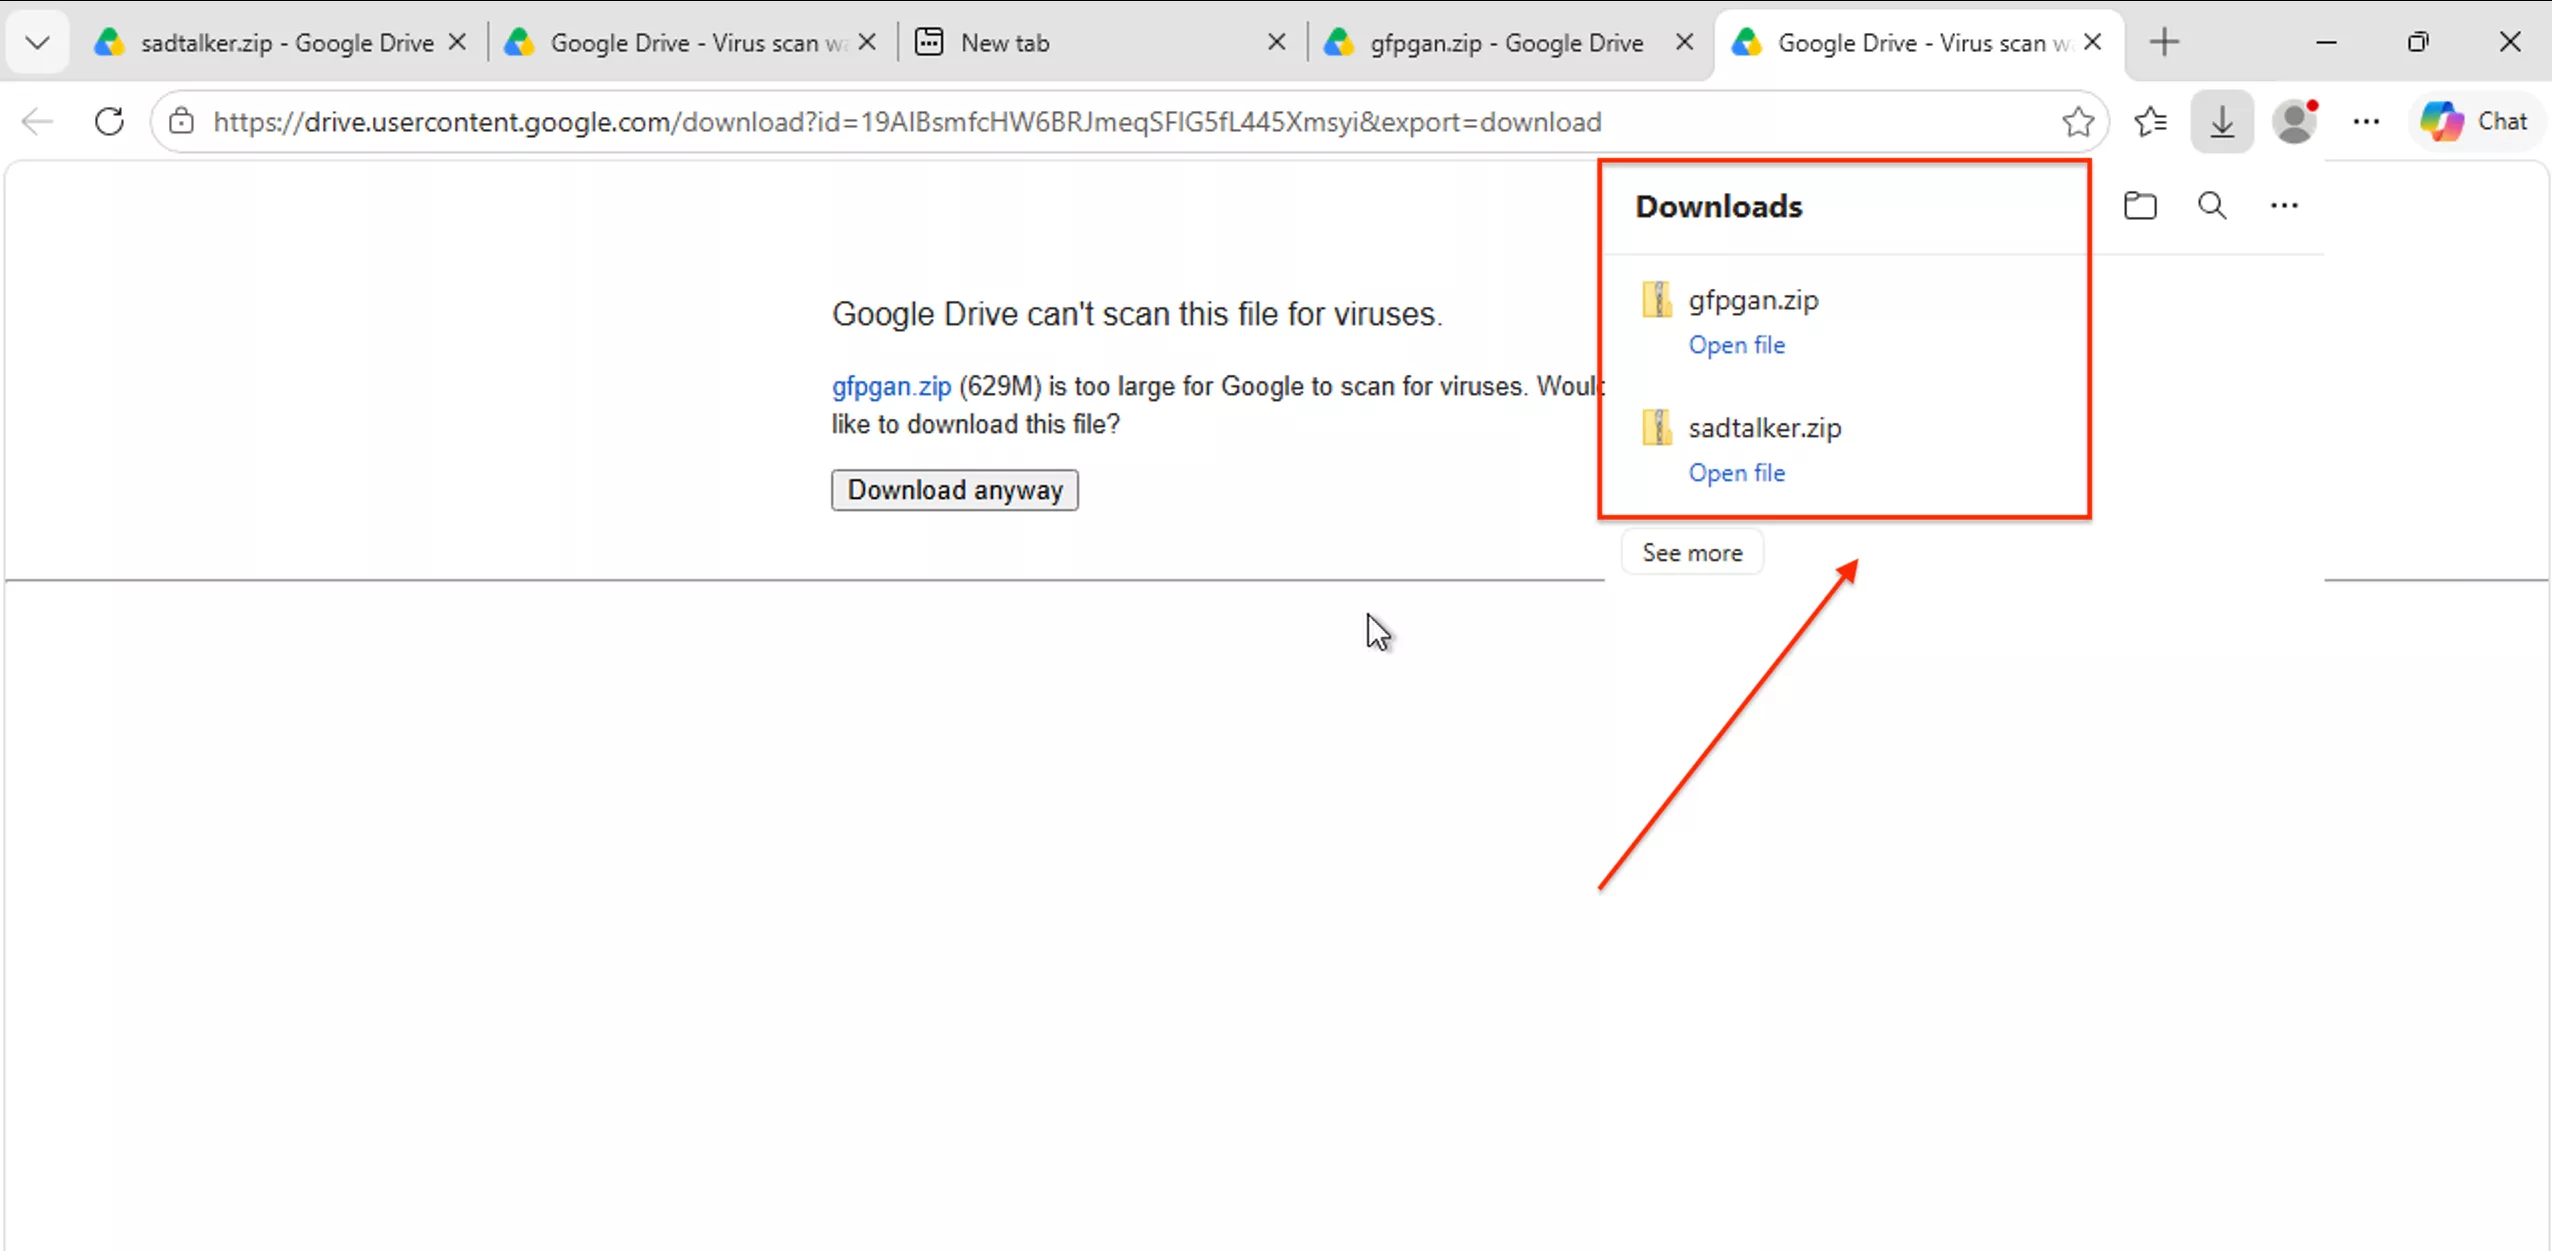
6.1 Downloading Weights from Google Drive
Click Download Anyway to obtain the zipped model packages:
6.2 Verifying Folder Placement via “dir” Command
Extract sadtalker.zip into SadTalker\checkpoints\ and the GFPGAN weights into SadTalker\gfpgan\weights\. Then verify in terminal:
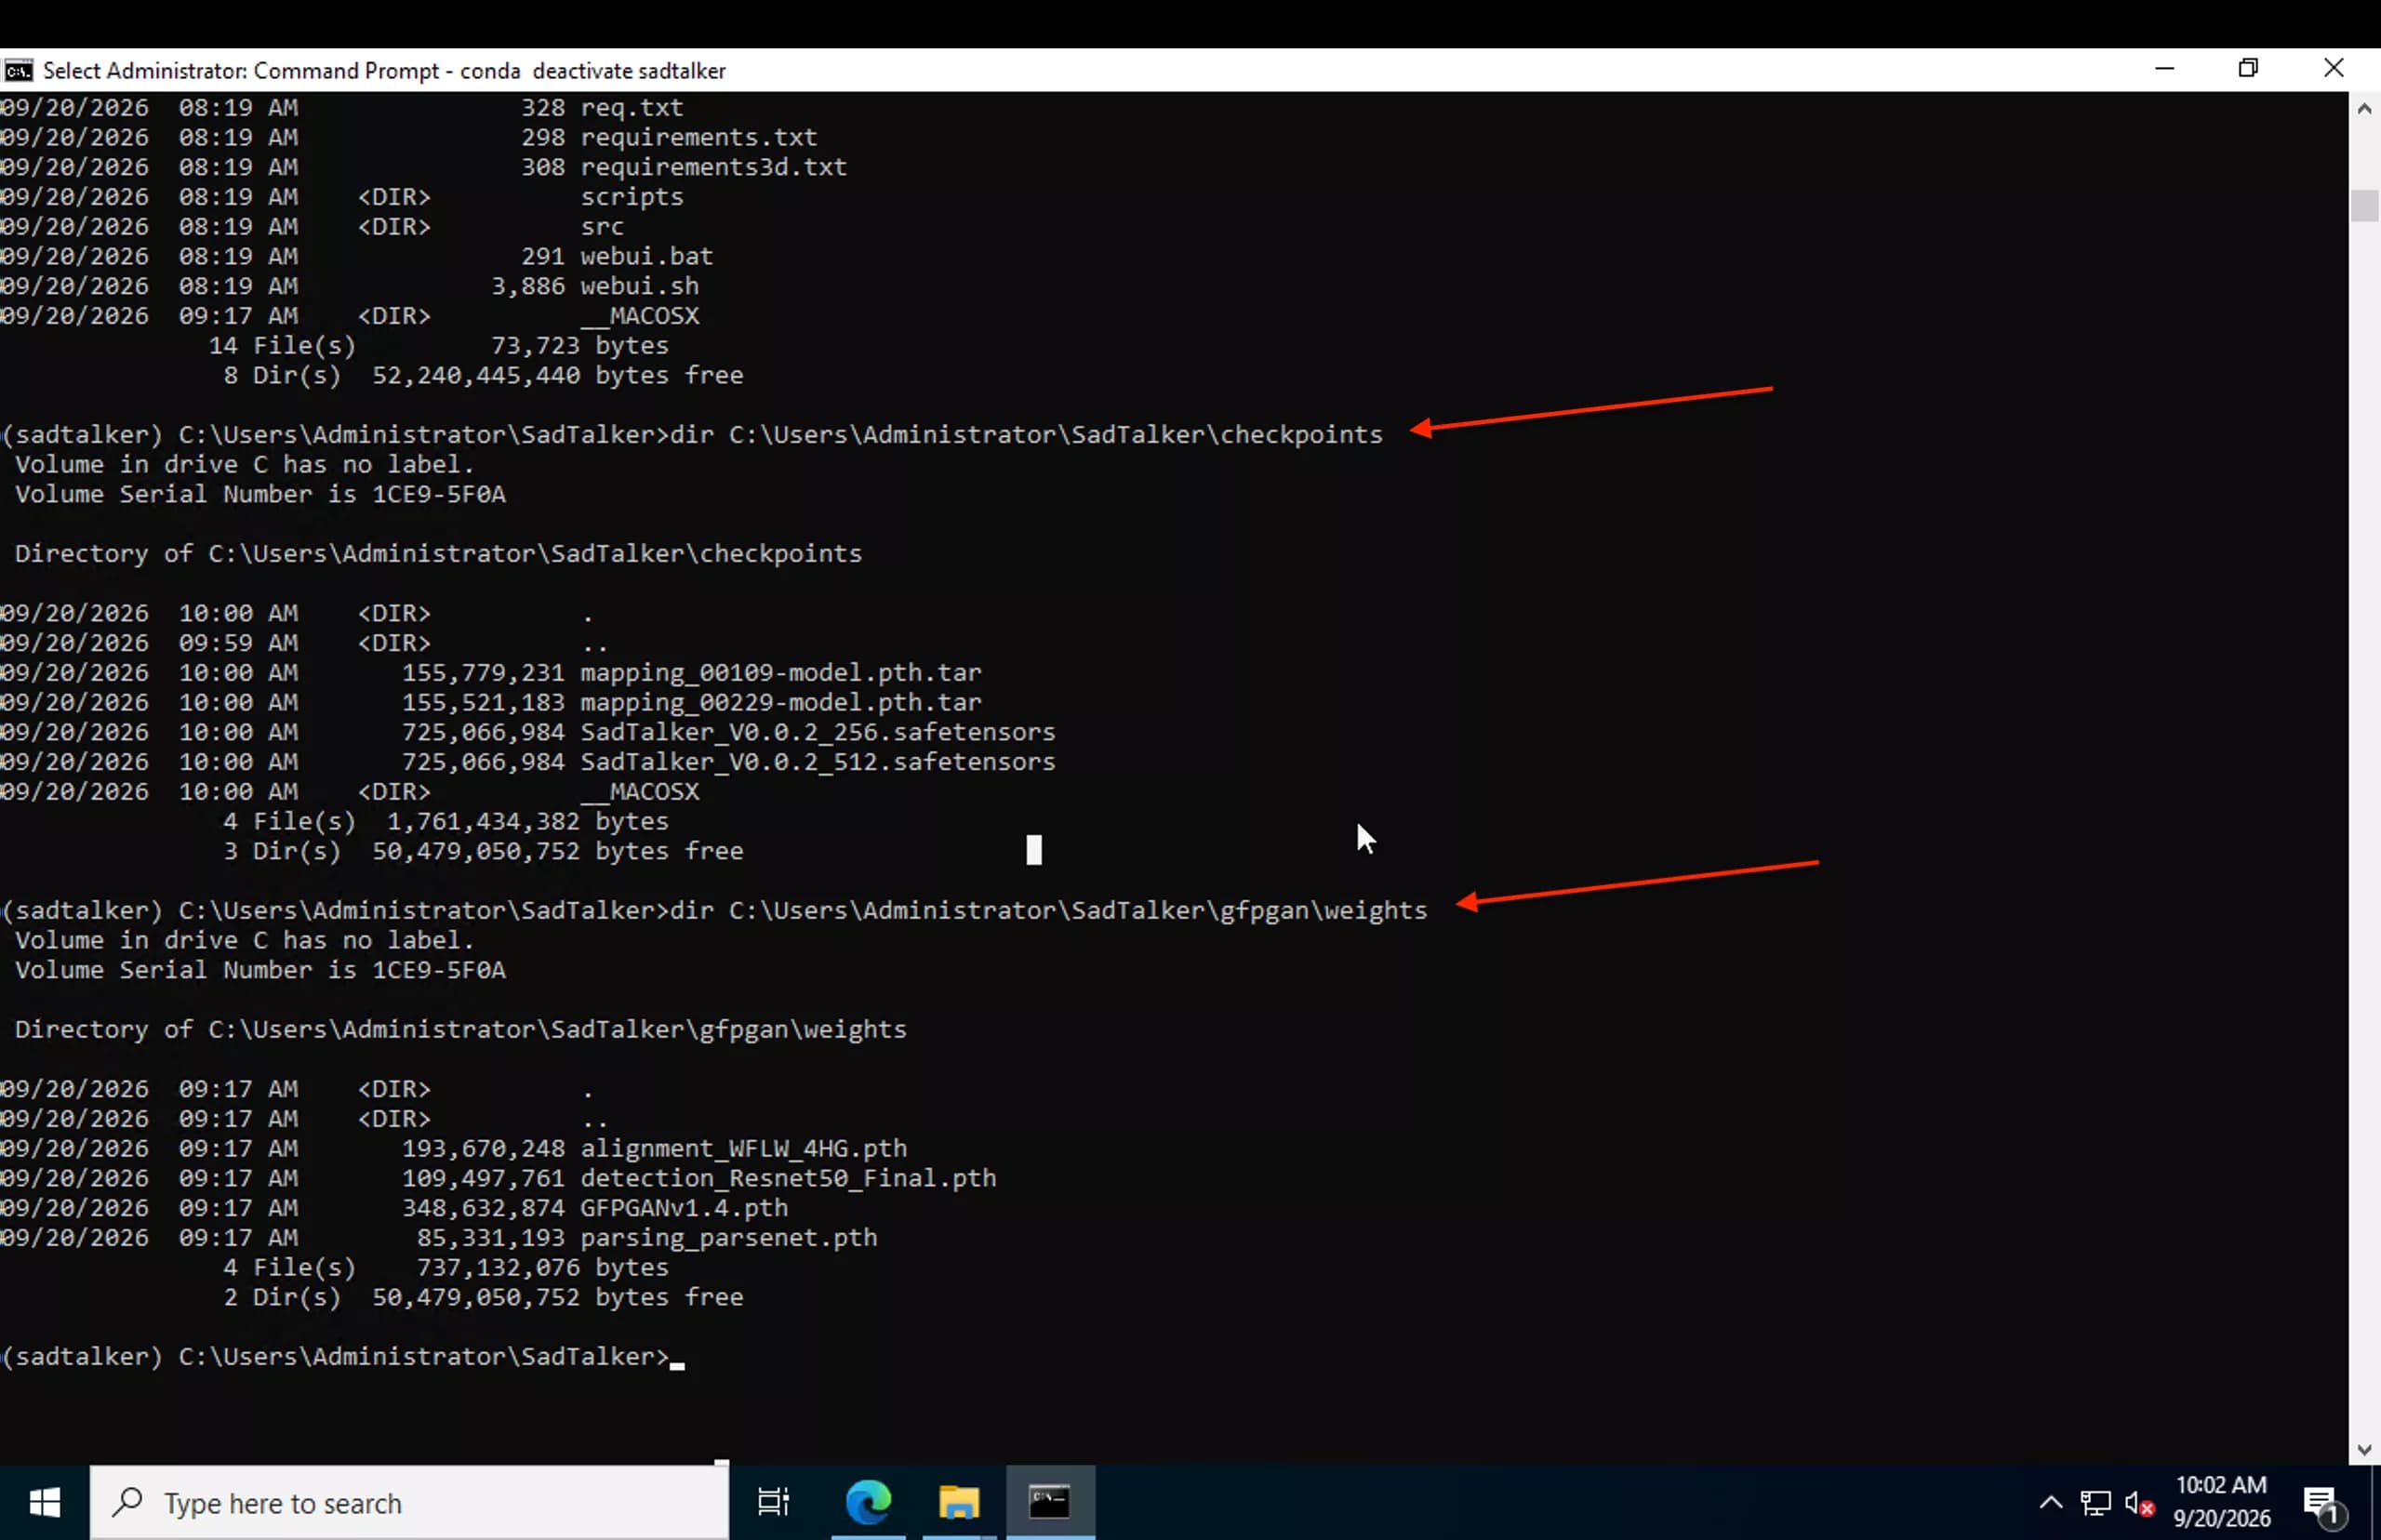
- • mapping_00109-model.pth.tar (155 MB)
- • mapping_00229-model.pth.tar (155 MB)
- • SadTalker_V0.0.2_256.safetensors (279 MB)
- • SadTalker_V0.0.2_512.safetensors (279 MB)
- • alignment_WFLW_4HG.pth (198 MB)
- • detection_Resnet50_Final.pth (109 MB)
- • GFPGANv1.4.pth (348 MB)
- • parsing_parsenet.pth (84 MB)
8. Step 7: Launch SadTalker WebUI (webui.bat)
Now that Python, PyTorch with CUDA, FFmpeg, and model weights are in place, start the local Gradio interface using the Windows batch launcher webui.bat:
7.1 Starting the Batch Launcher
Run webui.bat inside the SadTalker directory. The terminal initializes the environment and reports the local URL:
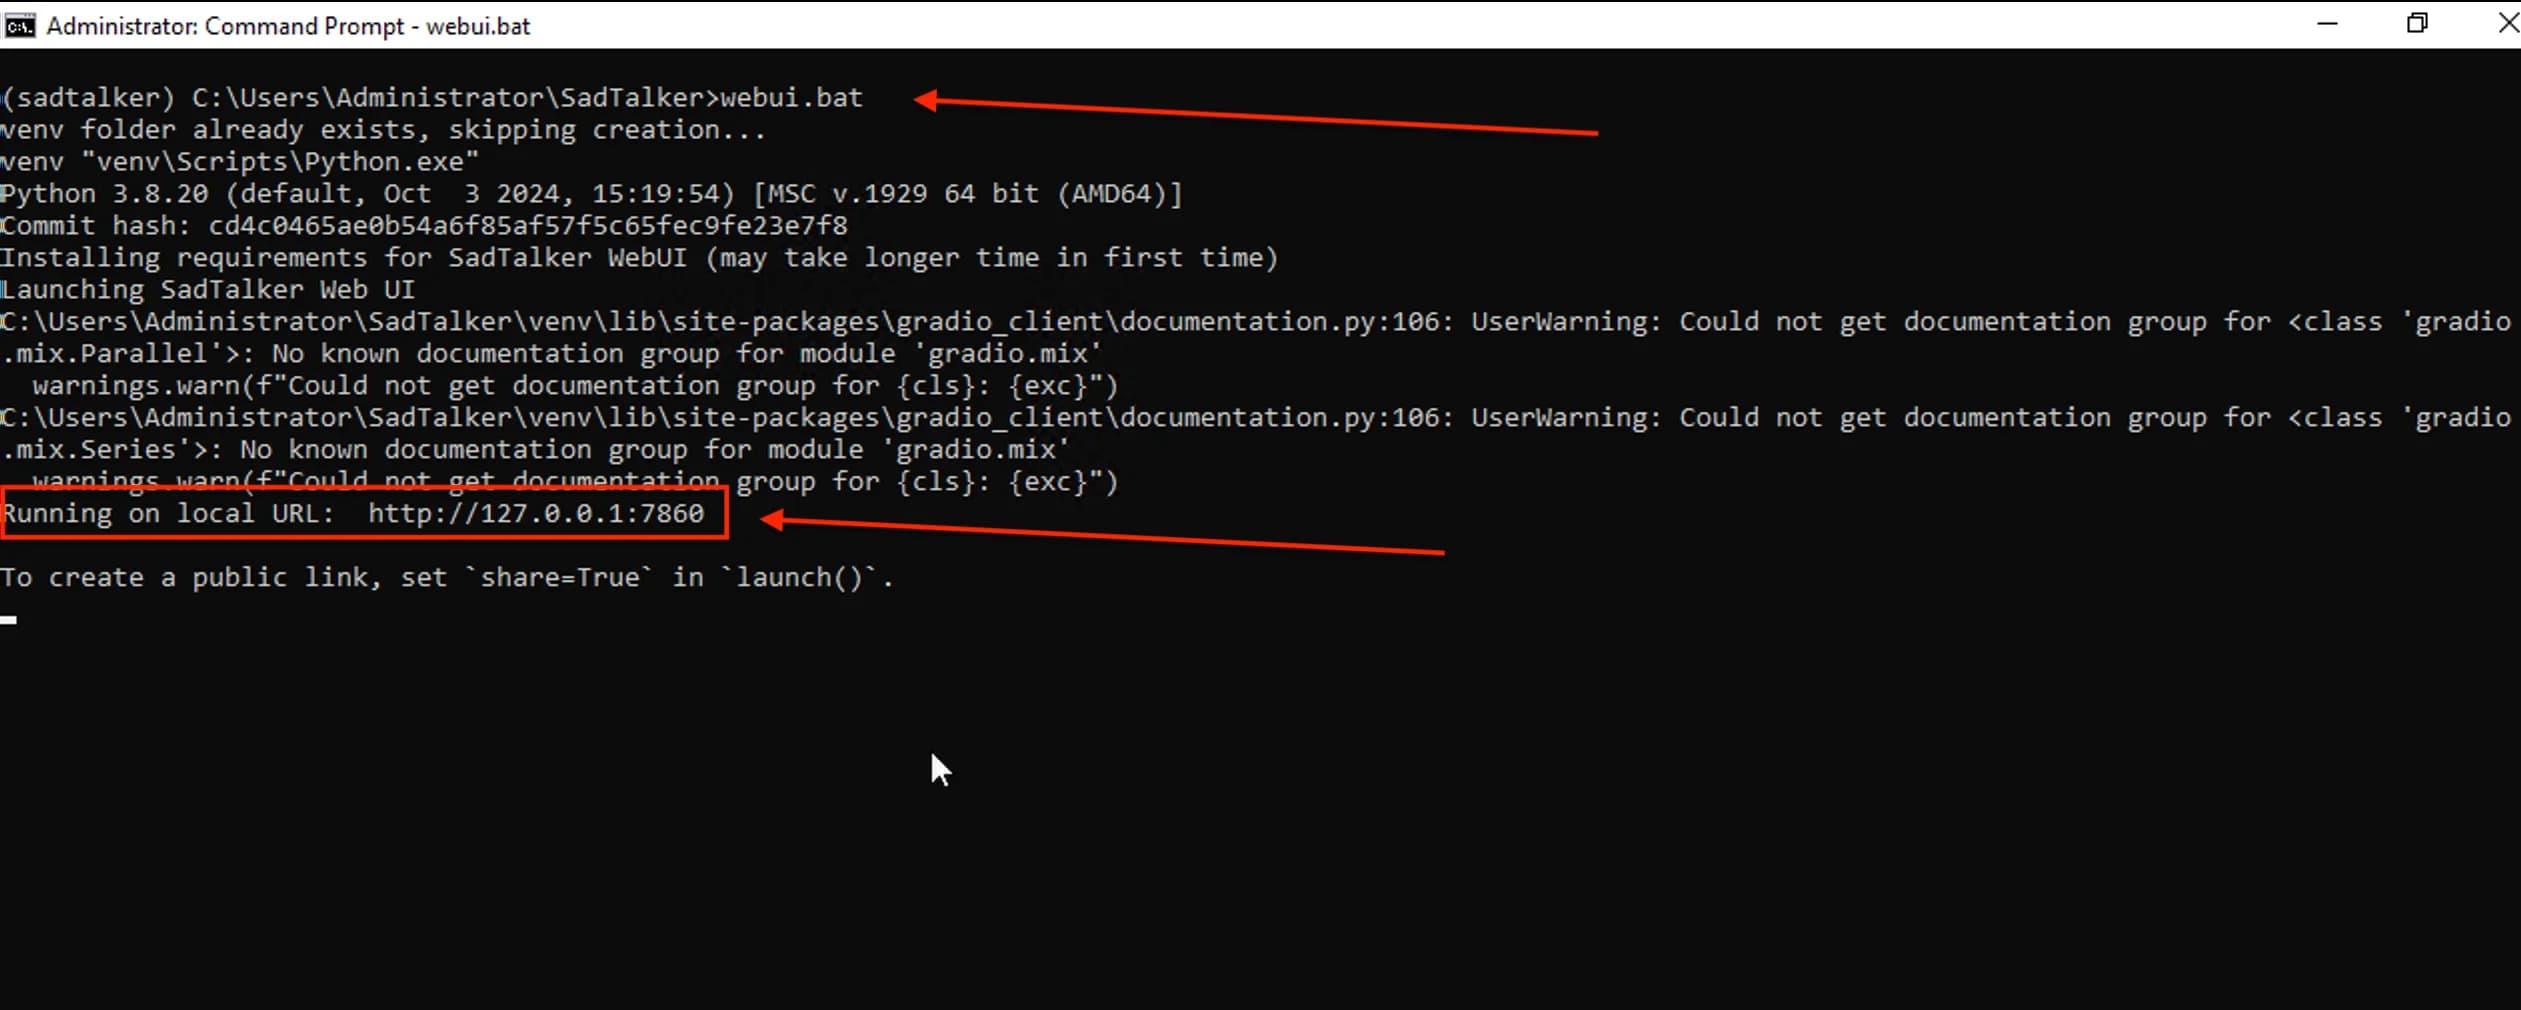
Running on local URL: http://127.0.0.1:78609. Step 8: Fixing Gradio Row.style Error
The Error: AttributeError: 'Row' object has no attribute 'style'
If your launcher pulled a newer Gradio version during installation, SadTalker crashes immediately with:
The Permanent Fix (Gradio 3.30.0):
Press Ctrl + C in your terminal to stop the process, then force-install Gradio 3.30.0 into the environment:
If you are using the virtual environment created by webui.bat:
Then relaunch:
10. Step 9: Verify PyTorch CUDA & GPU Access in Python
Do not rely solely on nvidia-smi. Confirm that Python actively detects your NVIDIA GPU device:
9.1 One-Line CUDA Detection Test
11. Step 10: Edge Cases: Visual C++ & LMDB Wheels
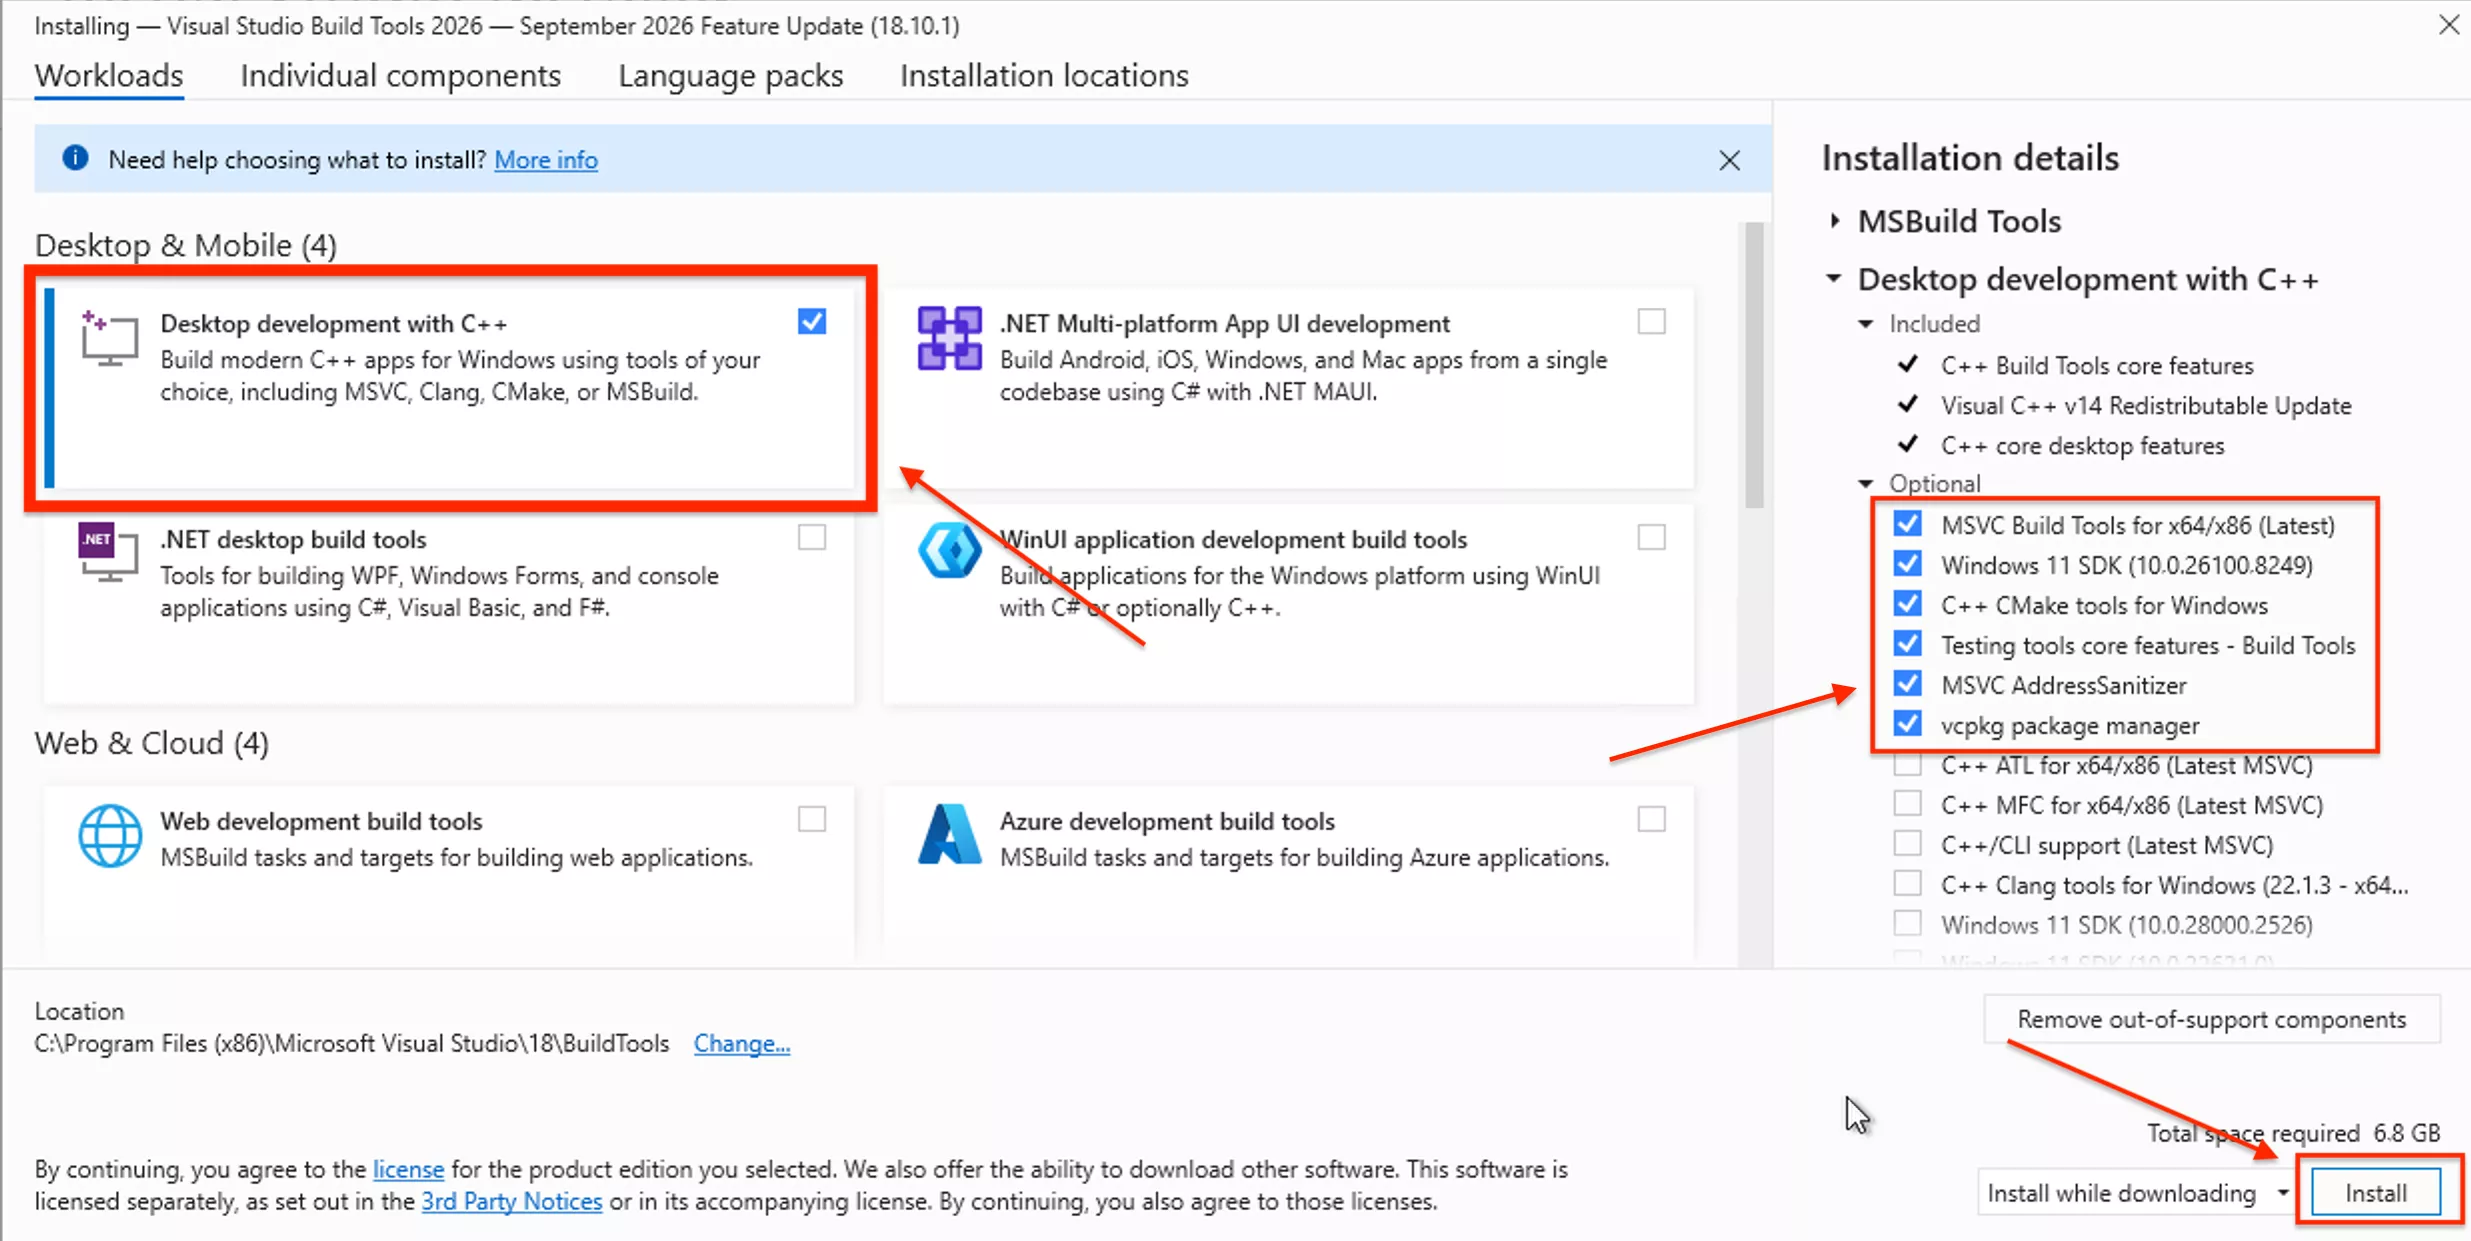
If you ever manually install requirements (pip install -r requirements.txt), the lmdb package attempts to compile native C++ code, throwing:Microsoft Visual C++ 14.0 or greater is required.
10.1 Option A: Visual Studio Build Tools Setup
Install Visual C++ Build Tools and check Desktop development with C++:
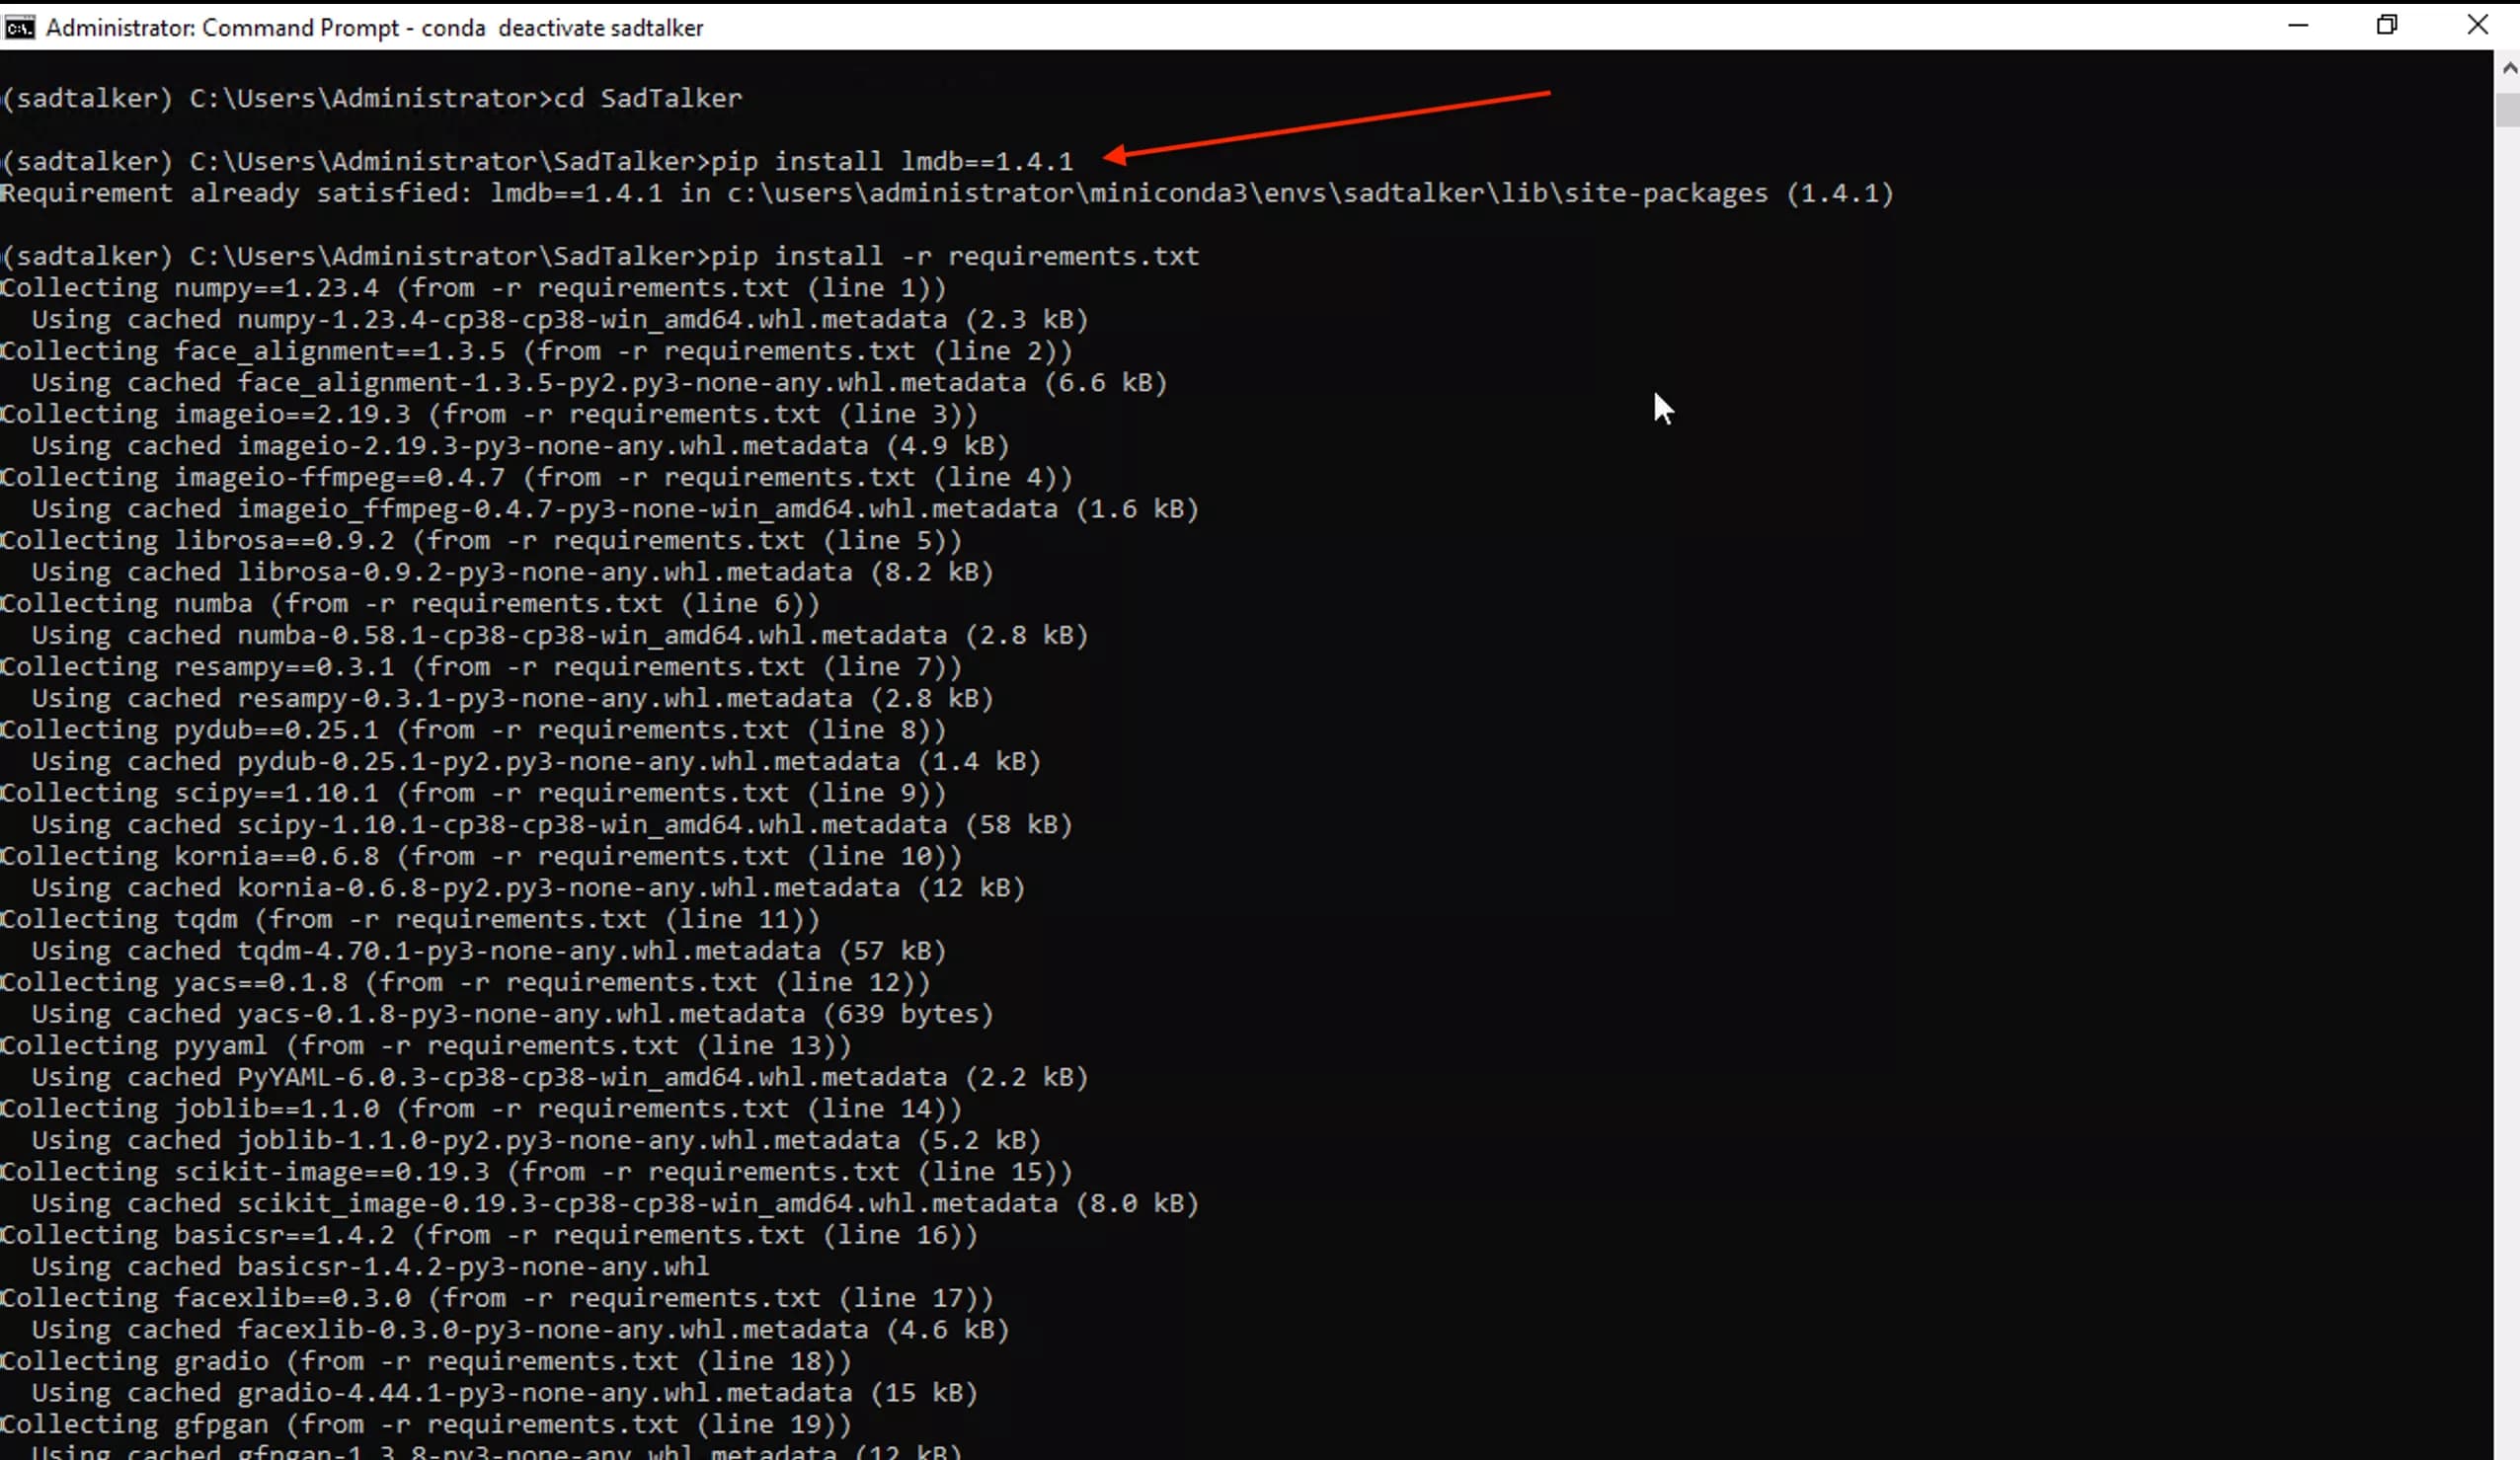
10.2 Option B: Fast Pre-Built LMDB Wheel (Bypassing Compiler)
Alternatively, bypass installing the multi-gigabyte Visual Studio toolchain by installing the compatible binary wheel:
12. Step 11: Live Inference Showcase (Input vs Output)
Below is the verified test run executed on our dedicated Windows workstation. We supplied a high-resolution static female portrait together with a 14.36-second speech narration audio file. SadTalker synthesized natural 3D head motion, eye blinks, and mouth lip-sync without any camera footage:
A high-resolution photo of a presenter with clear facial features and front-facing lighting:

speaker-image.webpStandard 16kHz mono speech audio narration used to drive mouth articulation and head trajectory:
sadtalker-female-narration-audio.wav (Duration: 14.36 seconds)11.3 SadTalker Generated Video Output
--preprocess full --still13. Step 12: Empirical Inference Benchmark on NVIDIA Tesla T4
To profile latency on Windows without Gradio overhead, we executed the model directly via PowerShell's Measure-Command utility:
12.1 PowerShell Measure-Command Terminal Output
Progress bars and stopwatch duration recorded on our dedicated Windows workstation:
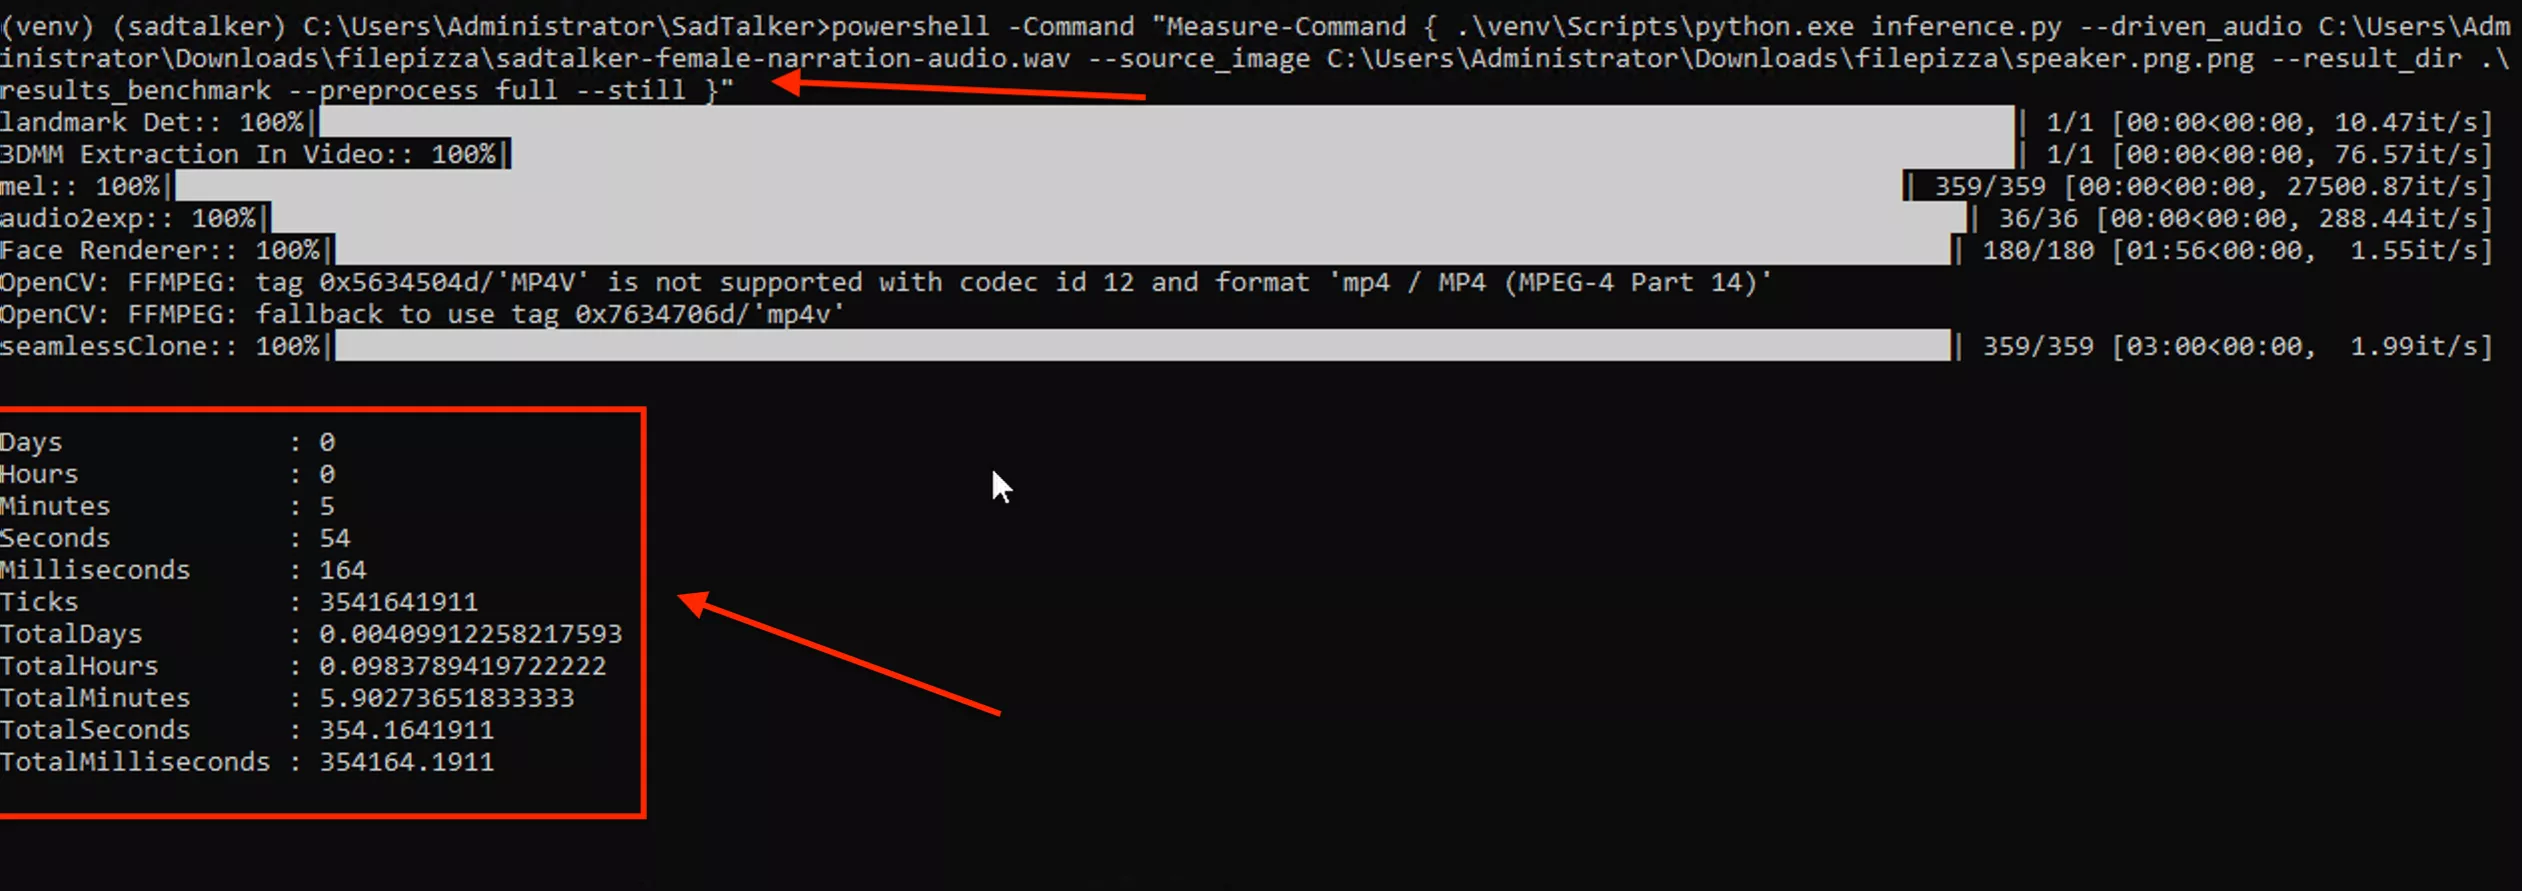
| Execution Stage | Progress & Speed | Elapsed Time | Technical Explanation |
|---|---|---|---|
| Stage 1: Landmark Det | 1/1 [10.47 it/s] | 0.09s | Detects facial contour and 68 landmark points on the static input image. |
| Stage 2: 3DMM Extraction | 1/1 [76.57 it/s] | 0.01s | Reconstructs 3D Morphable Model head shape coefficients. |
| Stage 3: Mel Spectrogram | 359/359 [27,500 it/s] | 0.01s | Extracts acoustic frequency bins across the 14.36s audio track. |
| Stage 4: Audio2Exp Net | 36/36 [288.44 it/s] | 0.12s | Maps audio phonemes into animated facial expression coefficients. |
| Stage 5: Face Renderer | 180/180 [1.55 it/s] | 1 min 56 sec | Neural generator renders warped facial frames on NVIDIA Tesla T4 Tensor Cores. |
| Stage 6: SeamlessClone Blending | 359/359 [1.99 it/s] | 3 min 00 sec | Poisson seamless cloning pastes animated face back into the full-size portrait. |
| Total Wall-Clock Time | 359 Frames @ 25 FPS | 5 min 54.16 sec | 354.16 seconds total (~24.6 seconds of render time per second of video). |
Stages 1 through 4 take less than 0.3 seconds combined. The two primary computational steps are Face Renderer (1.55 it/s) and CPU-bound seamlessClone (1.99 it/s). If you run with --preprocess crop instead of full, the seamlessClone stage is bypassed, cutting total generation time in half (under 2 minutes).
14. Step 13: WebUI Usage & Parameter Guide
Once http://127.0.0.1:7860 opens in your Windows browser, configure each parameter according to your desired quality:
Preprocess Mode
- • crop: Crops tightly around the face. Fastest render speed.
- • resize: Scales input directly without face detection cropping.
- • full (Recommended): Preserves the full image composition and seamlessly blends animated face back.
- • extcrop / extfull: Extended bounding boxes for wider head tilts.
Still Mode
Enabling Still Mode restricts head rotation and keeps the neck/torso stationary, focusing animation on lips and eye blinks.
Face Enhancer (GFPGAN)
Restores fine facial texture, sharpening teeth, eyelids, and skin pores on the final video output.
Expression Scale & Pose
Controls facial movement intensity (Default: 1.0). Higher values (1.2 to 1.5) produce wider mouth shapes and stronger emotion.
15. Step 14: Quick Daily Startup Script
Once setup is complete, you never need to repeat any installation steps. Create a desktop shortcut or batch script namedstart_sadtalker.batfor one-click daily launches:
16. Frequently Asked Questions
Related Guides & Benchmarks
Verified SHA256 hashes, file sizes, and directory tree verifier.
RTX 4090 vs RTX 3090 inference times & VRAM tests.
Audio-driven vs video-driven head-to-head empirical breakdown.
Cloud GPU execution with tested one-click notebooks.