How to Install SadTalker
GitHub, Windows 1-Click WebUI, Local CLI & Colab — everything you need to get SadTalker running in minutes, on any platform.
Using Docker on a Linux NVIDIA GPU host? Run the tested Docker starter kit.
Prerequisites & Specs
System Requirements
Verify your hardware specifications before installing SadTalker locally. While SadTalker can run in CPU mode, an NVIDIA GPU with CUDA support is recommended for acceptable generation speeds.
| Component | Minimum | Recommended |
|---|---|---|
| OS | Windows 10/11, macOS, Ubuntu Linux | Ubuntu 20.04/22.04 LTS / Windows 10/11 (64-bit) |
| Python | 3.8.x | Python 3.8.20 (Standard for all platforms) |
| RAM | 8 GB | 16 GB+ |
| GPU | 6 GB VRAM (256px crop) | NVIDIA RTX 3060 (12GB) / Tesla T4 (16GB) |
| Disk space | ~10 GB (checkpoints + dependencies) | 25 GB+ fast SSD |
SadTalker Hardware Requirements: RTX 3060 vs High-End GPUs
Choose How to Run SadTalker
Pick the method that fits your operating system and hardware
| Method | Best for | Setup time | GPU needed? |
|---|---|---|---|
| Windows 1-Click (webui.bat)→ | Windows 10/11 with NVIDIA GPU | ~10–15 min | Recommended (6GB+) |
| Linux (Ubuntu / Vast.ai)→ | Cloud GPUs (Vast/RunPod) or Ubuntu local | ~10–15 min | Recommended (NVIDIA) |
| Google Colab→ | Trying it for free, no install | ~5 min | No (Colab provides one) |
| Hugging Face Spaces | Instant testing in-browser | 0 min | No |
| Local CLI (macOS / Linux)→ | Repeated/private use, full control | 20–40 min | Recommended |
Free Cloud Option
Run SadTalker on Google Colab
No install required — free GPU included
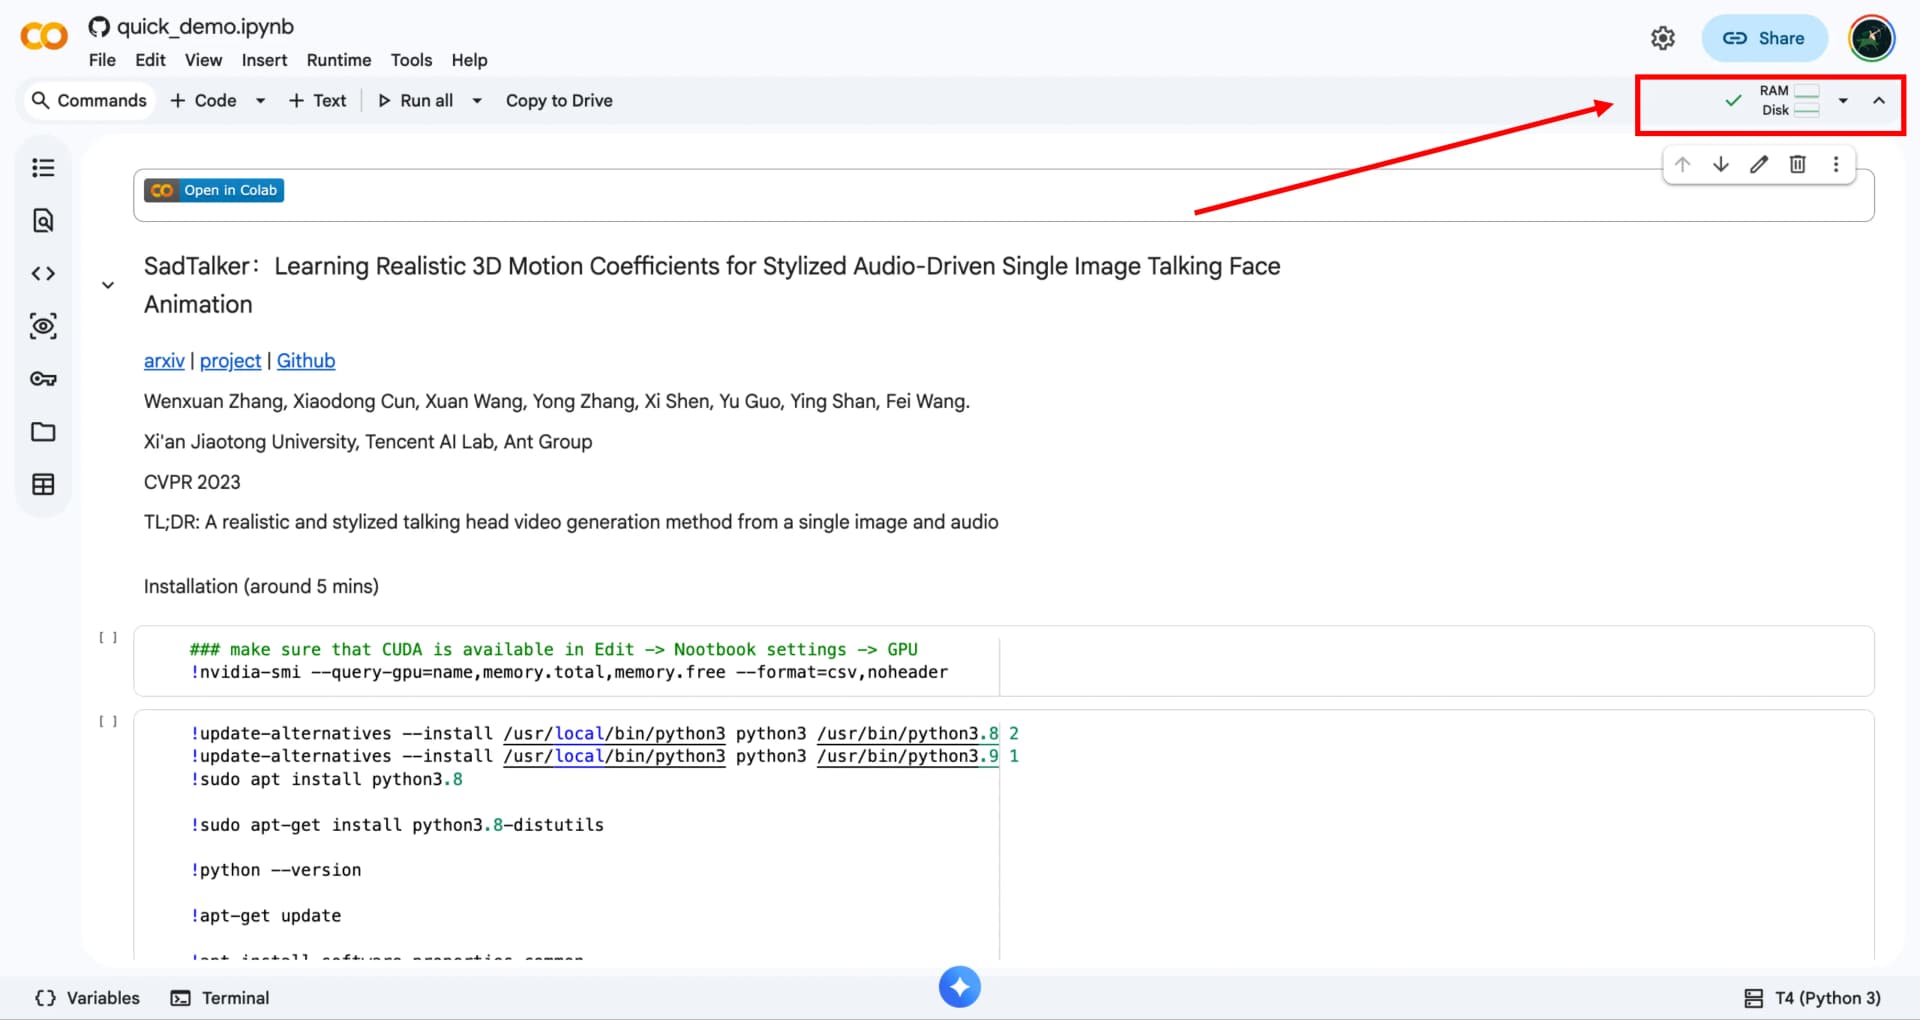
Open the official SadTalker Colab notebook.
Go to Runtime → Change runtime type → GPU, then save.
Run the setup cell — this clones the repository and fetches the pre-trained checkpoints automatically. First run takes a few minutes.
Upload your source image and audio file in the designated cells.
Run the generation cell. Your output video appears inline and can be saved directly from Colab's file browser.
Tip: Colab's free-tier disconnects after a period of inactivity, and GPU availability is not guaranteed — if you plan to generate several videos, a local install avoids queueing.
Windows 10 / 11 / Server (64-bit)
Windows Installation
Automated 1-click batch launcher or manual step-by-step setup
Windows Installation (1-Click Batch Method)
If you are on Windows OS with an NVIDIA GPU, you do not need to manually configure complicated virtual environments. SadTalker provides a native batch launcher (webui.bat). Here is the 4-step quick summary:
Install Python 3.8 (strictly enable “Add to PATH”) and Git for Windows.
Extract Gyan.dev essentials to C:\ffmpeg\bin and add to Windows PATH (avoids Conda DLL bugs).
git clone ... then place sadtalker.zip in checkpoints/ and GFPGAN in gfpgan/weights/.
Run webui.bat. It auto-creates venv, downloads PyTorch CUDA, and launches http://127.0.0.1:7860.
Row.style fix, LMDB wheel troubleshooting, and NVIDIA Tesla T4 benchmark.Step 1: Install Python 3.8 and Git for Windows
SadTalker strictly requires Python 3.8.x. Newer Python versions (3.10, 3.11, or 3.12) break core C-extensions including basicsr, dlib, and legacy PyTorch CUDA wheels.
webui.bat will fail to locate Python.Step 2: Install Standalone FFmpeg
FFmpeg is required to mux generated speech audio with facial video frames. Conda-installed FFmpeg builds on Windows frequently trigger libfontconfig-1.dll crashes. We strongly recommend a standalone build:
- Get the release essentials zip from Gyan.dev FFmpeg.
- Extract the archive into
C:\ffmpeg\. - Add
C:\ffmpeg\binto your Windows System Environment Variables (PATH). - Verify in PowerShell or Command Prompt:
ffmpeg -versionCommand not found? Use our FFmpeg troubleshooting guide for Windows, Linux and macOS PATH fixes.
Step 3: Clone the SadTalker Repository
Open Git Bash or Command Prompt in the directory where you want to store SadTalker:
git clone https://github.com/OpenTalker/SadTalker.git
cd SadTalker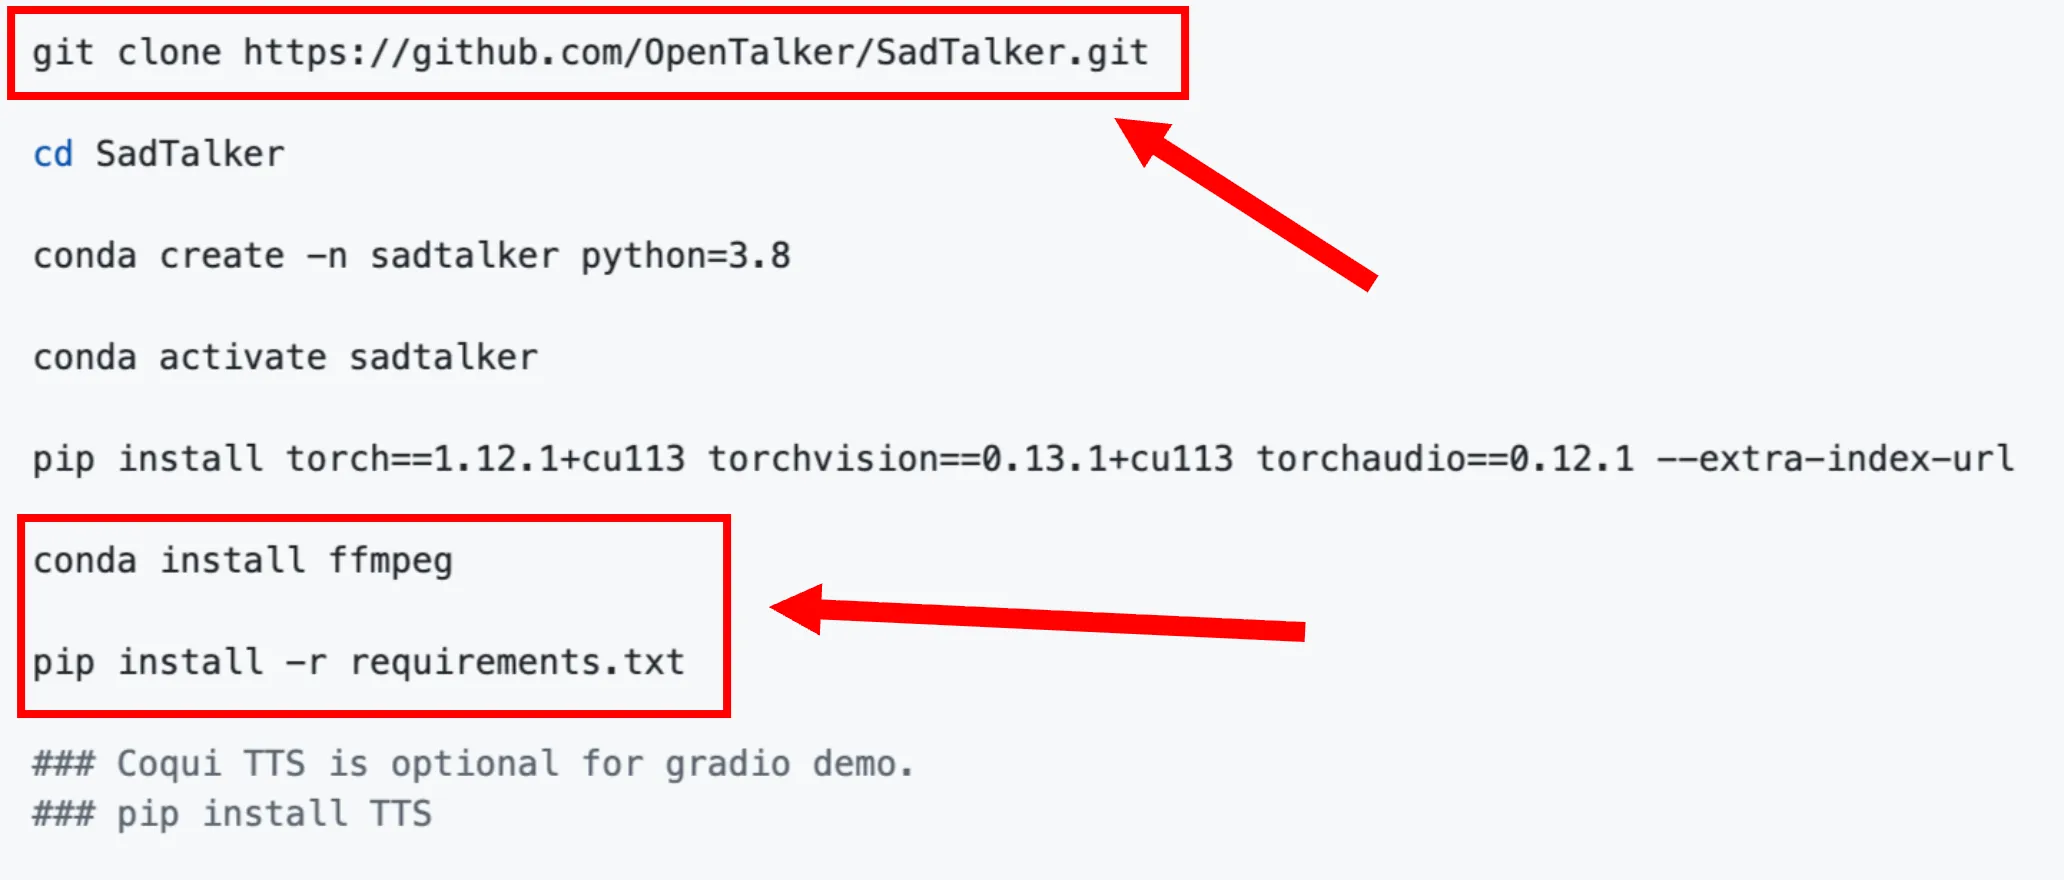
Step 4: Launch via webui.bat (1-Click Setup)
Double-click webui.bat inside the SadTalker folder, or execute it in your terminal:
webui.batOn its first run, webui.bat automatically provisions an isolated Python virtual environment (venv), downloads PyTorch with CUDA acceleration (torch 1.12.1+cu113), installs Python packages from requirements.txt, and launches the Gradio server on http://127.0.0.1:7860.
macOS 12+ (Apple Silicon M1/M2/M3/M4 & Intel)
macOS Installation
Local setup guide using Homebrew, Conda, and Python 3.8
SadTalker runs locally on macOS on both Apple Silicon (M1/M2/M3/M4) and Intel Macs. Conda is used to manage an isolated Python 3.8 environment, while Homebrew provides system FFmpeg.
Install Homebrew, Git, and FFmpeg
If you don't already have Homebrew installed, install it first. Then use Homebrew to install Git and FFmpeg for audio/video muxing:
brew install git ffmpegCreate a Python 3.8 Conda Environment
Use Miniconda or Anaconda to create a clean Python 3.8 environment pinned to avoid dependency conflicts:
# Create isolated Python 3.8 environment
conda create -n sadtalker python=3.8 -y

# Activate environment
conda activate sadtalkerClone SadTalker & Install Python Dependencies
Clone the repository and install the required Python packages into your active Conda environment:
git clone https://github.com/OpenTalker/SadTalker.git
cd SadTalker
pip install -r requirements.txtGet Checkpoints & Model Weights
Get the required models using the included shell script, or see our Models & Checkpoints section for direct links:
bash scripts/download_models.shLaunch SadTalker on macOS
Start the Gradio WebUI locally:
python app_sadtalker.pyOr execute headless CLI inference directly via terminal:
python inference.py \
  --driven_audio ./examples/driven_audio/bus_chinese.wav \
  --source_image ./examples/source_image/full_body_1.png \
  --result_dir ./results \
--cpu--preprocess crop and use 256px face resolution.Audited & Tested on Vast.ai / Ubuntu
SadTalker Linux Installation & Verified Output
This section contains the verified installation procedure, package prerequisites, driver verification via nvidia-smi, bug patches, and successful generation proof tested directly on Ubuntu 22.04 LTS (Vast.ai Cloud GPU instances with NVIDIA RTX 4090 and RTX 3090).
| Host Platform | Vast.ai Cloud Container (Image: vastai/pytorch_cuda-12.8.1-auto/jupyter) |
| Operating System | Ubuntu 22.04 LTS (x86_64 Linux kernel 6.x) |
| Primary GPU | NVIDIA GeForce RTX 4090 (24,564 MiB GDDR6X, Driver Version: 570.172.08, CUDA Version: 12.8) |
| Secondary GPU | NVIDIA GeForce RTX 3090 (24,564 MiB GDDR6X, Driver Version: 535+, CUDA Version: 12.x) |
| Host Processor & RAM | AMD Ryzen 9 7950X 16-Core Processor (32 Threads), 64 GB DDR5 RAM, NVMe SSD Storage |
Hardware & Driver Check (nvidia-smi)
Confirm your NVIDIA GPU driver and maximum CUDA support are registered by the Linux kernel prior to setting up Python libraries.
nvidia-smi
nvidia-smi --query-gpu=name,memory.total,driver_version,temperature.gpu --format=csvname, memory.total [MiB], driver_version, temperature.gpu
NVIDIA GeForce RTX 4090, 24564 MiB, 570.172.08, 50
+-----------------------------------------------------------------------------------------+
| NVIDIA-SMI 570.172.08 Driver Version: 570.172.08 CUDA Version: 12.8 |
|-----------------------------------------+------------------------+----------------------+
| GPU Name Persistence-M | Bus-Id Disp.A | Volatile Uncorr. ECC |
| Fan Temp Perf Pwr:Usage/Cap | Memory-Usage | GPU-Util Compute M. |
|=========================================+========================+======================|
| 0 NVIDIA GeForce RTX 4090 On | 00000000:01:00.0 Off | Off |
| 0% 50C P8 25W / 450W | 1MiB / 24564MiB | 0% Default |
+-----------------------------------------+------------------------+----------------------+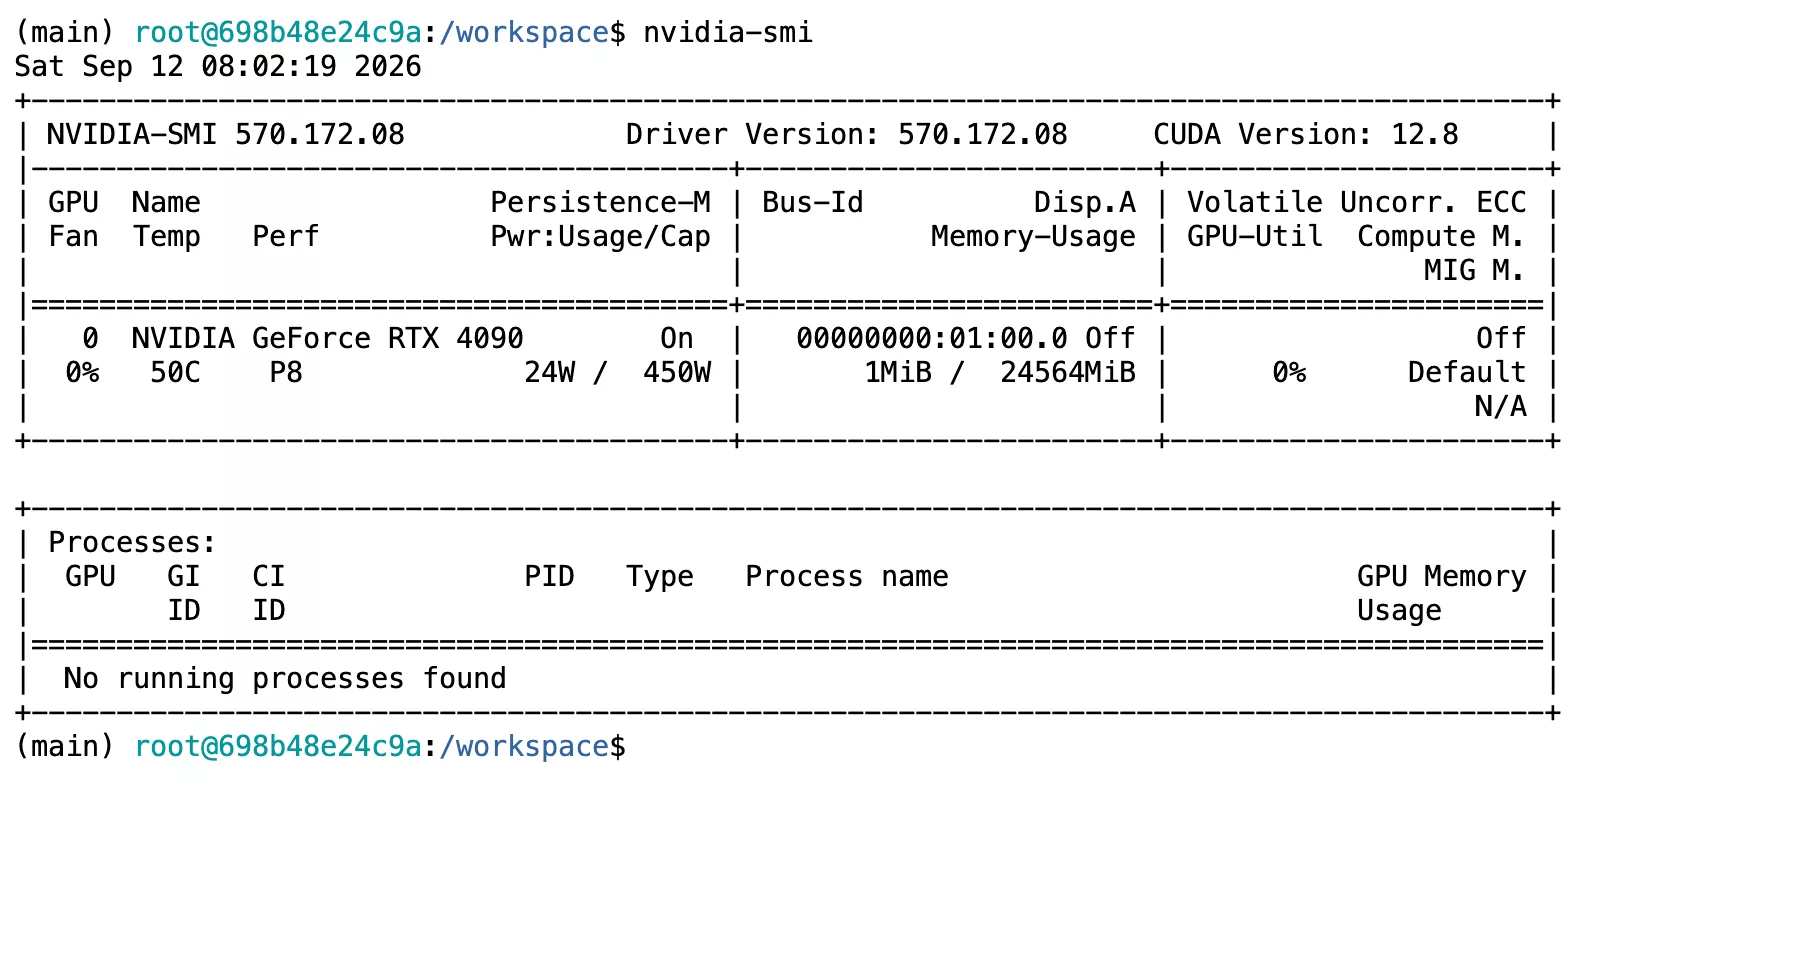
Terminal output of nvidia-smi verifying 24GB VRAM, Driver 570.172.08, and CUDA 12.8
Before renting a GPU, use the GPU cost calculator with your hourly rate and measured render time. Allow separately for installation, model downloads and idle time.
Linux Package Requirements Audit
SadTalker relies on specific system binaries and package versions. Our tests on Vast.ai and Ubuntu identified the exact requirements:
| Package | Requirement Level | Audit Findings & Technical Role |
|---|---|---|
| git | Mandatory | Required to clone the repository and fetch submodules. |
| ffmpeg | Critical | Muxes generated audio and video streams. If absent, generation runs all frames but crashes with an unhandled Python subprocess exception at completion. |
| wget | Mandatory | Used by download_models.sh to fetch model weights from GitHub releases. |
| Python 3.8 | Strict Version | Official upstream and tested environment require Python 3.8. Python 3.10+ causes wheel build failures in basicsr, dlib, and legacy torchvision imports. |
Install System Packages:
apt update && apt install -y git ffmpeg wget python3-pip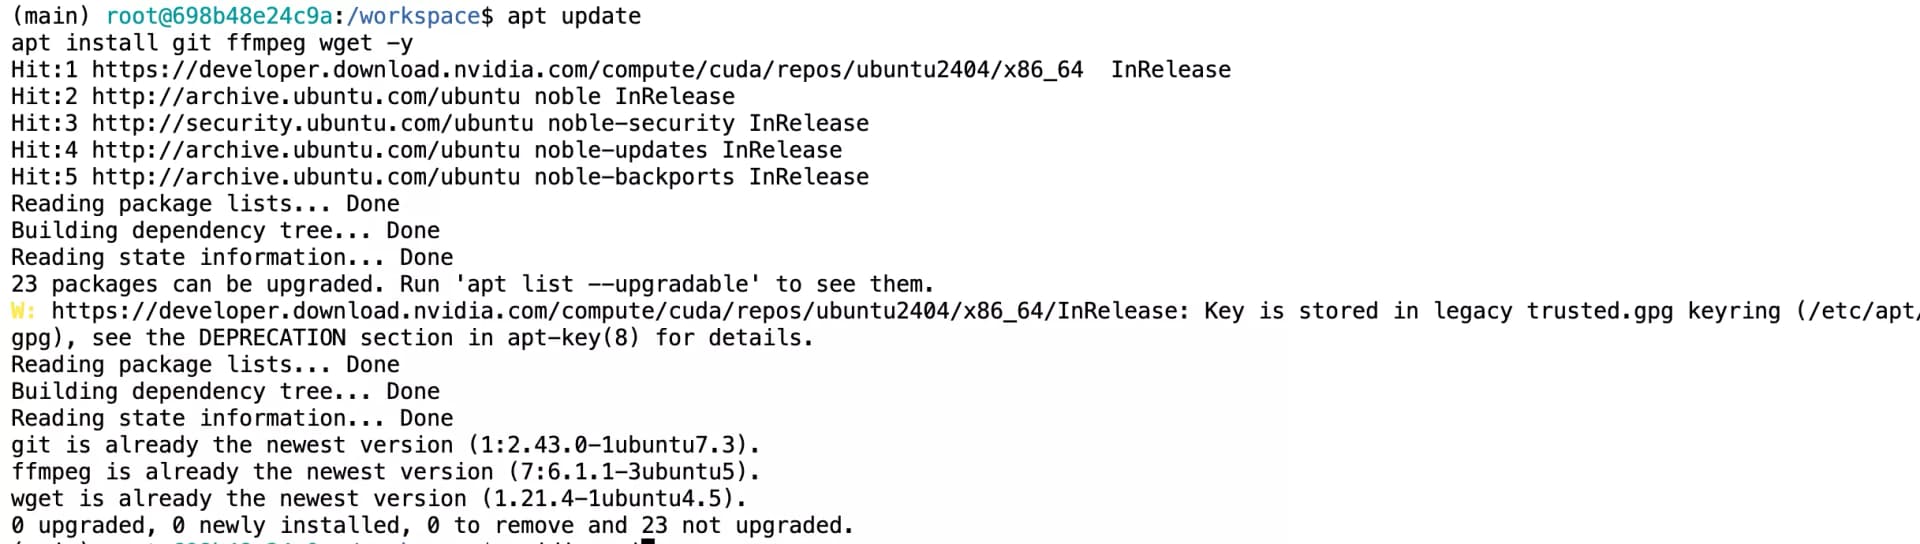
Terminal execution showing apt update and dependency installations on Ubuntu
Clone Repository & Create Python 3.8 Environment
Clone the official OpenTalker repository and initialize an isolated Conda environment pinned to Python 3.8.
# Clone official repository
git clone https://github.com/OpenTalker/SadTalker.git
cd SadTalker

# Create and activate Python 3.8 environment
conda create -n sadtalker python=3.8 -y
conda activate sadtalkerInstall PyTorch & Python Requirements
Install PyTorch with CUDA acceleration before running the repository requirements file.
# Install PyTorch with CUDA support
pip install torch torchvision torchaudio

# Install repository requirements
pip install -r requirements.txt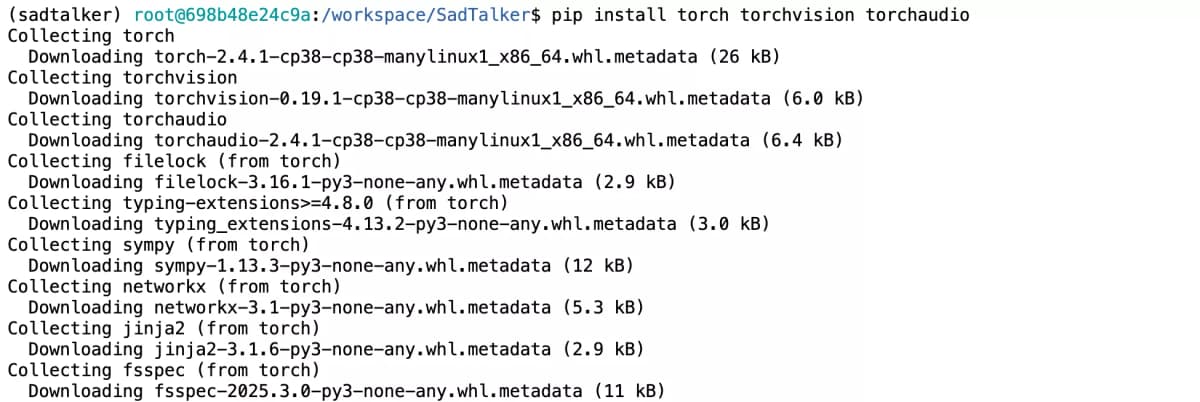
PyTorch CUDA installation log
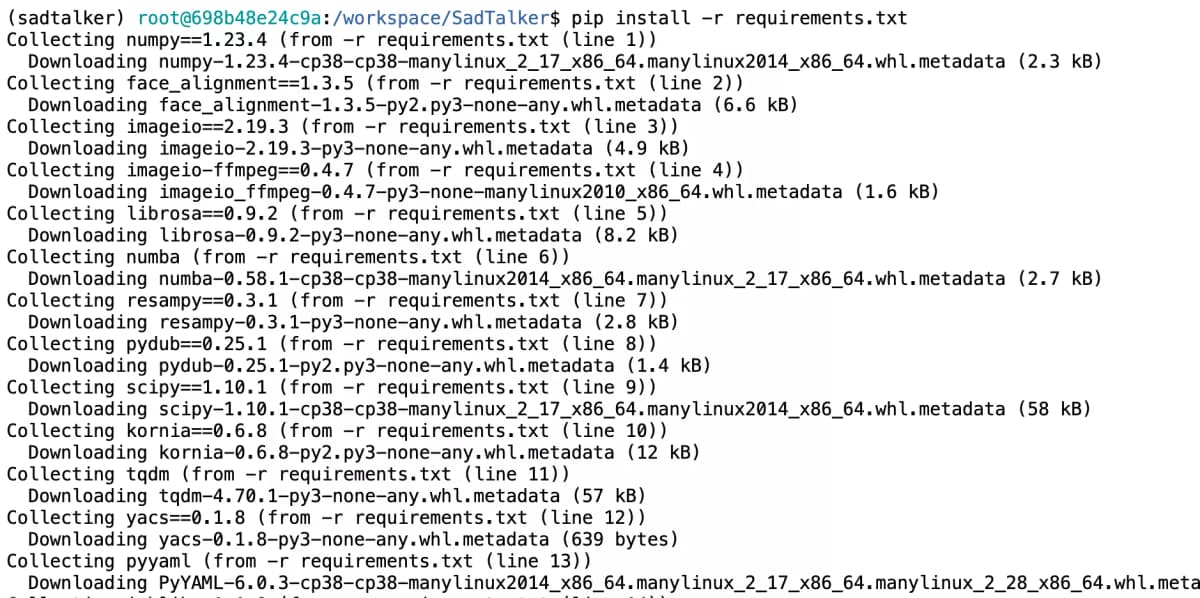
Requirements installation log
Get Pretrained Weights & Checkpoints
Run the official script to populate checkpoints/ and gfpgan/weights/:
bash scripts/download_models.sh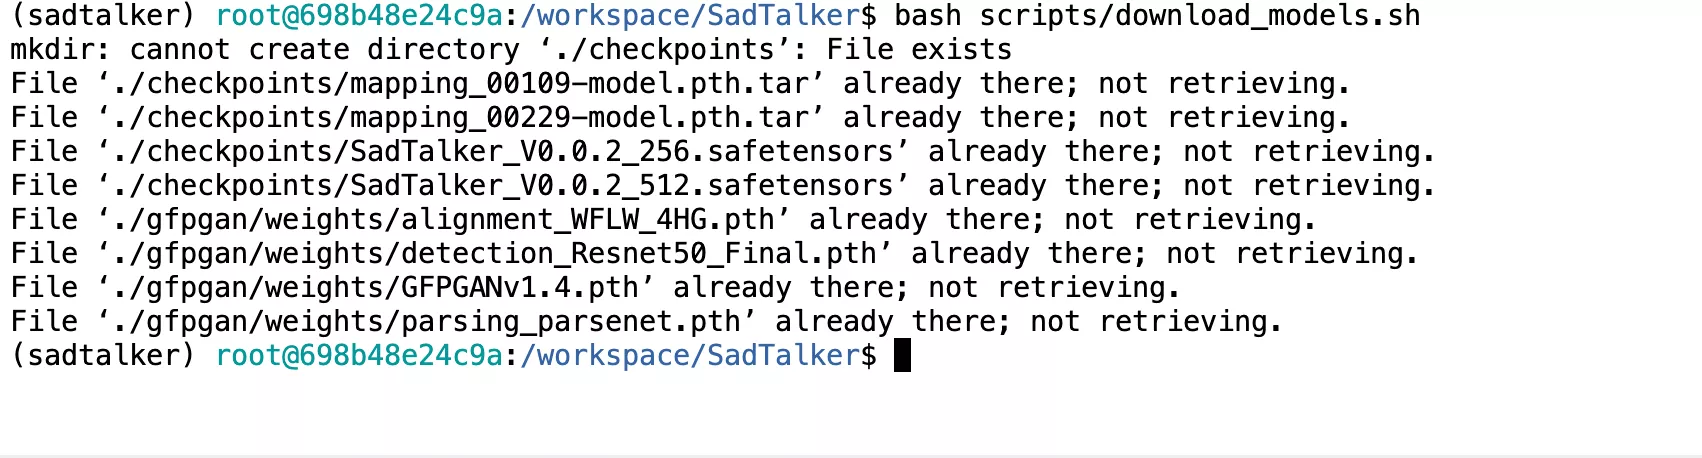
Terminal execution showing automated model weights retrieval
Verified Bug Fixes on Linux / Ubuntu
The following issues were encountered and resolved during our Vast.ai / Ubuntu testing:
Cause: In newer torchvision builds, functional_tensor was merged into torchvision.transforms.functional. The basicsr package still attempts to import the legacy path.
sed -i 's/from torchvision.transforms.functional_tensor import rgb_to_grayscale/from torchvision.transforms.functional import rgb_to_grayscale/' $(python -c "import site; print(site.getsitepackages()[0])")/basicsr/data/degradations.pyCause: Starting the WebUI with Gradio 4.x fails because the .style() method was removed from Gradio. Pin to a compatible Gradio 3.x release:
pip install "gradio==3.41.2"Cause: If you utilize the Coqui TTS voice cloning tab within the WebUI, install the verified package version:
pip install TTS==0.13.3Launch Commands: WebUI & Headless CLI
SadTalker provides both a browser-based Gradio interface and a headless CLI inference script for batch processing.
python app_sadtalker.pyRunning on local URL: http://127.0.0.1:7860
To create a public link, set `share=True` in `launch()`.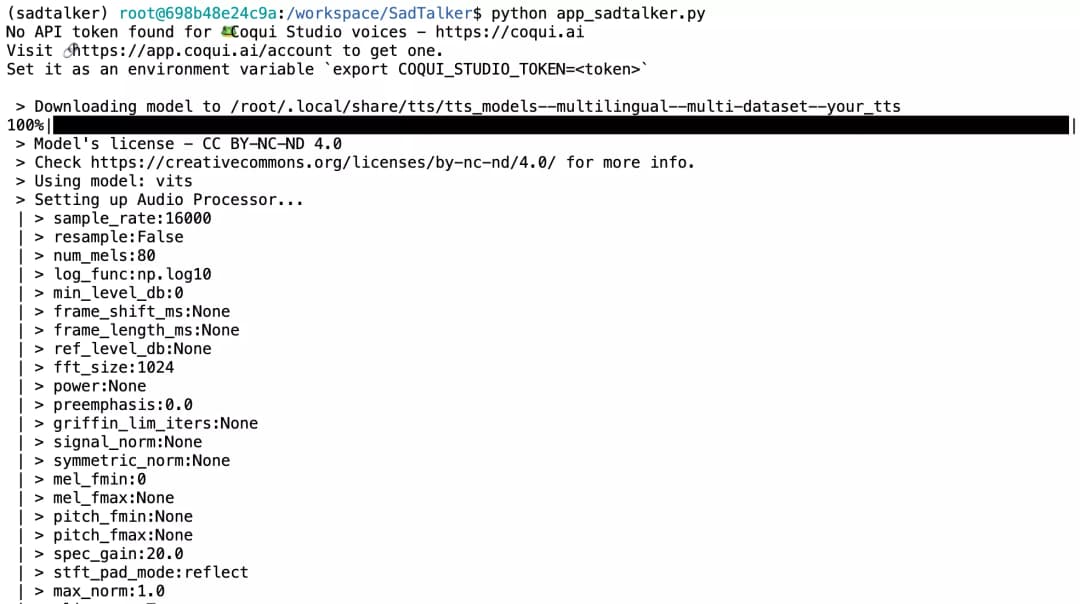
Server startup on port 7860

Active local URL confirmed
python inference.py \
  --driven_audio ./examples/driven_audio/bus_chinese.wav \
  --source_image ./examples/source_image/full_body_1.png \
  --result_dir ./results \
  --enhancer gfpgan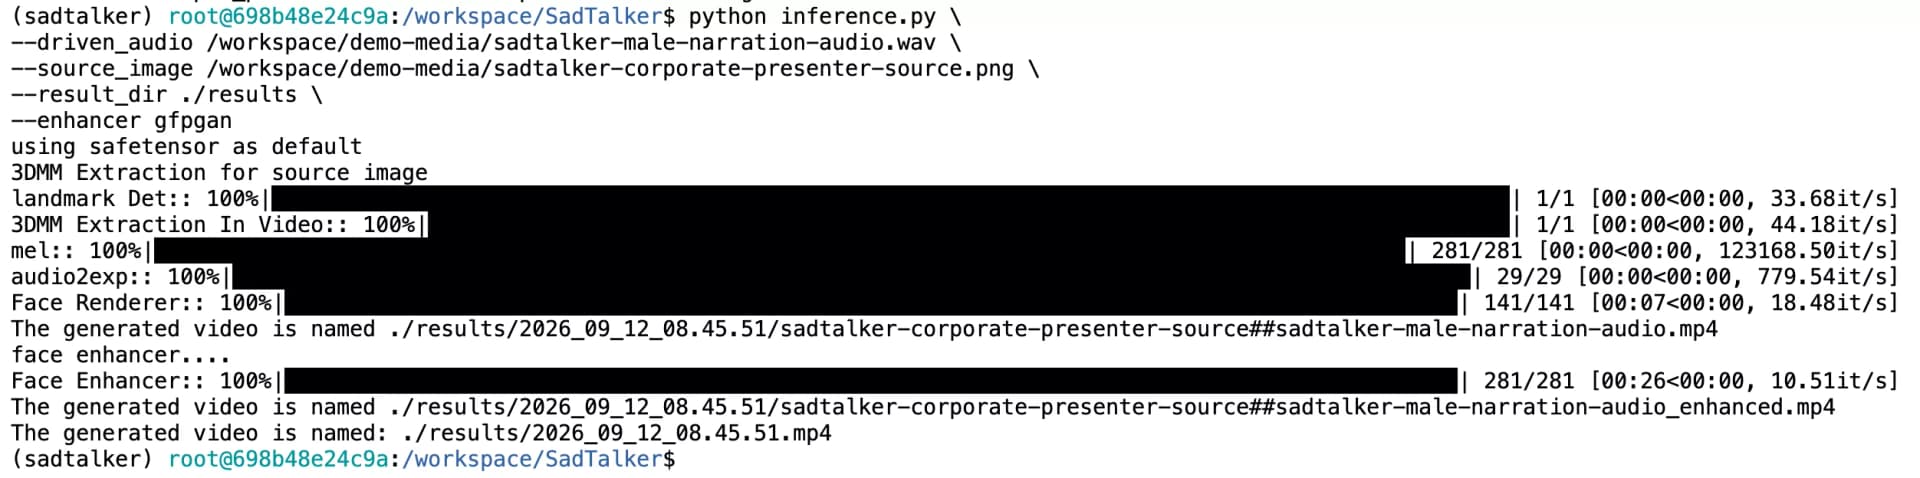
Inference command execution with driven audio and source image
Successful Generation Proof & Benchmark Timings
Below is the complete terminal log, execution breakdown, and output video from the production test run on an NVIDIA RTX 4090 (24GB VRAM) and RTX 3090 (24GB VRAM) using 512px resolution and the GFPGAN face enhancer:
time python inference.py \
  --driven_audio ./sadtalker-male-narration-audio.wav \
  --source_image ./sadtalker-corporate-presenter-source.png \
  --enhancer gfpgan \
  --still \
--size 512landmark Det:: 100%|████████████████████████████████████████| 1/1 [00:00<00:00, 34.00it/s]
3DMM Extraction In Video: 100%|████████████████████████████████████████| 1/1 [00:00<00:00, 31.84it/s]
mel:: 100%|████████████████████████████████████████| 113/113 [00:00<00:00, 68060.03it/s]
audio2exp:: 100%|████████████████████████████████████████| 23/23 [00:00<00:00, 114.72it/s]
Face Renderer:: 100%|████████████████████████████████████████| 141/141 [00:13<00:00, 10.37it/s]
Face Enhancer:: 100%|████████████████████████████████████████| 281/281 [00:26<00:00, 10.60it/s]
The generated video is named: ./results/2026_03_23_09.43.34/sadtalker-corporate-presenter-source##sadtalker-male-narration-audio.mp4
The generated video is named: ./results/2026_03_23_09.43.34.mp4
real 0m40.490s
user 1m48.337s
sys 0m4.402s| Input Source Files | 11.24s voice audio (281 frames @ 25fps) + 512px presenter portrait |
| RTX 4090 Wall Time | 40.490s total (Face Renderer: 10.37 it/s, GFPGAN: 10.60 it/s) |
| RTX 3090 Wall Time | 2m 10.135s (130s) |
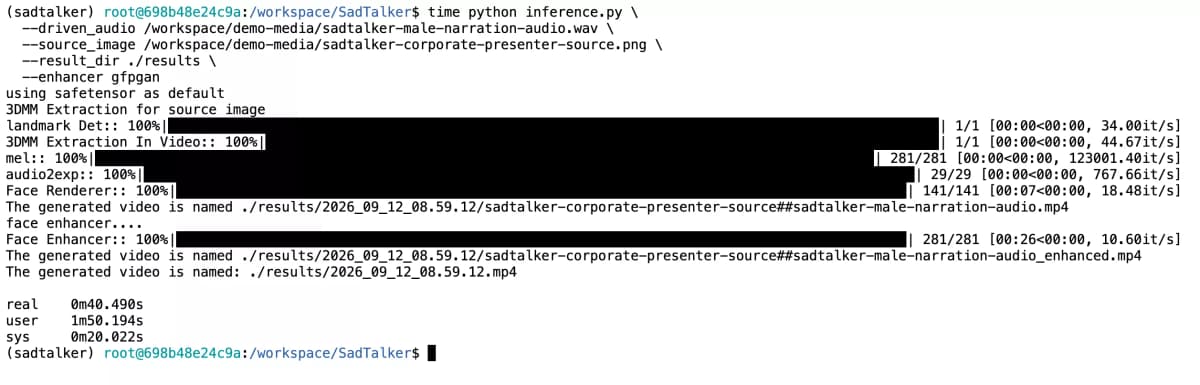
Wall-clock execution recorded via time command on Ubuntu
Actual 512px video rendered from presenter image and narration audio
Interactive Graphical Interface
SadTalker WebUI
Browser-based Gradio app with full animation controls and live preview
WebUI Launch Commands
webui.batpython app_sadtalker.pyOnce launched, the local Gradio server becomes accessible in your browser at:
http://127.0.0.1:7860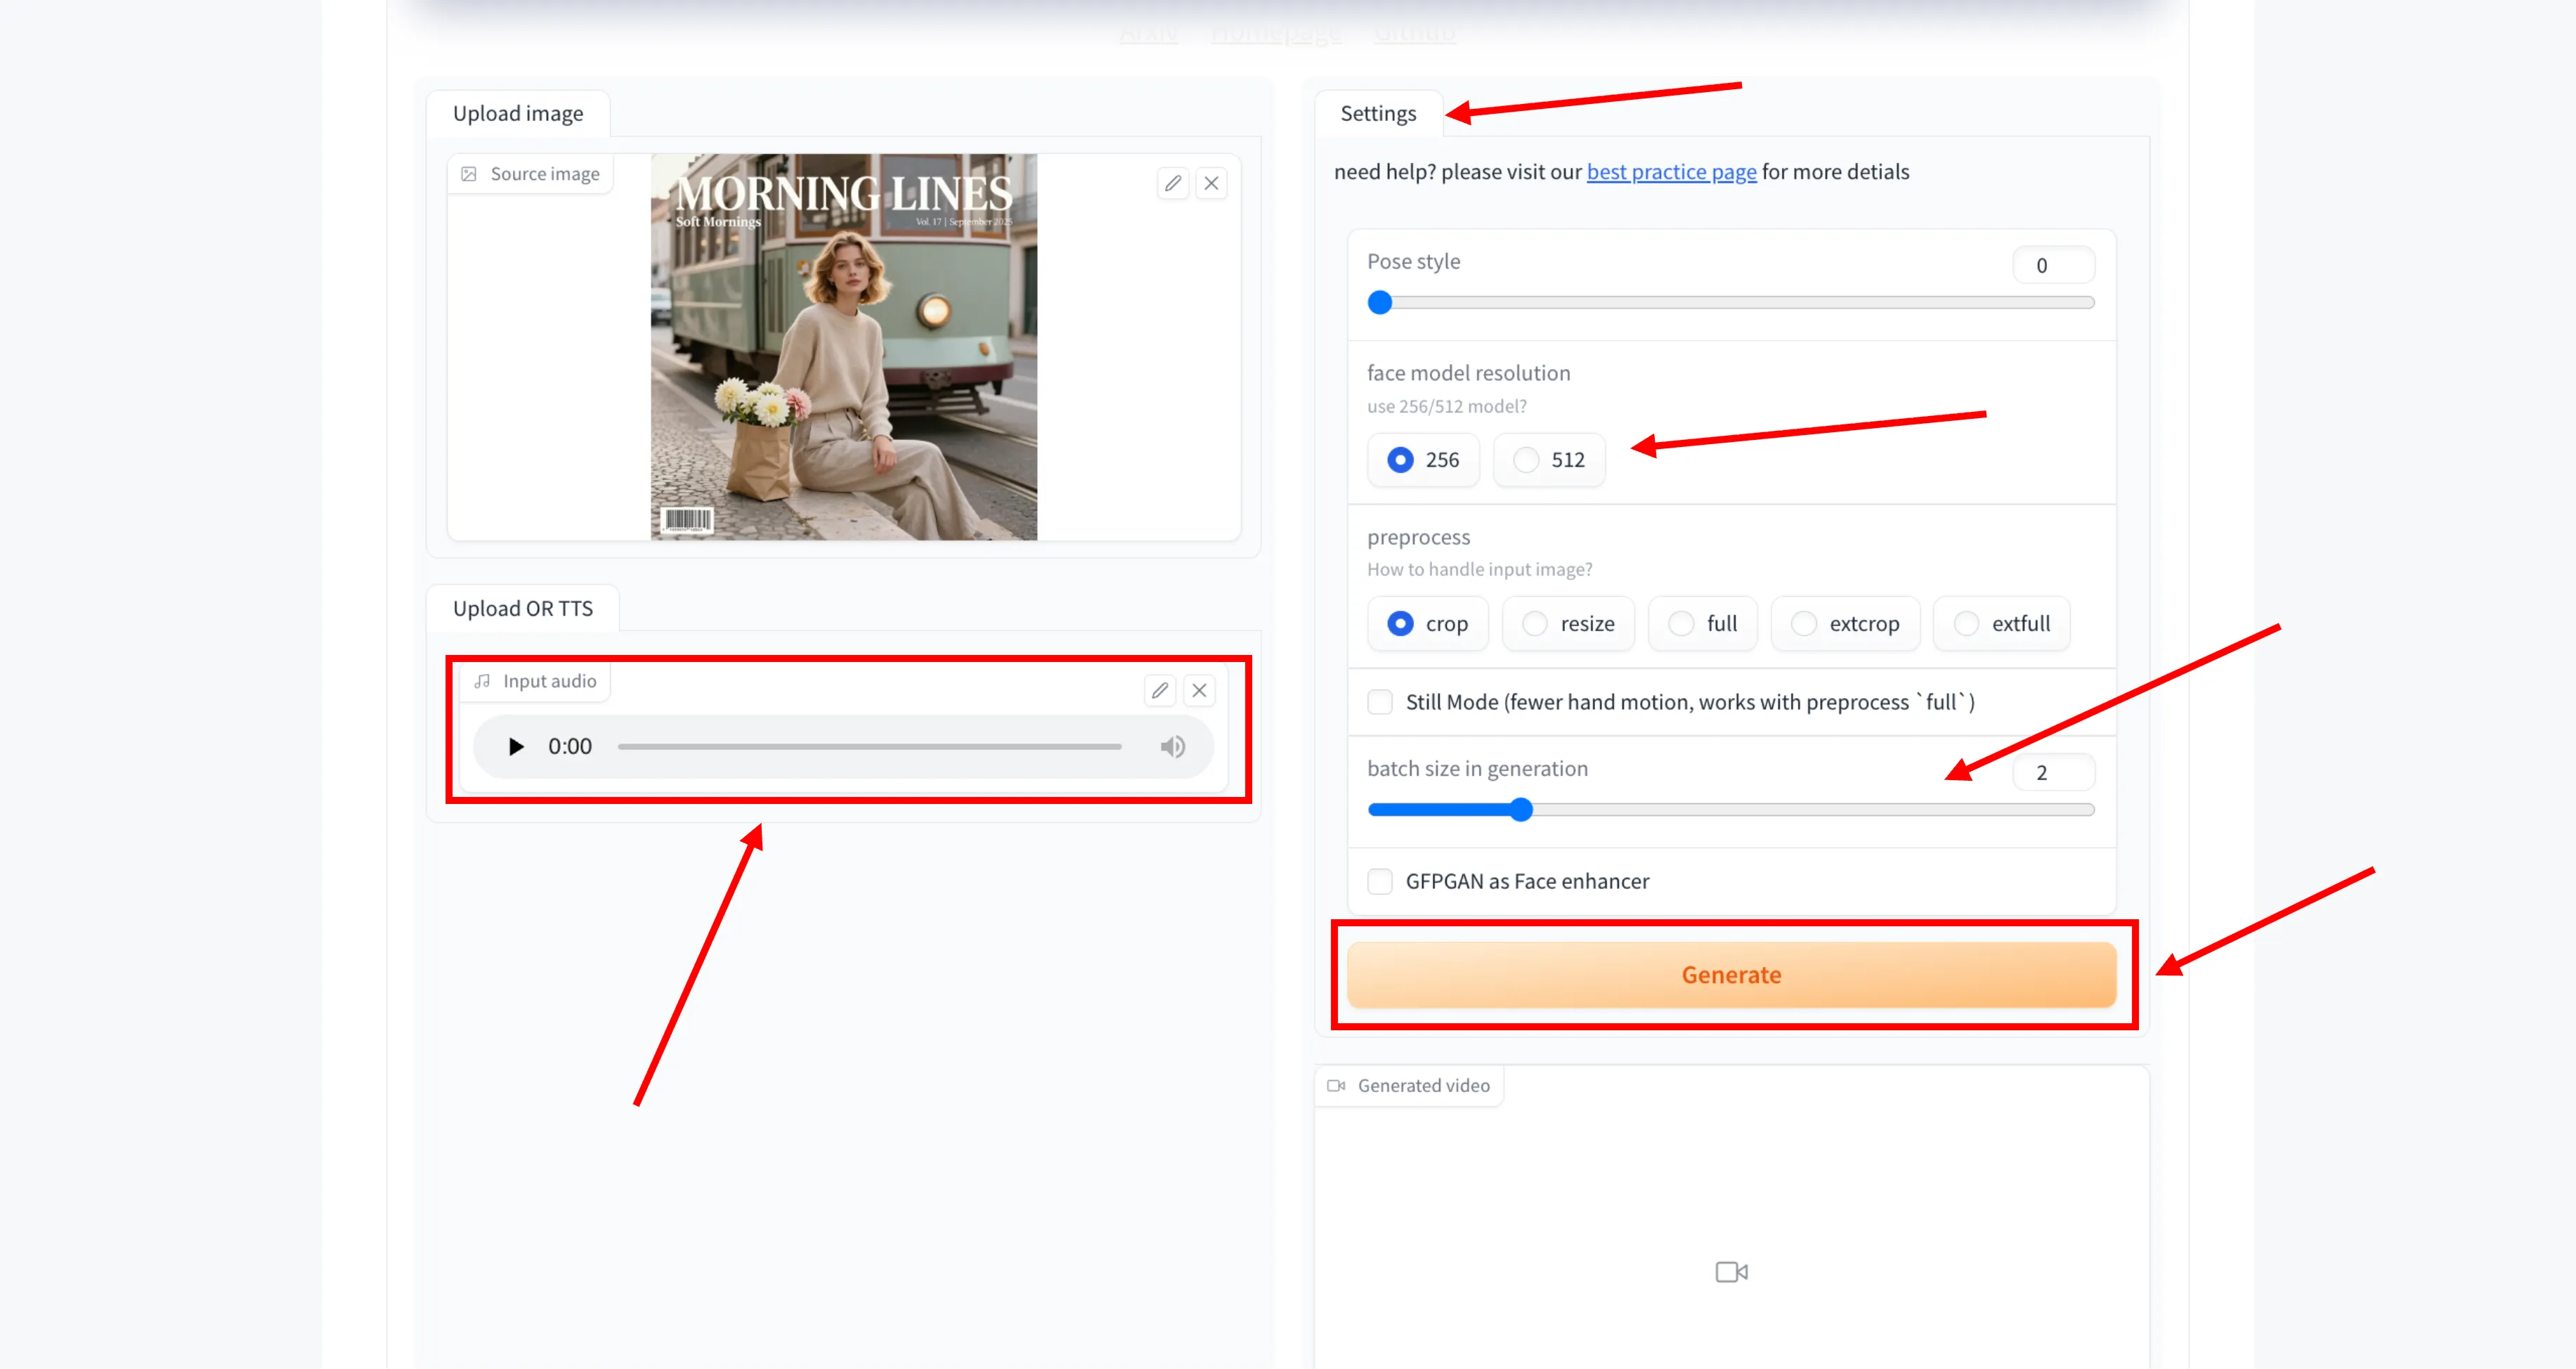
Key WebUI Controls & Settings
Upload a high-resolution front-facing headshot and a clean speech audio file (WAV or MP3 format).
Crop isolates the head for fast rendering. Resize keeps the full image aspect ratio. Full animates within the original scene.
Suppresses exaggerated head tilt and movement to maintain realistic corporate avatar posture.
Automatically applies high-resolution facial restoration to eyes, teeth, and skin texture.
Choose between 256px (lower VRAM footprint, faster generation) and 512px (larger base face renderer). Final dimensions depend on preprocessing and enhancement. See the Best Settings master guide.
Controls the intensity and responsiveness of mouth opening, eyebrows, and facial expressions (default 1.0).
Pretrained Weights & Checkpoints
Models & Checkpoints
Get the links and placement instructions for all required neural network weights
Automated Checkpoint Download
SadTalker includes an official script to use the models directly from GitHub releases:
bash scripts/download_models.shDirect Download Packages
If the script fails due to network limitations or GitHub API rate limits, get the verified archives manually from Google Drive:
Contains 256px and 512px safetensors model weights and mapping networks. Extract into SadTalker/checkpoints/.
Contains GFPGANv1.4, ResNet-50 detection, and parsing models. Extract into SadTalker/gfpgan/weights/.
SadTalker/
├── checkpoints/
│   ├── SadTalker_V0.0.2_256.safetensors
│   ├── SadTalker_V0.0.2_512.safetensors
│   ├── mapping_00109-model.pth.tar
│   └── mapping_00229-model.pth.tar
└── gfpgan/
    └── weights/
        ├── GFPGANv1.4.pth
        ├── alignment_WFLW_4HG.pth
        ├── detection_Resnet50_Final.pth
└── parsing_parsenet.pthCommon Installation Errors
Solutions to the most frequently encountered setup and runtime issues
If startup stops at a missing model file, use the checkpoint missing guide to check the download and folder before reinstalling.
AttributeError: 'Row' object has no attribute 'style'
Caused by Gradio 4.x removing deprecated .style() methods. Downgrade Gradio to 3.30.0 or 3.41.2:
pip install gradio==3.30.0Microsoft Visual C++ 14.0 Required / LMDB Wheel Error
Happens when pip attempts to compile LMDB from source on Windows. Install the pre-compiled binary wheel directly:
pip install lmdb==1.4.1CUDA Out of Memory (OOM)
Start with batch size 1, resolution 256, and enhancement disabled. Memory needs vary by workload. Follow the CUDA out of memory guide.
Video Generates But Doesn't Display in WebUI
This is caused by a Gradio video component serialization mismatch. Pin Gradio to version 3.30.0.
pip install gradio==3.30.0Frequently Asked Questions
Got questions about SadTalker installation? Here are answers to common questions.
Which Option Should You Choose?
On Windows with NVIDIA GPU?
Use the 1-click batch launcher. Read our complete zero-to-hero Windows WebUI Guide with screenshots & telemetry.
Just testing it once?
Use Hugging Face Spaces or Colab — zero setup required.
Generating regularly on Linux/Mac?
Install locally via CLI — no queue times, no disconnects, full control over settings.
No dedicated GPU?
Colab's free GPU tier is your best option; local CPU generation works but is significantly slower.