SadTalker ComfyUI Workflow:
3 Simple Steps for Beginners.
Generate lifelike talking-head videos directly inside ComfyUI. No broken Python dependencies, no PyTorch version mismatches, and no hunting for 8 model files manually.
Verified RTX 4090 Output
This is what your workflow generates
An 11.24-second video generated from a single portrait and audio track in 35.1 seconds. Rendered with 25 fps H.264 video and clear AAC audio, playing right inside the ComfyUI canvas.
Why does SadTalker usually fail in ComfyUI?
The Dependency Conflict
ComfyUI uses modern Python 3.12 with PyTorch 2.4+. In contrast, SadTalker depends on legacy libraries requiring Python 3.10 and PyTorch 2.1.2. Attempting to install both into a single Python environment causes C++ compilation errors, broken wheels, and system crashes.
The Isolated Worker Fix
Our custom node decouples execution. ComfyUI runs completely unhindered in its native environment while SadTalker executes in an isolated background worker. All 8 neural network models are fetched and verified automatically.
System Prerequisites
Confirm your environment meets these hardware and software specifications before proceeding with setup:
ComfyUI Running
A functioning ComfyUI installation (Windows Portable package, standard Linux clone, or Vast.ai / RunPod cloud instance).
NVIDIA GPU (6GB+)
CUDA-compatible GPU with at least 6 GB VRAM (RTX 3060/4060, T4, A10, RTX 4090). Host system needs NVIDIA driver with CUDA 11.8+ or 12.x.
FFmpeg on PATH
FFmpeg binary accessible in terminal. Preinstalled on cloud templates; installable locally via apt install ffmpeg or winget install ffmpeg.
6 GB Disk Space
Free drive capacity for the isolated Python 3.10 virtual environment, PyTorch wheels, and model weights (~3.5 GB).
uv to provision a portable, precompiled Python 3.10 runtime without root privileges.Add the Custom Node Package
Open your terminal, navigate to your ComfyUI custom_nodes directory, and extract our custom node package.
OpenTalker/SadTalker repository into custom_nodes. That repository is a command-line script without ComfyUI node definitions. Use our package below:# 1. Go to your ComfyUI custom_nodes directory
cd /workspace/ComfyUI/custom_nodes
# 2. Clone the official custom node repository
git clone https://github.com/sonukkc1312/comfyui-sadtalker.git
# (Alternative without git: curl -fL -o comfyui-sadtalker.zip https://sadtalker.ai/comfyui/comfyui-sadtalker.zip && unzip -q comfyui-sadtalker.zip)ComfyUI Dashboard & Node Folder Context
Custom nodes placed inside ComfyUI/custom_nodes/ are automatically scanned and registered on startup.
Create Environment & Run 1-Line Installer
To avoid system package conflicts or missing Python binaries, we use uv to create a standalone Python 3.10 environment in seconds. Running setup_worker.py installs the dependencies, provisions all 8 models, and verifies CUDA acceleration:
# 1. Create a dedicated Python 3.10 virtual environment
pip install uv
uv venv /opt/sadtalker-venv --python 3.10 --seed
source /opt/sadtalker-venv/bin/activate

# 2. Run the 1-line automated installer (provisions all 8 models & configures ComfyUI)
python /workspace/ComfyUI/custom_nodes/comfyui-sadtalker/setup_worker.py- Installs PyTorch 2.1.2 with CUDA 12.1 acceleration into the dedicated worker.
- Provisions all 8 required checkpoints:
SadTalker 256/512, 3D mapping models, and GFPGAN face restoration weights. - Executes a live CUDA smoke test and outputs
config.jsonready for ComfyUI.
Load Workflow, Configure & Generate Video
Start ComfyUI and load the ready-to-use workflow. Here is the step-by-step visual progression:
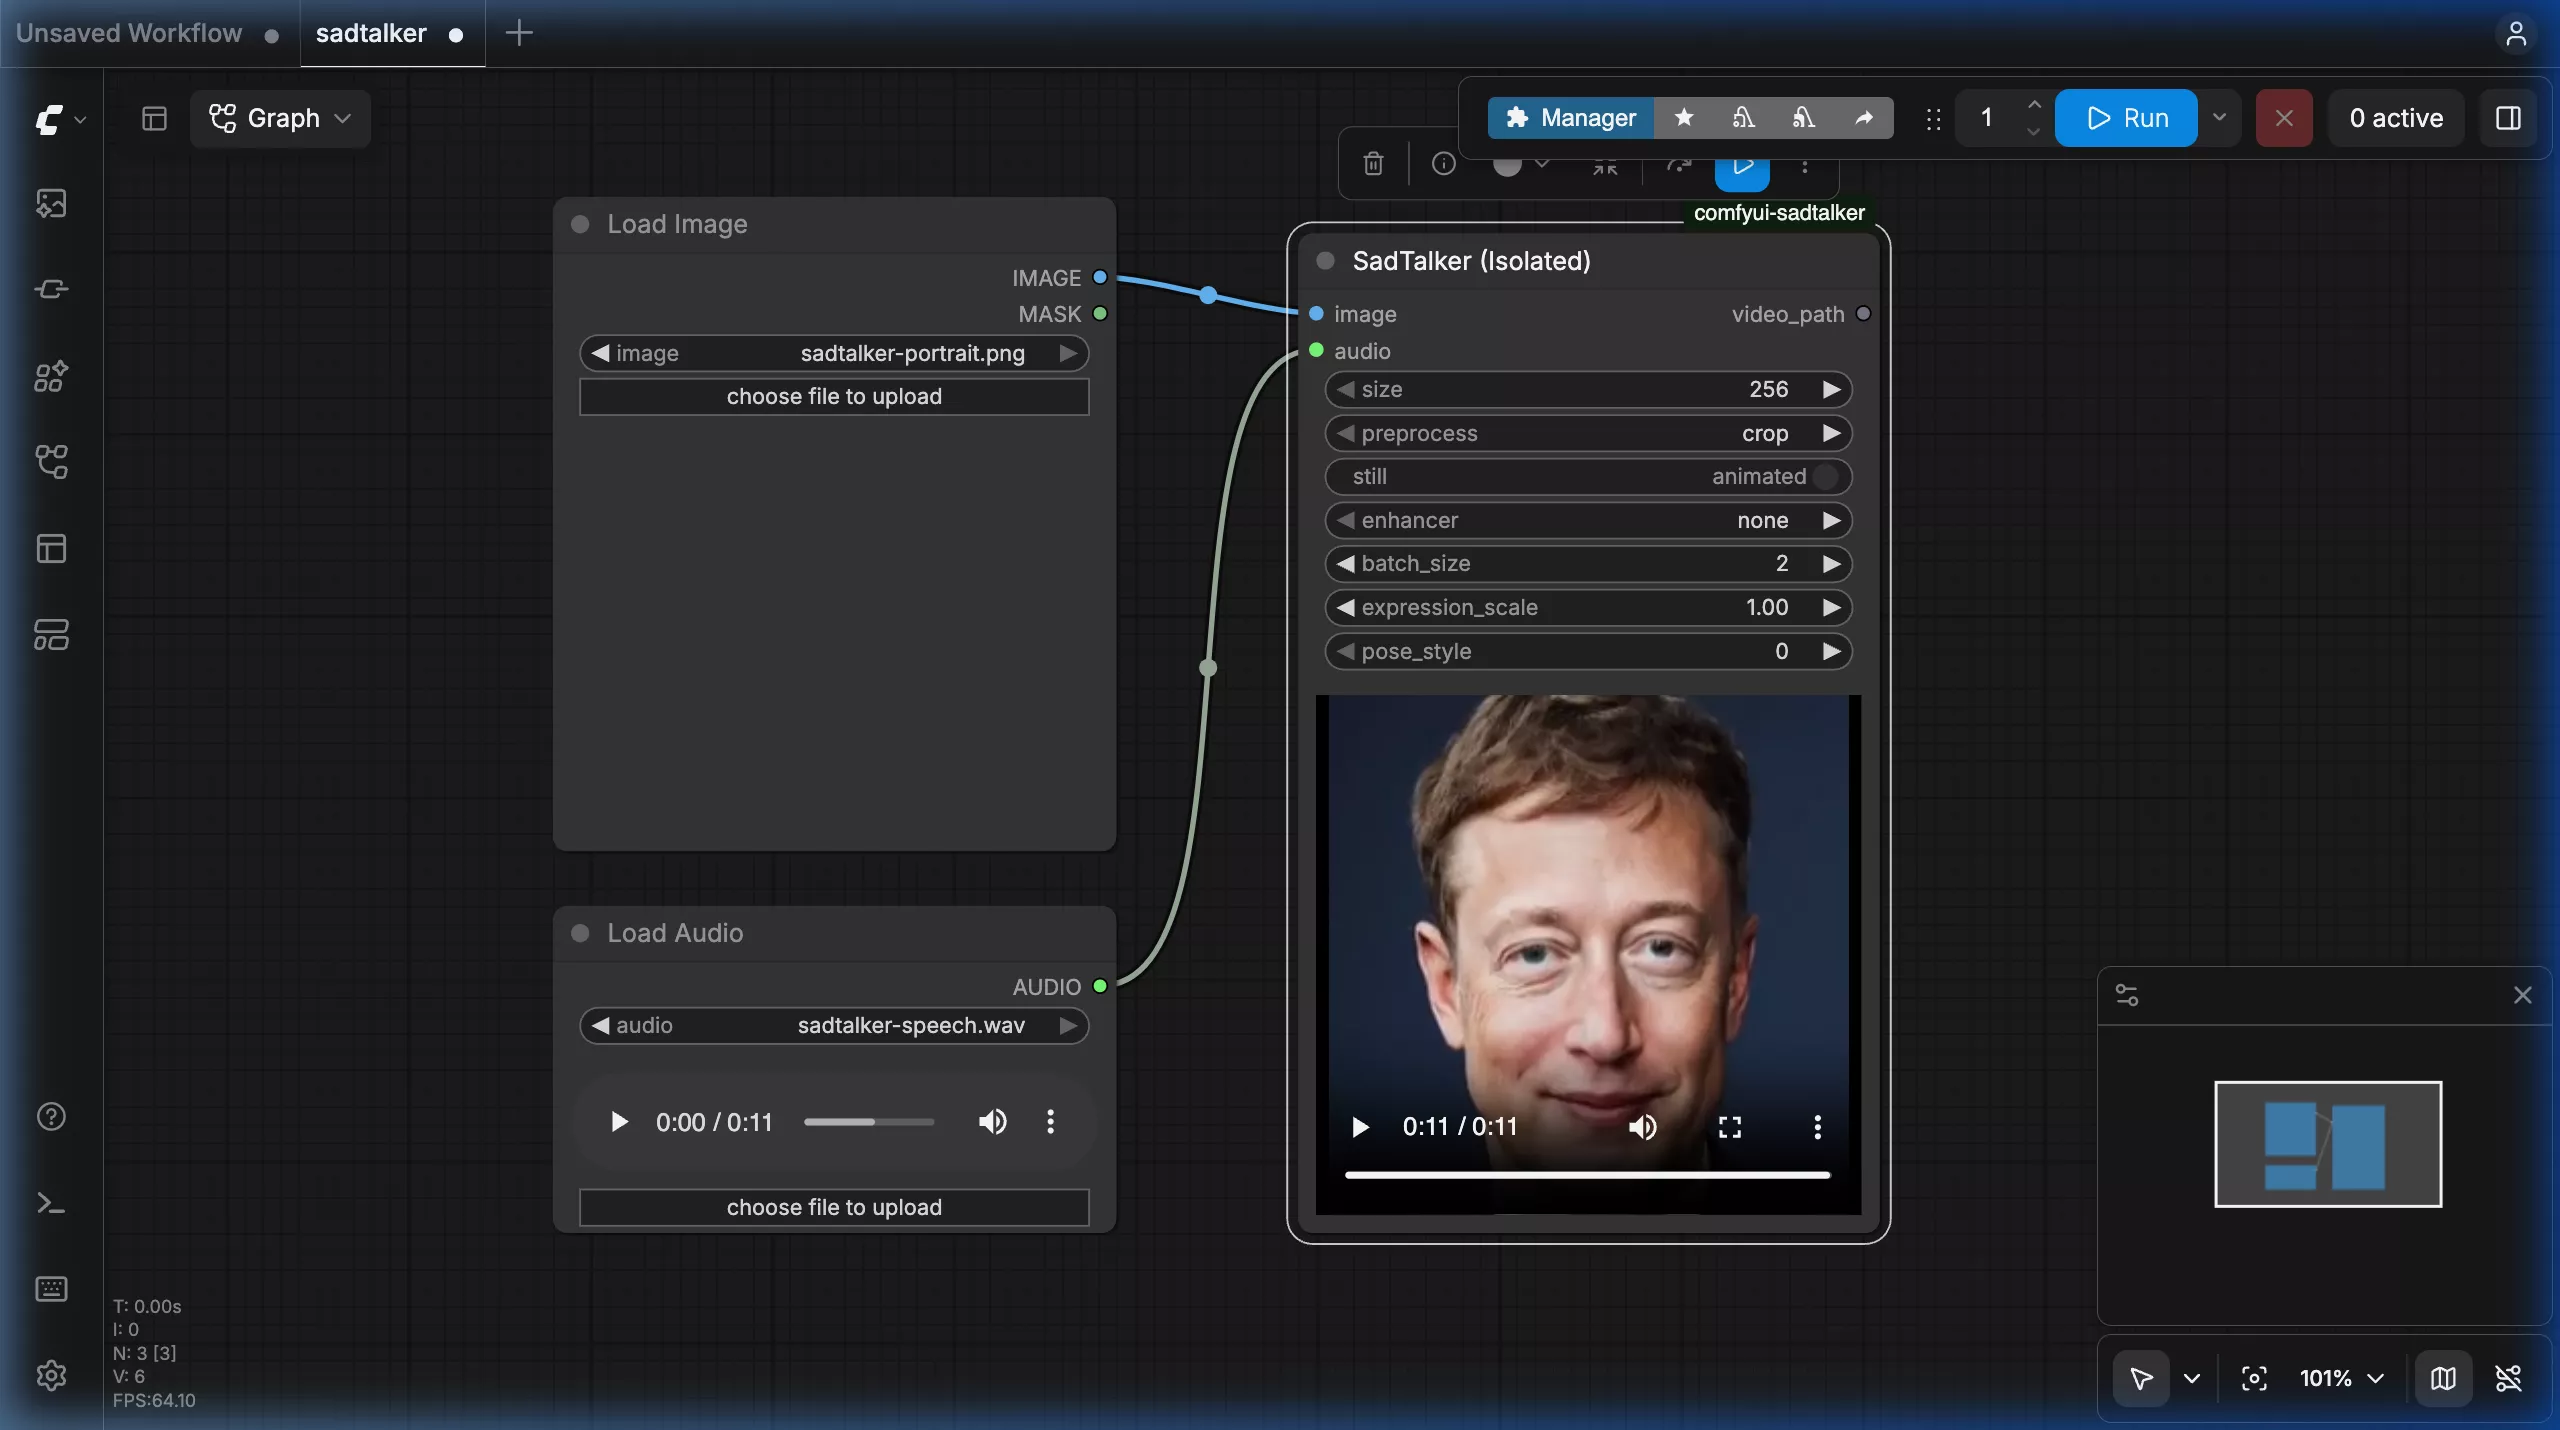
Step 3.1: Load Workflow in ComfyUI
Click Load in the right-side ComfyUI control menu (or drag-and-drop sadtalker.json directly into your browser):
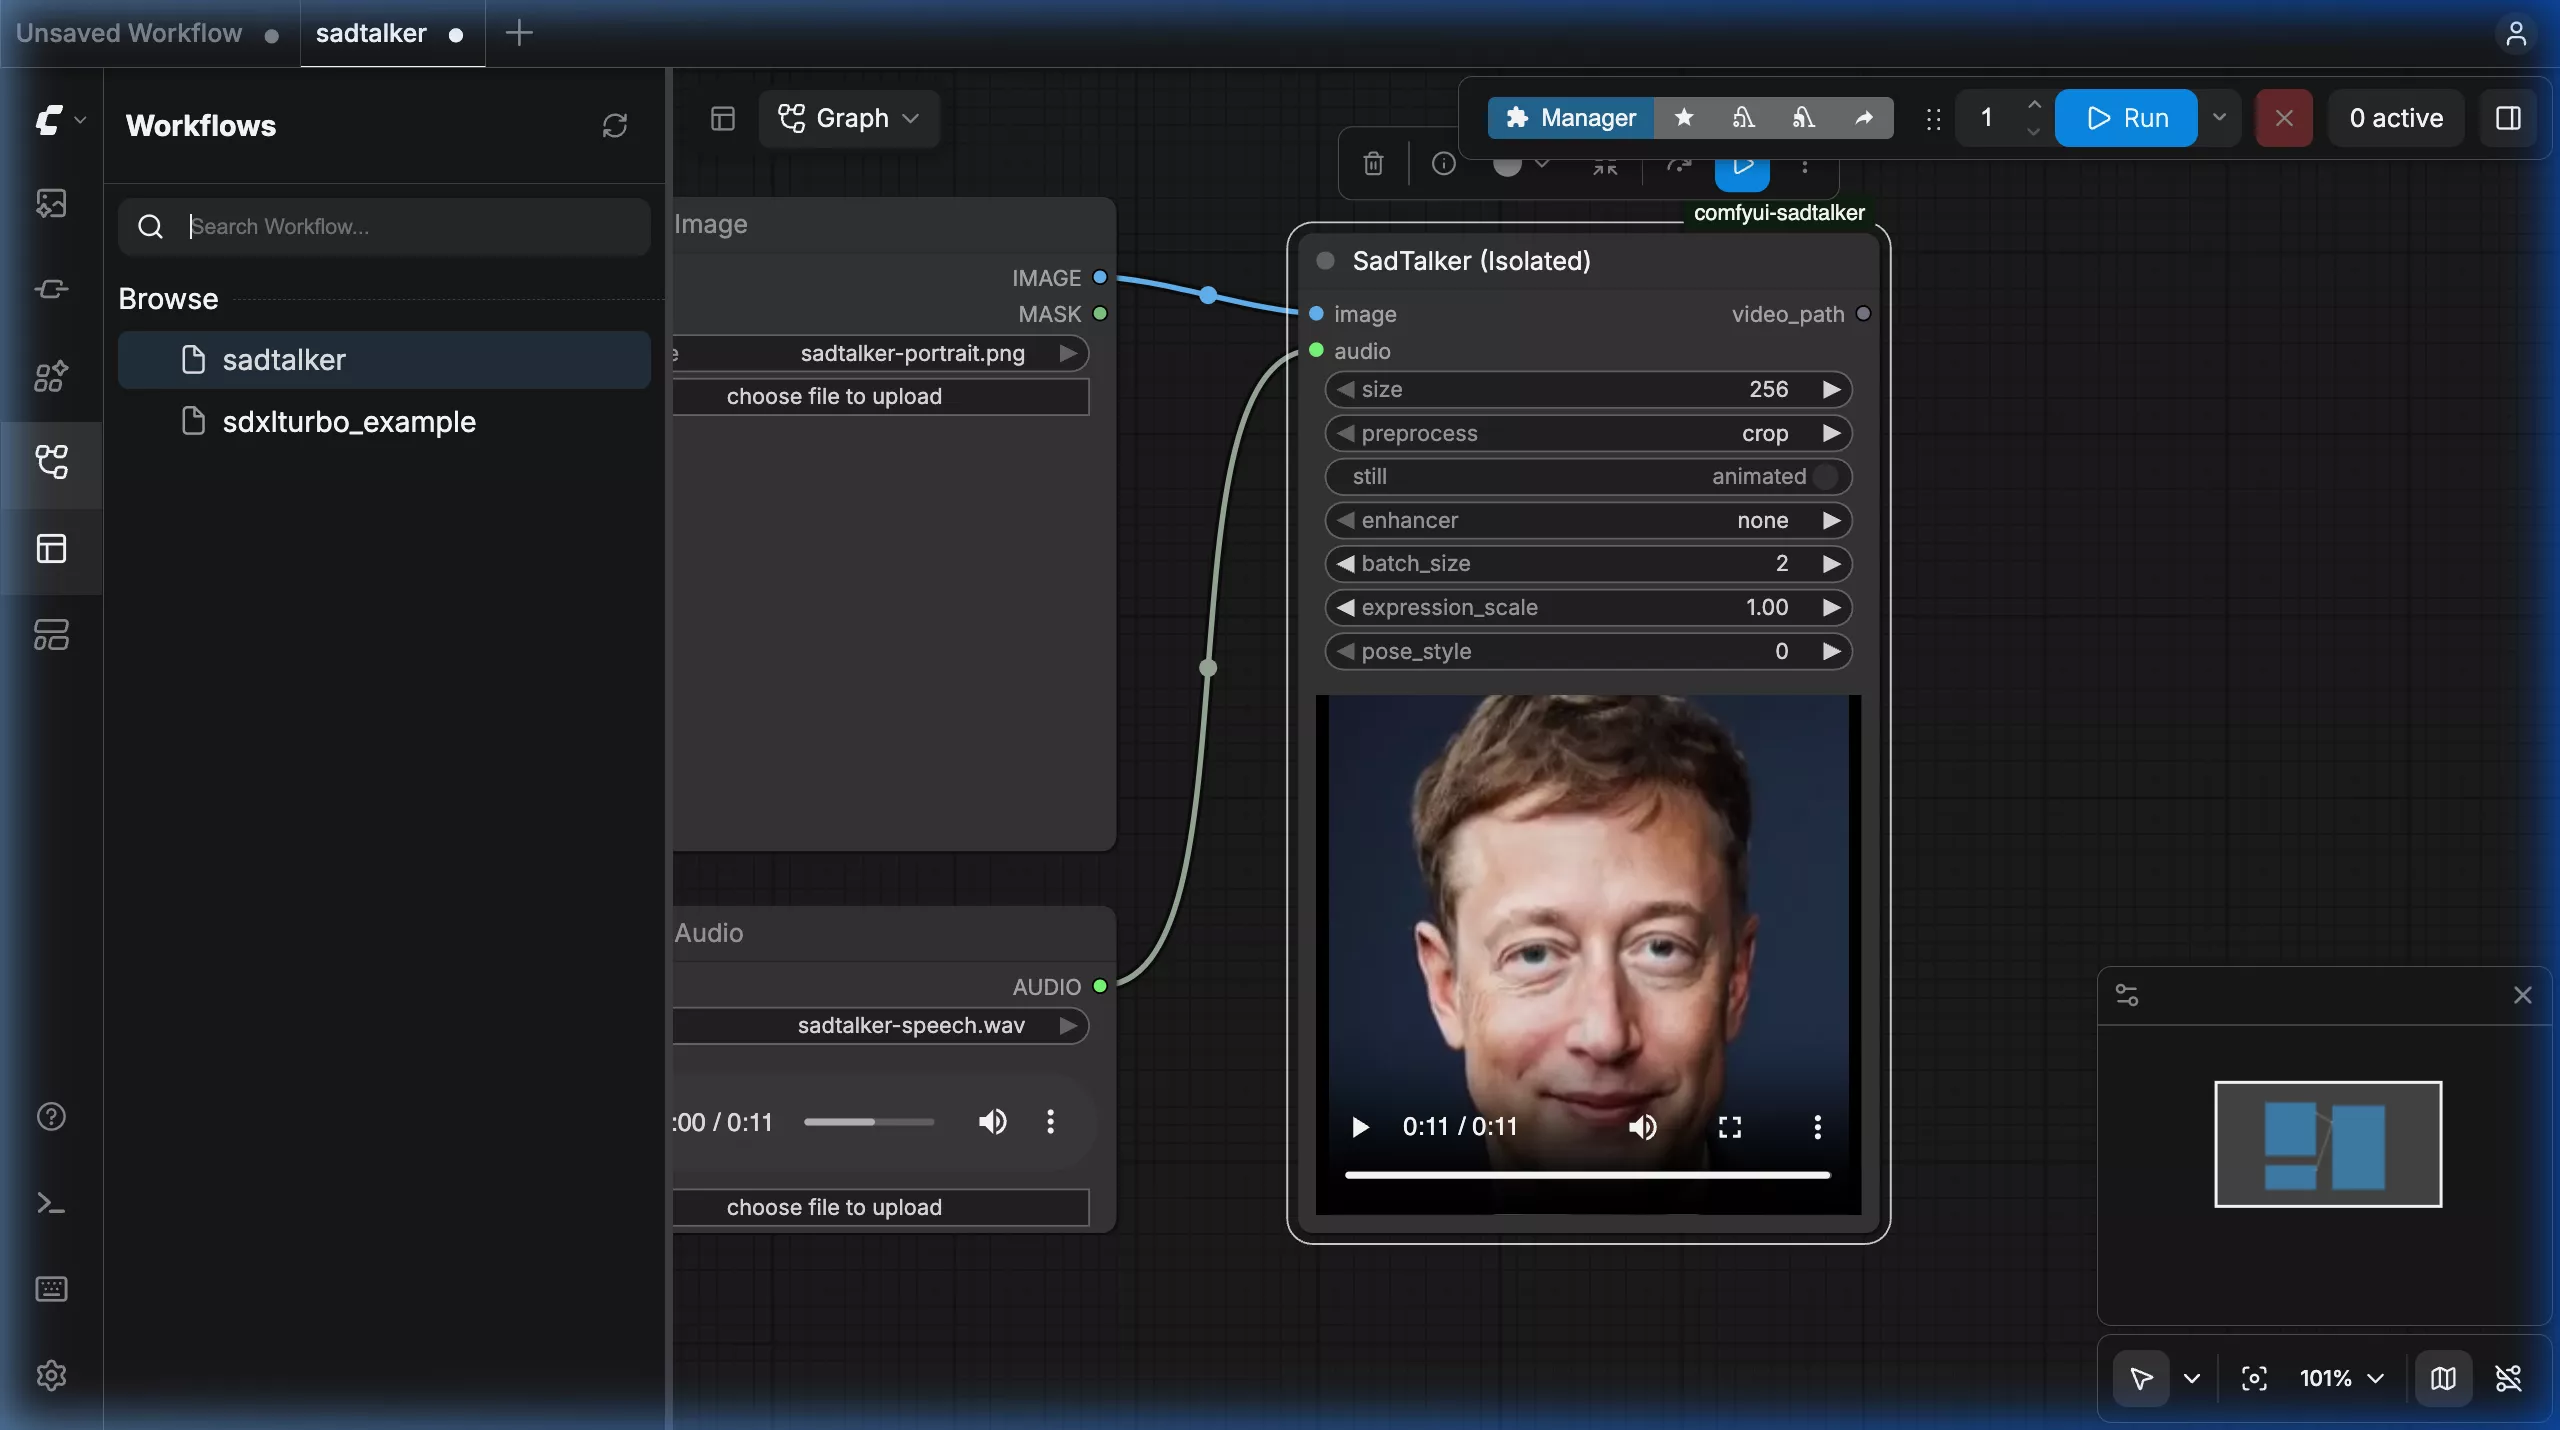
Step 3.2: Inspect Connected Workflow Graph
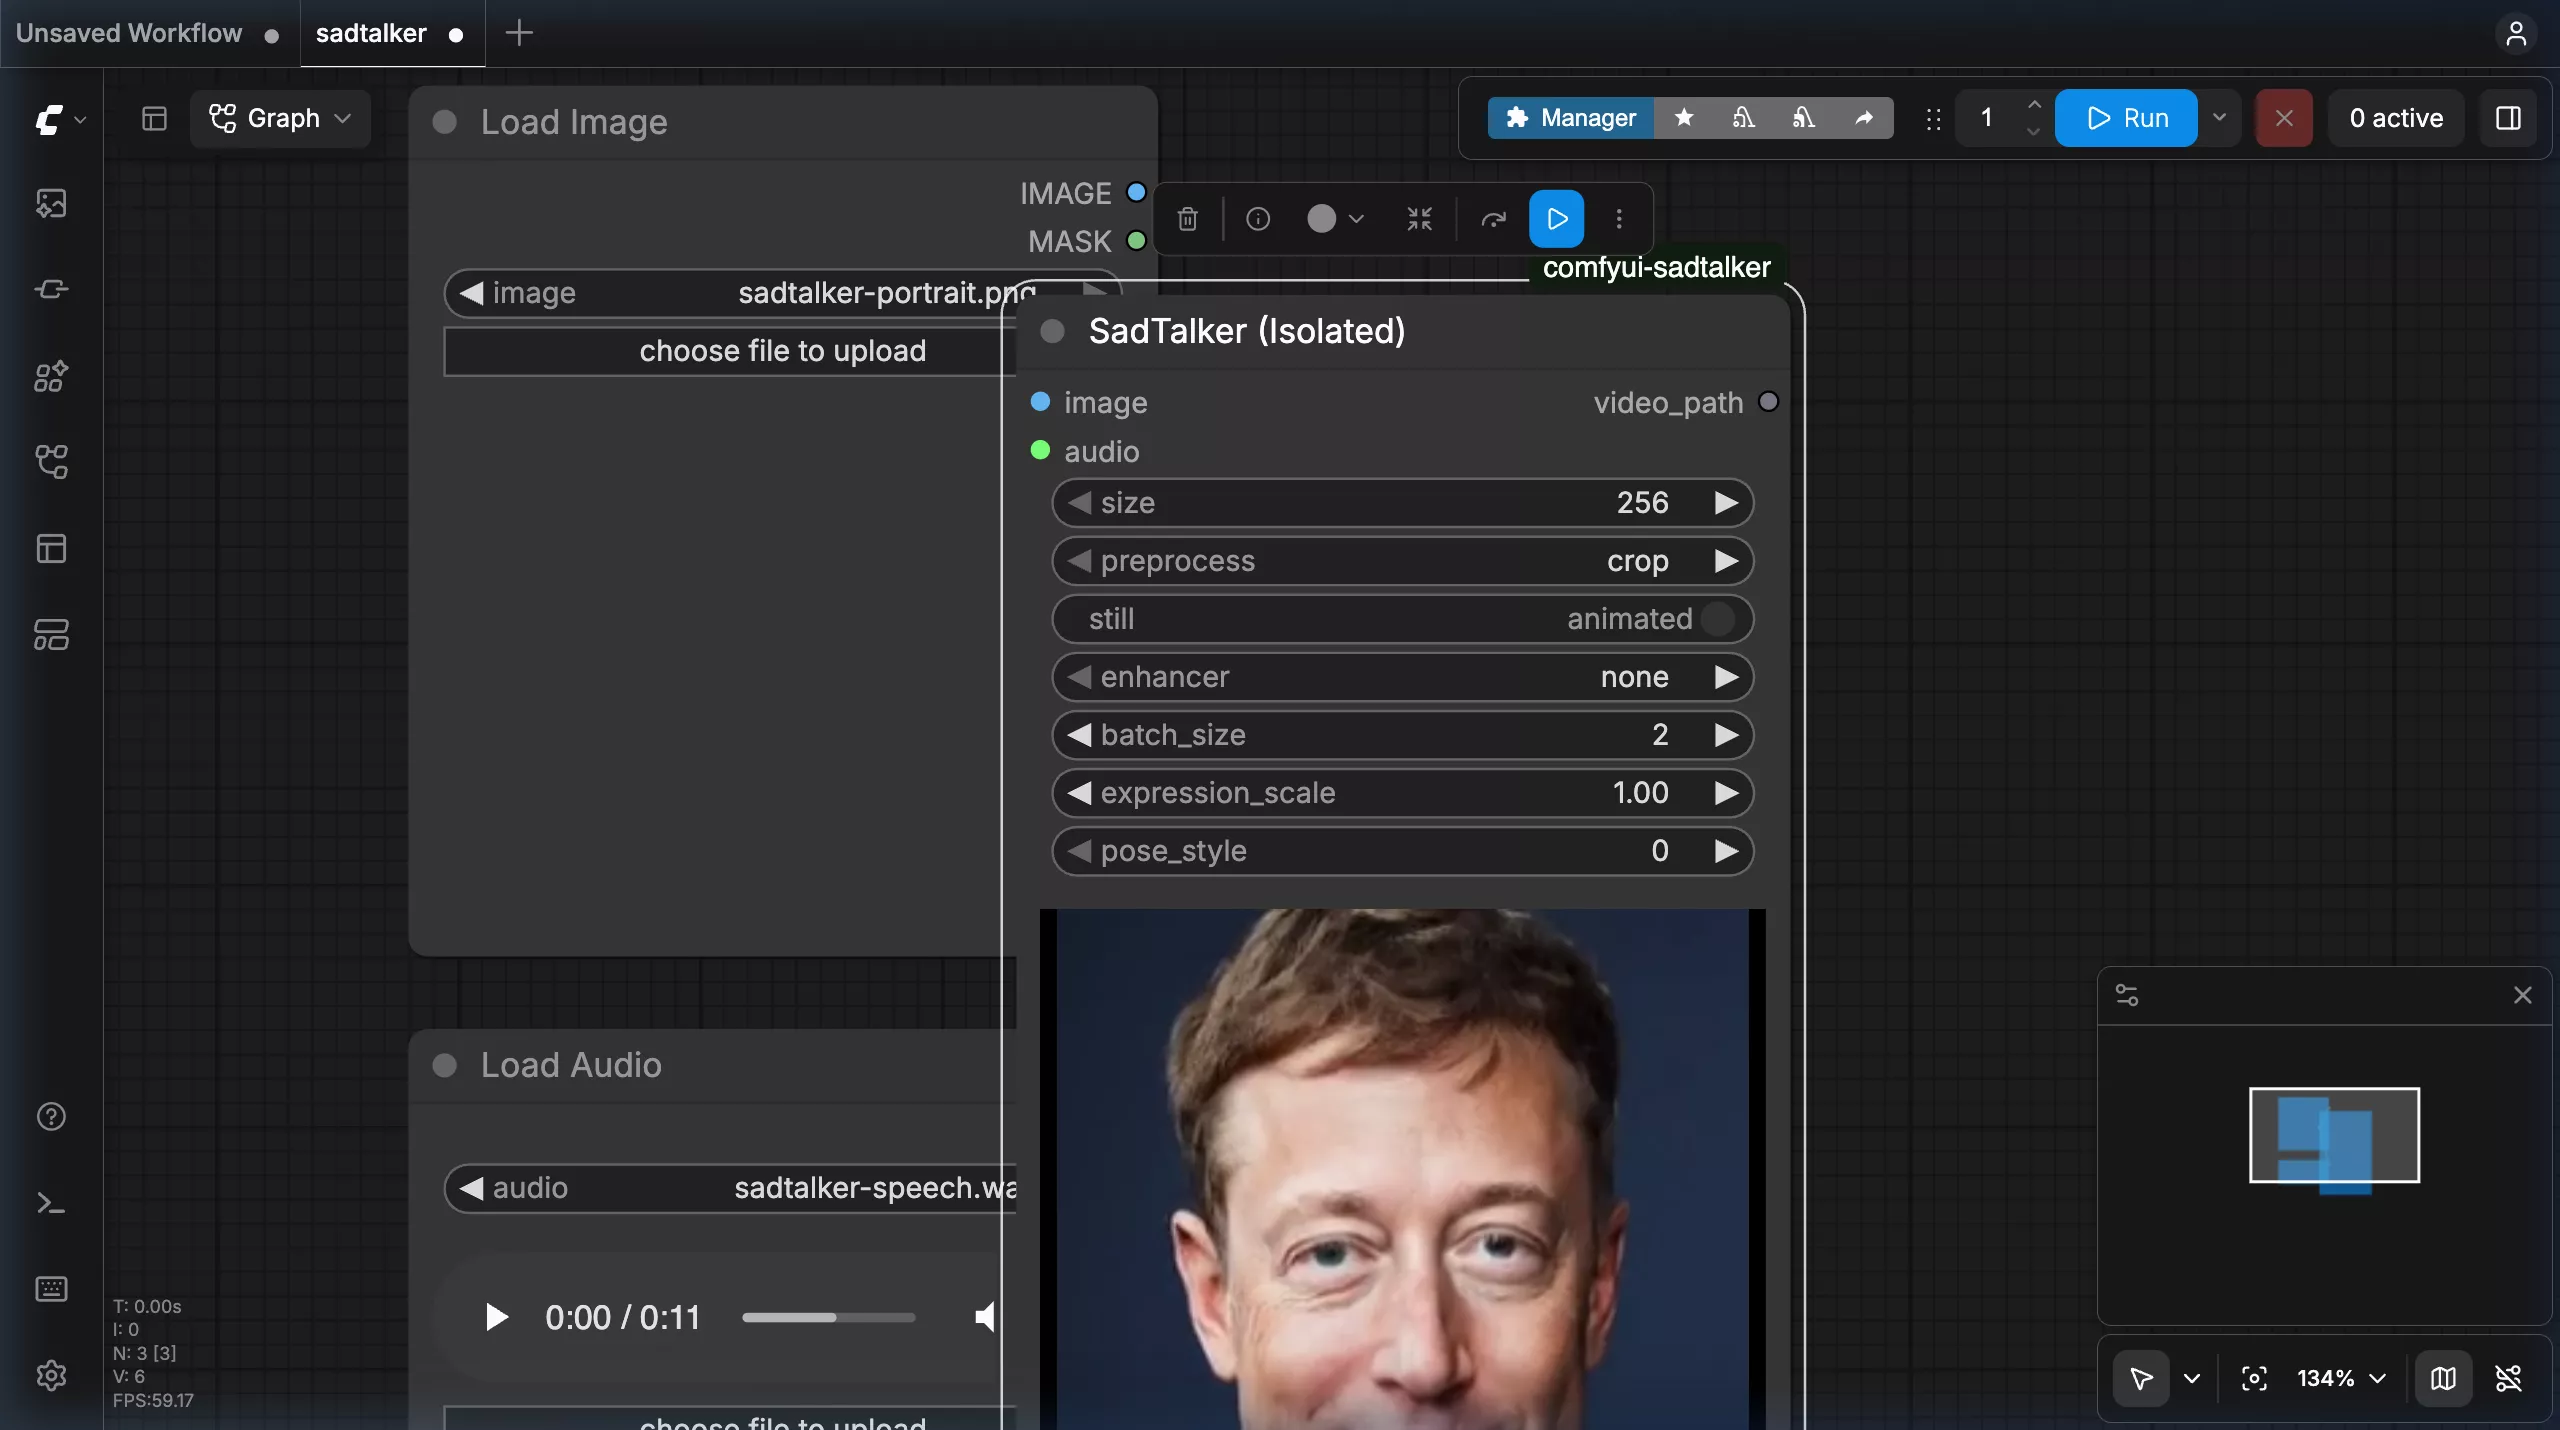
The canvas opens with Load Image, Load Audio, the SadTalker processing node, and an embedded setup guide with model checklist:
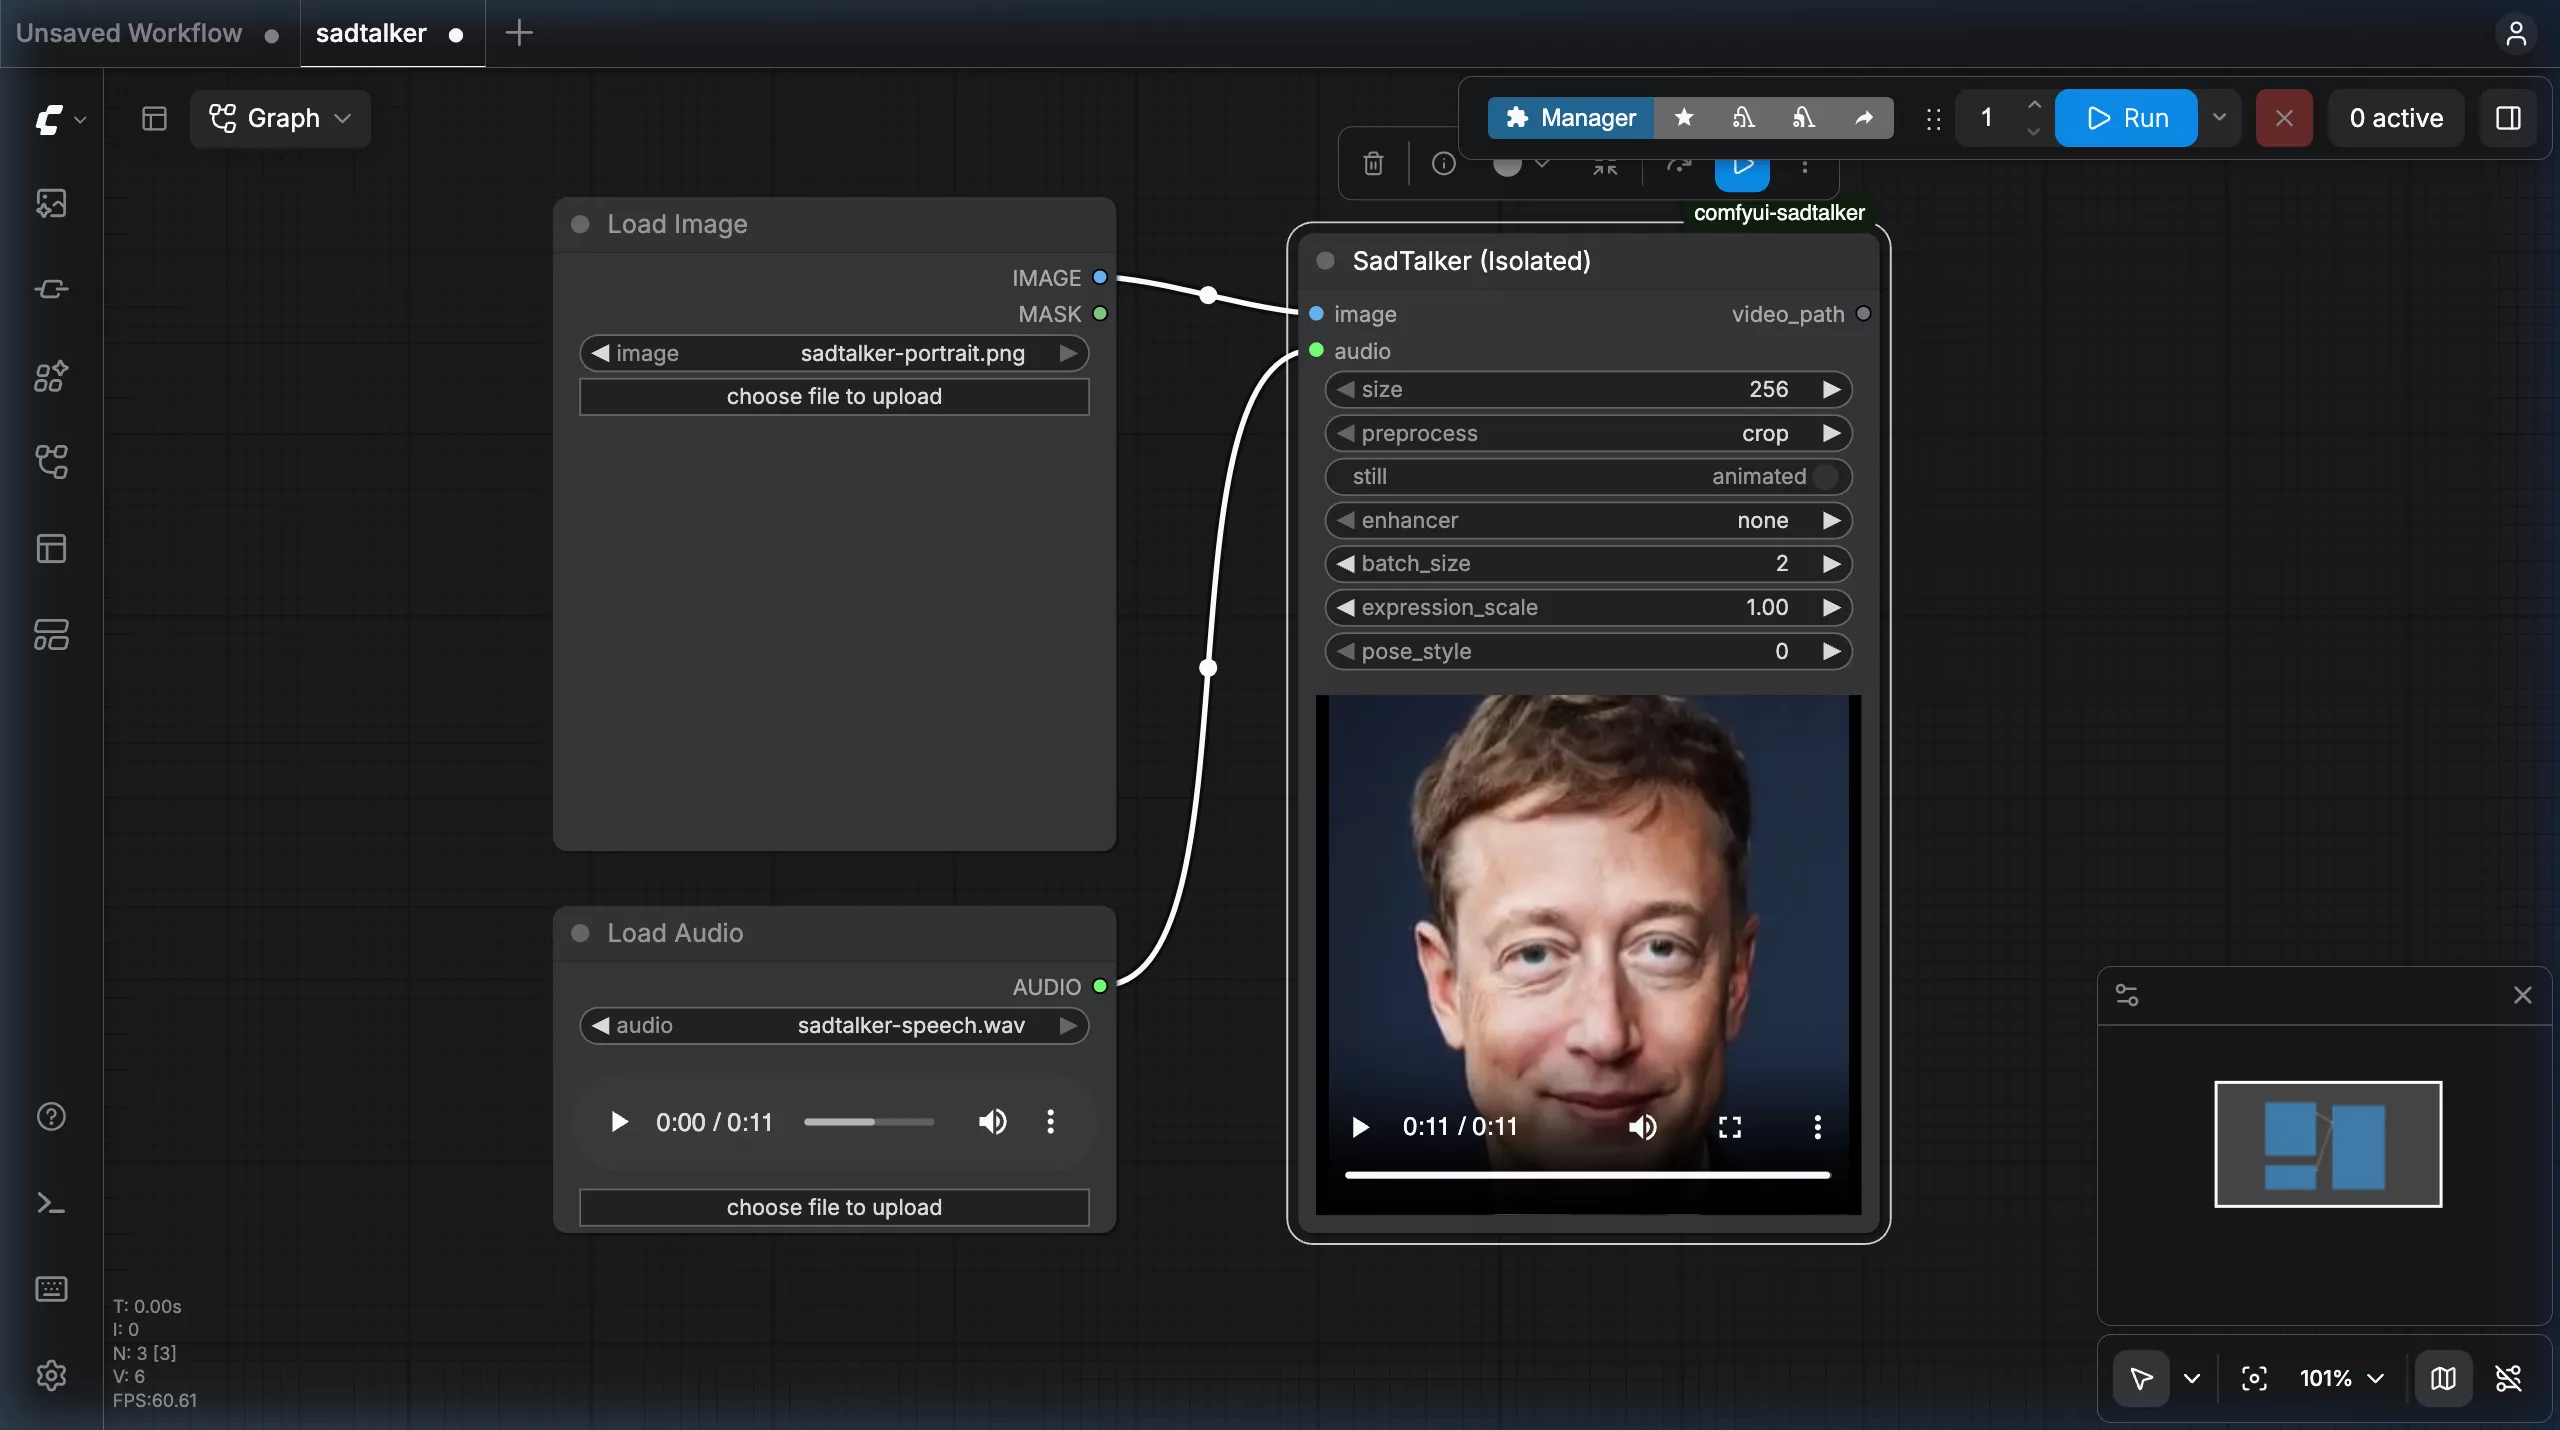
Step 3.3: Select Portrait Image & Audio Track
Select your source portrait and driven audio. Recommended beginner settings: size: 256, preprocess: crop, and still: false:
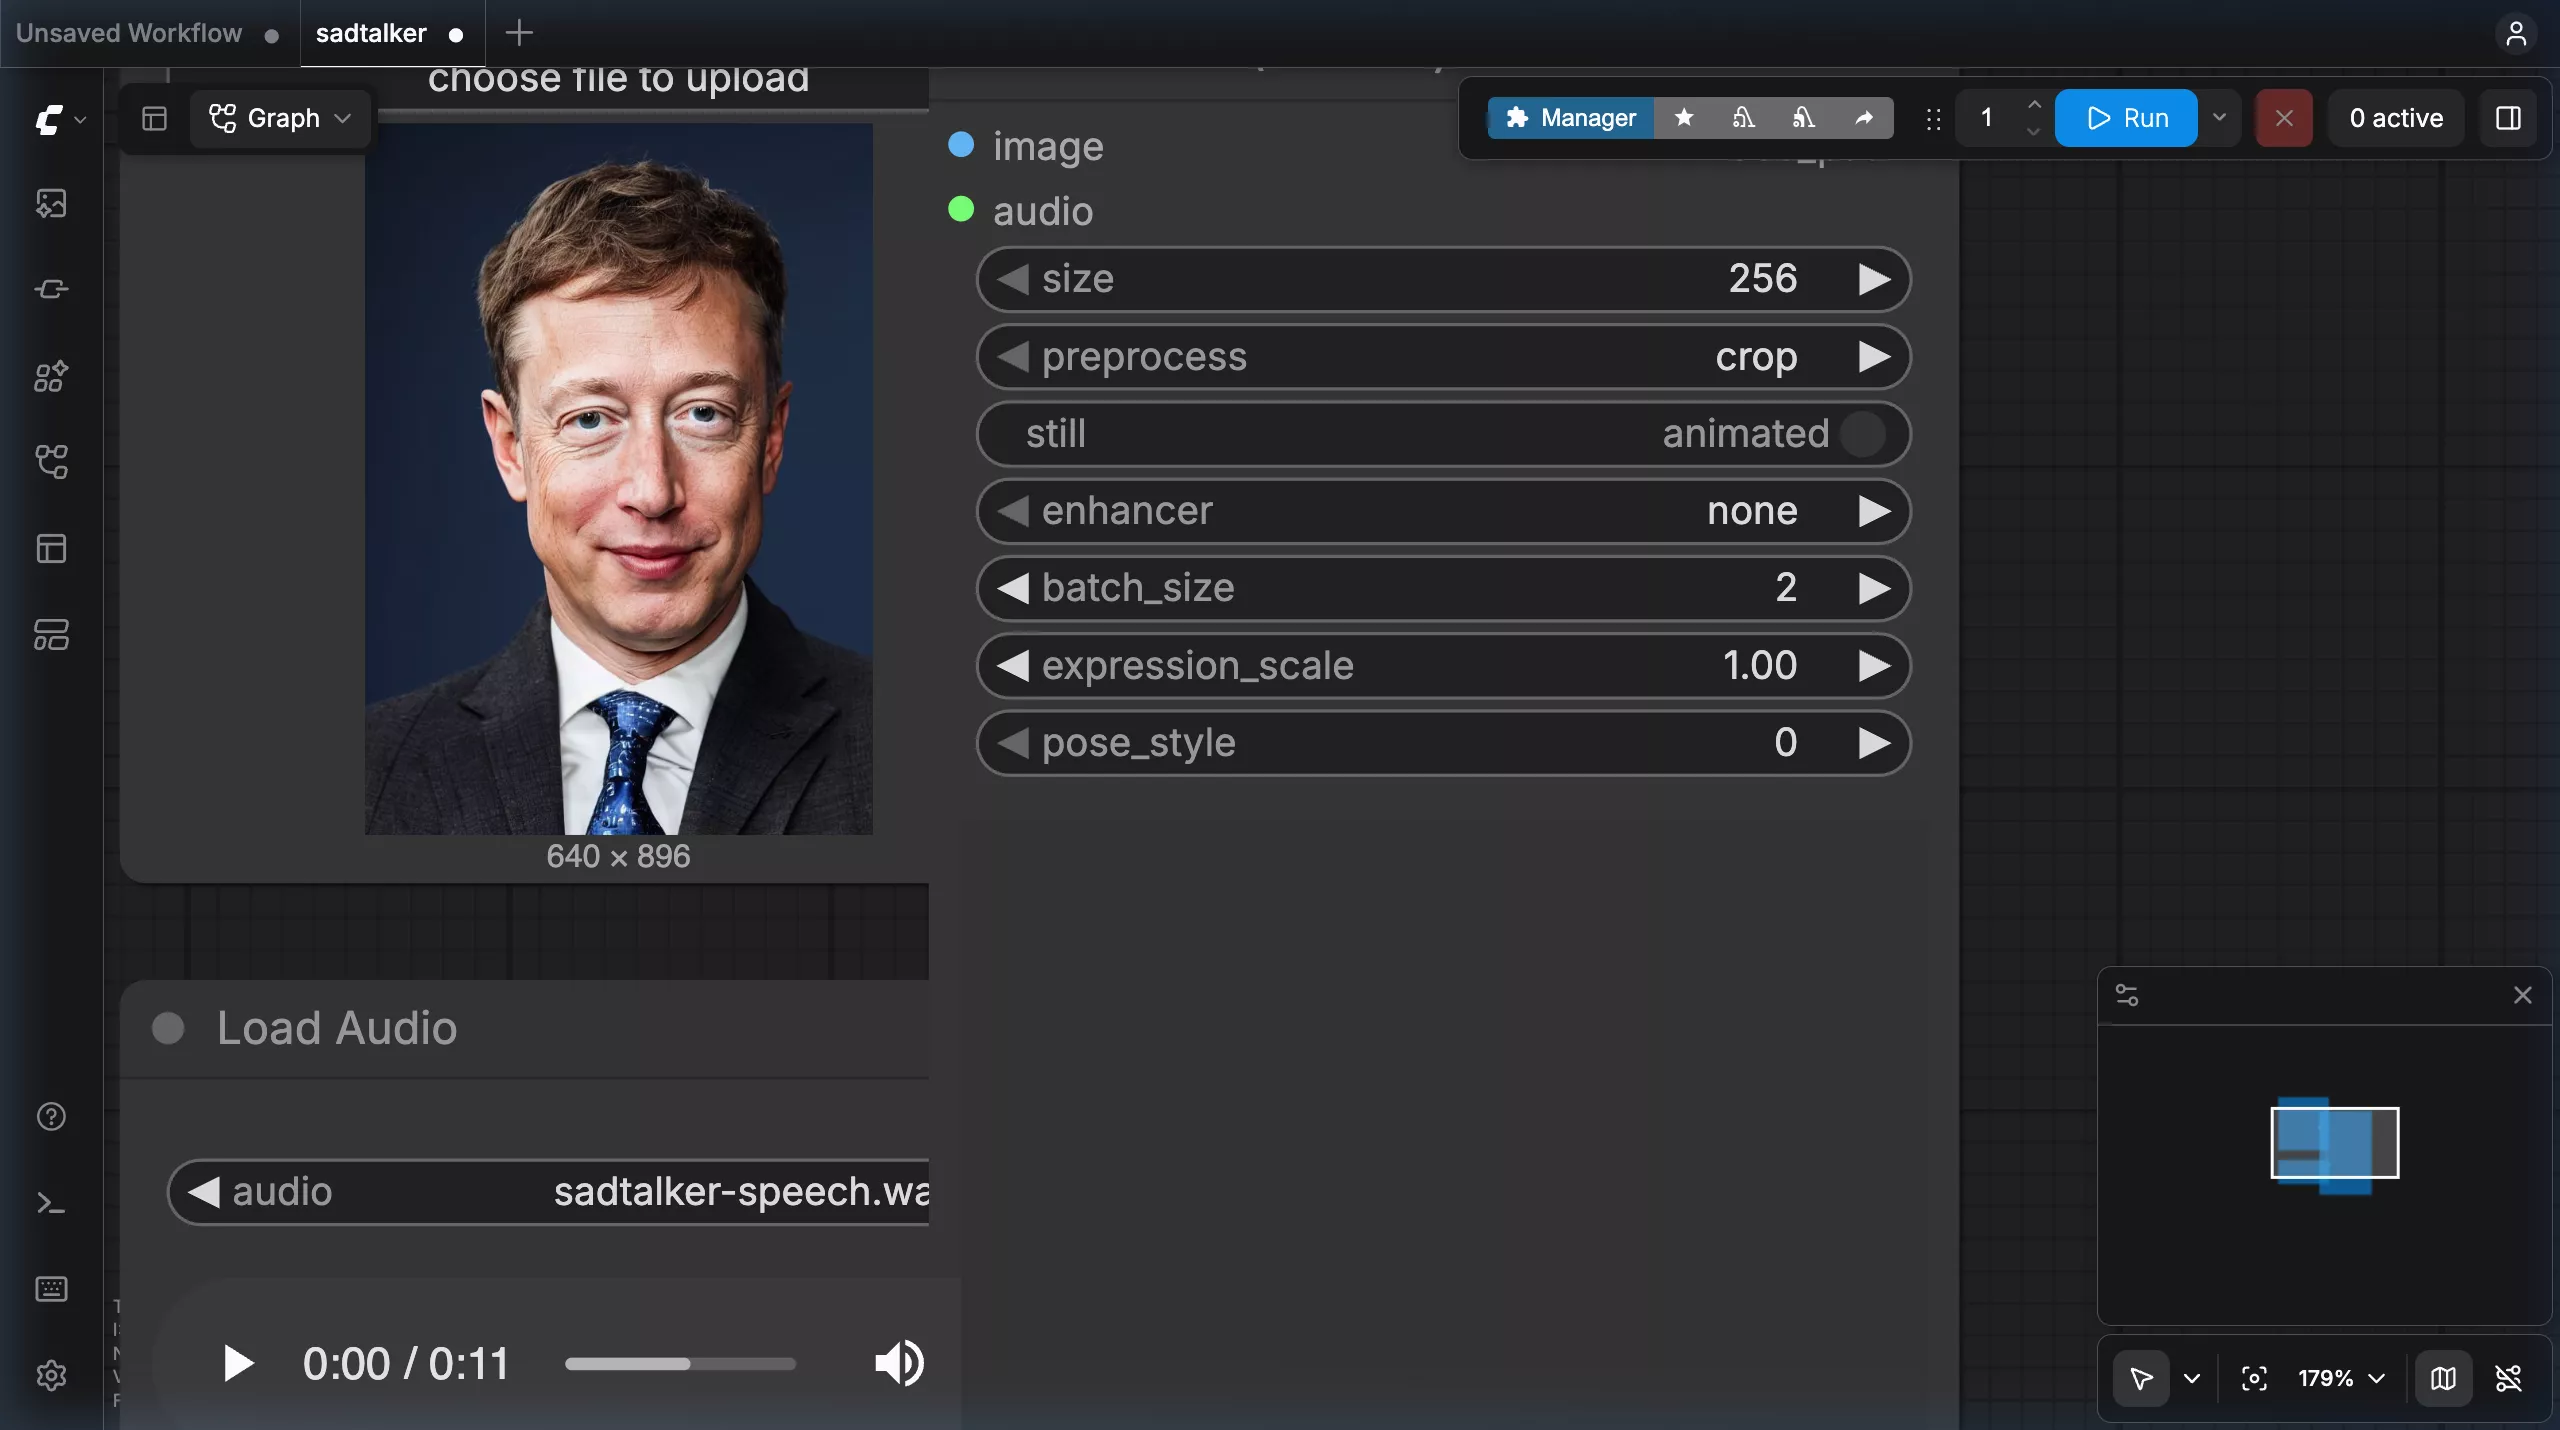
Step 3.4: Generate Video & Inline Playback
Click Queue Prompt. Once processing finishes, the generated talking-head video plays immediately inside the embedded HTML5 video player:
The video can be played, paused, scrubbed, or viewed fullscreen directly on the canvas without leaving ComfyUI.
Recommended Node Parameters
Fine-tune motion and visual fidelity using these tested parameter values:
| Parameter | Default | Description |
|---|---|---|
| size | 256 | Video resolution (256 for fast render; 512 for higher quality). |
| preprocess | crop | Face cropping mode. crop focuses on the head; full animates in original frame context. |
| still | false | When enabled, suppresses natural head rotation for steady, formal presenter videos. |
| enhancer | none | Optional face enhancement using gfpgan for high-definition facial restoration. |
| pose_style | 0 | Integer from 0 to 45 controlling head gesture style and nodding frequency. |
Frequently Asked Questions
What if I get “python3.10: command not found”?
Modern Linux installations do not ship with Python 3.10. By using uv venv /opt/sadtalker-venv --python 3.10 --seed as shown in Step 2, uv automatically installs a portable, precompiled Python 3.10 binary without requiring apt or root access.
How do I know if the models are installed?
When you load sadtalker.json, an instructional note appears on the canvas. If any model is missing when you click Run, ComfyUI displays an exact dialog listing the missing file and instructing you to run setup_worker.py.
Why did I receive “can not detect landmark”?
SadTalker requires a clear frontal face. Avoid illustrations, heavy profile angles, extreme shadows, or images where eyes or lips are partially occluded.
Where are output videos saved on disk?
Videos are saved in your ComfyUI directory under ComfyUI/output/sadtalker/<run-id>/*.mp4. Each job creates an isolated folder so renders are never overwritten.
Ready to animate your first portrait in ComfyUI?
Get the workflow JSON and custom node package below, or clone directly from GitHub: